

Some sections work in two steps: Save stores your changes in a draft, then
Publish all changes publishes the location’s entire draft. A Saved
changes ready to publish badge in the global header reminds you; after
publishing, it turns into Up to date. It’s the same principle as for the
menu.
General
Settings → General holds the location’s details:- Location name — the name of the place, shown on receipts and on the register’s sign-in screen. Required.
- Timezone — the timezone, in IANA format (for example
Europe/Paris). - Address, ZIP / Postal, City, Country — the address.
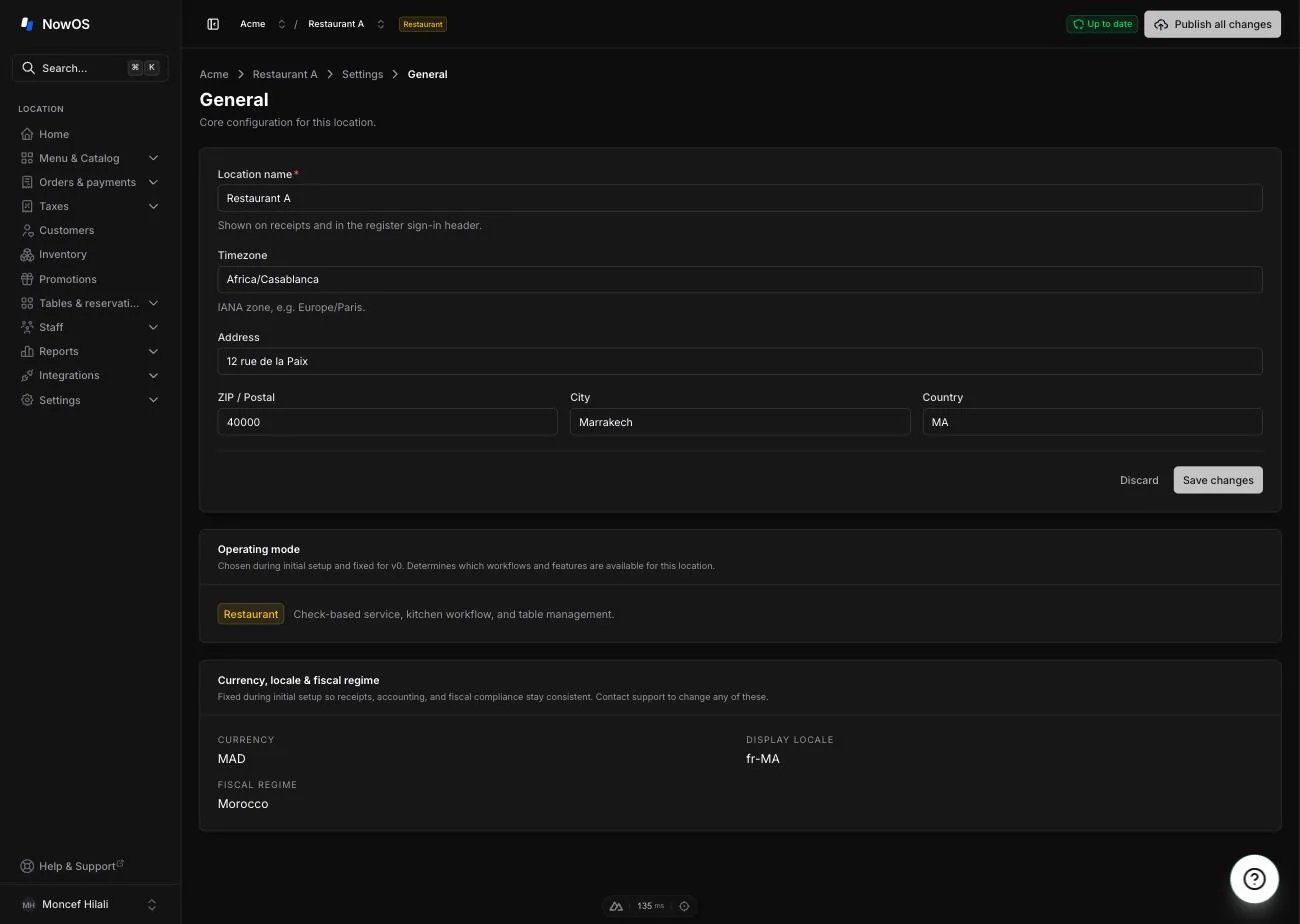
- Operating mode — the location’s Restaurant or Retail badge. The mode is chosen at creation and cannot be changed — see the two modes.
- Currency & locale — the currency and display format, fixed at creation so receipts and accounting stay consistent. Contact support to change them.
Receipts
Settings → Receipts defines the legal identity printed on every receipt:- Legal business name — the registered business name.
- Address — the address printed under the business name (multiple lines allowed).
- Fiscal identifiers — an ordered list of legal identifiers, each a label and a value. Add one row per identifier your country requires: in Morocco the IF, the ICE and the patente; in France the SIRET, the VAT number and the RCS. They print under the business name, one line each, in the order you set — at least one is required.
- Footer text — the text at the bottom of the receipt, optional: a thank-you message, opening hours…
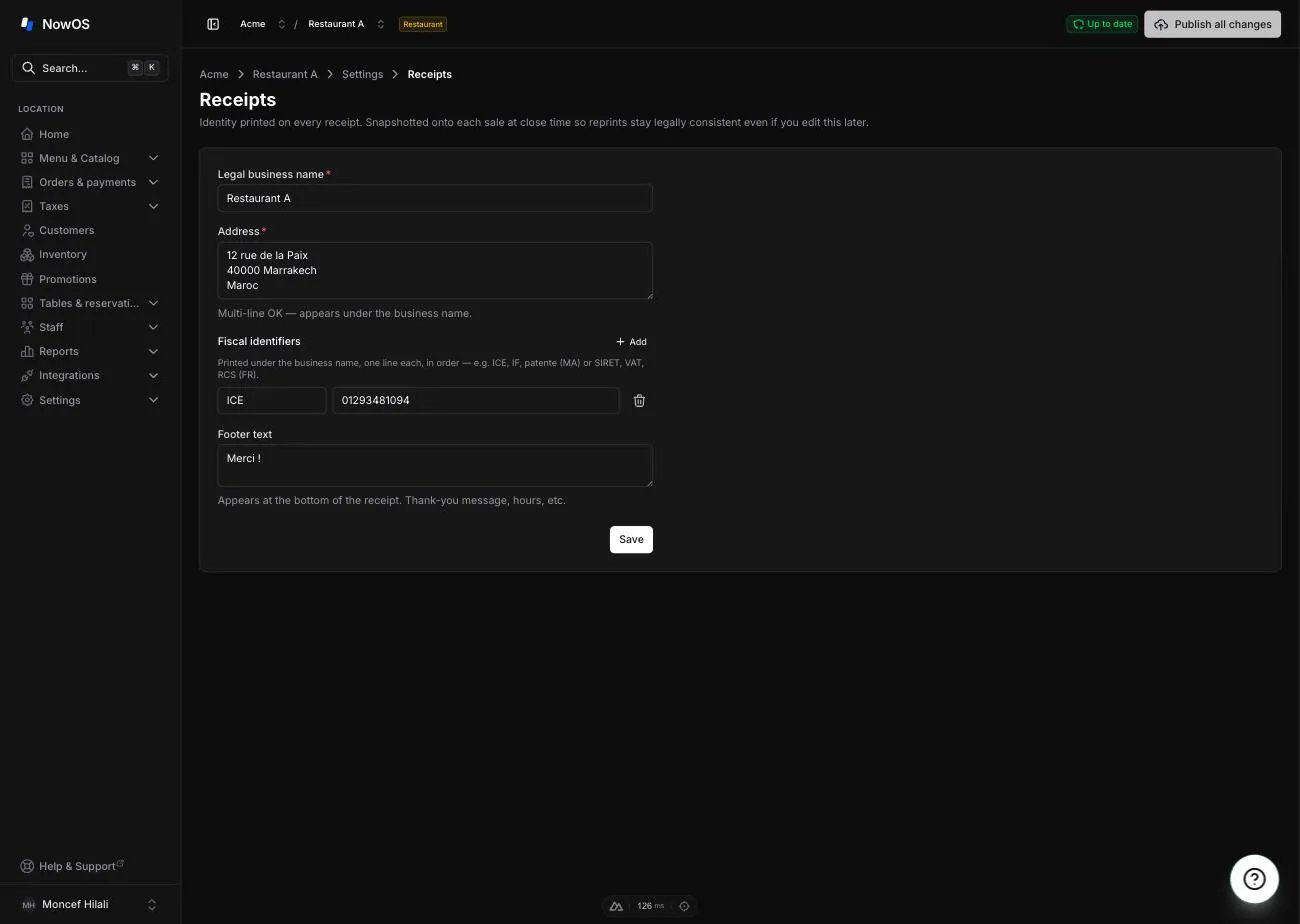
The identity is frozen onto each sale at payment time: if you change it later,
reprints of older sales keep the original identity. For what prints day to
day, see Receipts and printing.
Close of day
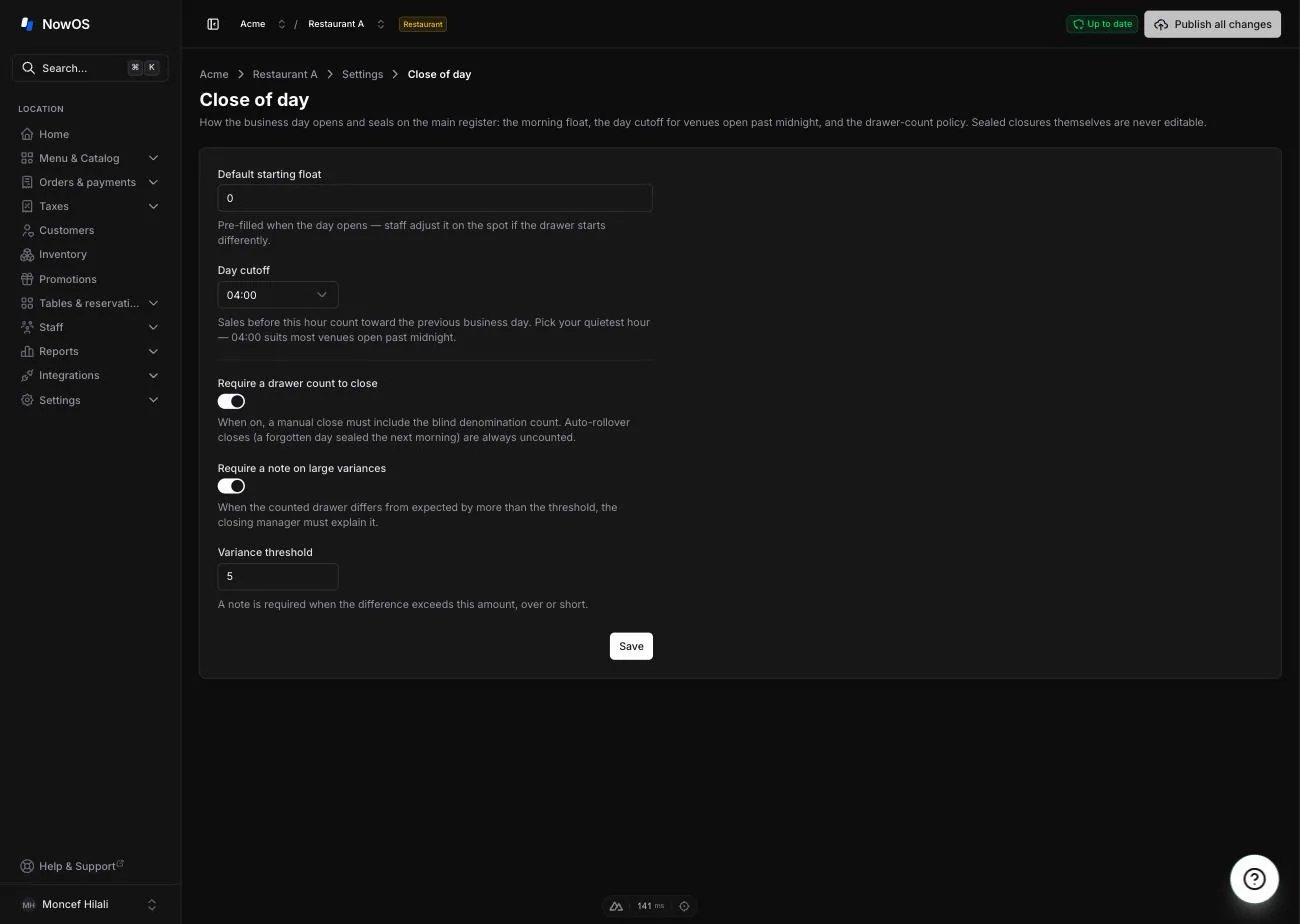
Settings → Close of day configures how the business day opens and closes on the main register:- Default starting float — the opening float suggested by default at start of day. Staff can adjust it on the spot if the drawer starts differently — see Start of day.
- Day cutoff — the cutoff hour: sales before this hour count toward the previous business day. Pick your quietest hour — 04:00 suits most venues open past midnight.
- Require a drawer count to close — when the switch is on, a manual close must include the blind count by denominations. Automatic closes (a forgotten day, sealed the next morning) always remain uncounted.
- Require a note on large variances — when the switch is on, the manager must explain any drawer difference beyond the threshold.
- Variance threshold — the amount beyond which the note is required, over or short. Visible when the previous switch is on.
Printers
In the menu, the section is called Printers & KDS in restaurant mode and Receipt printers in retail mode; the page itself is titled Printers. It lists the store’s thermal printers.Adding a printer
1
Open the form
Click Add printer.
2
Describe the printer
- Name — a clear name, for example “Counter receipt”. - IP address — the printer’s static IP address on the store network (recommended). - MAC address — as a fallback if you don’t have the IP; it’s on the printer’s self-test sheet. One of the two fields is required. - Paper width — 80 mm (most common) or 58 mm. - Model — the model, for example TM-m30III.
3
Confirm
Click Add printer. The printer appears in the table.
Choosing where each document prints
The Receipts column chooses the receipt printer. Click Set default and the button turns into Default. Click again to remove the role. In restaurant mode, choose the kitchen printer on each preparation station, not in this table.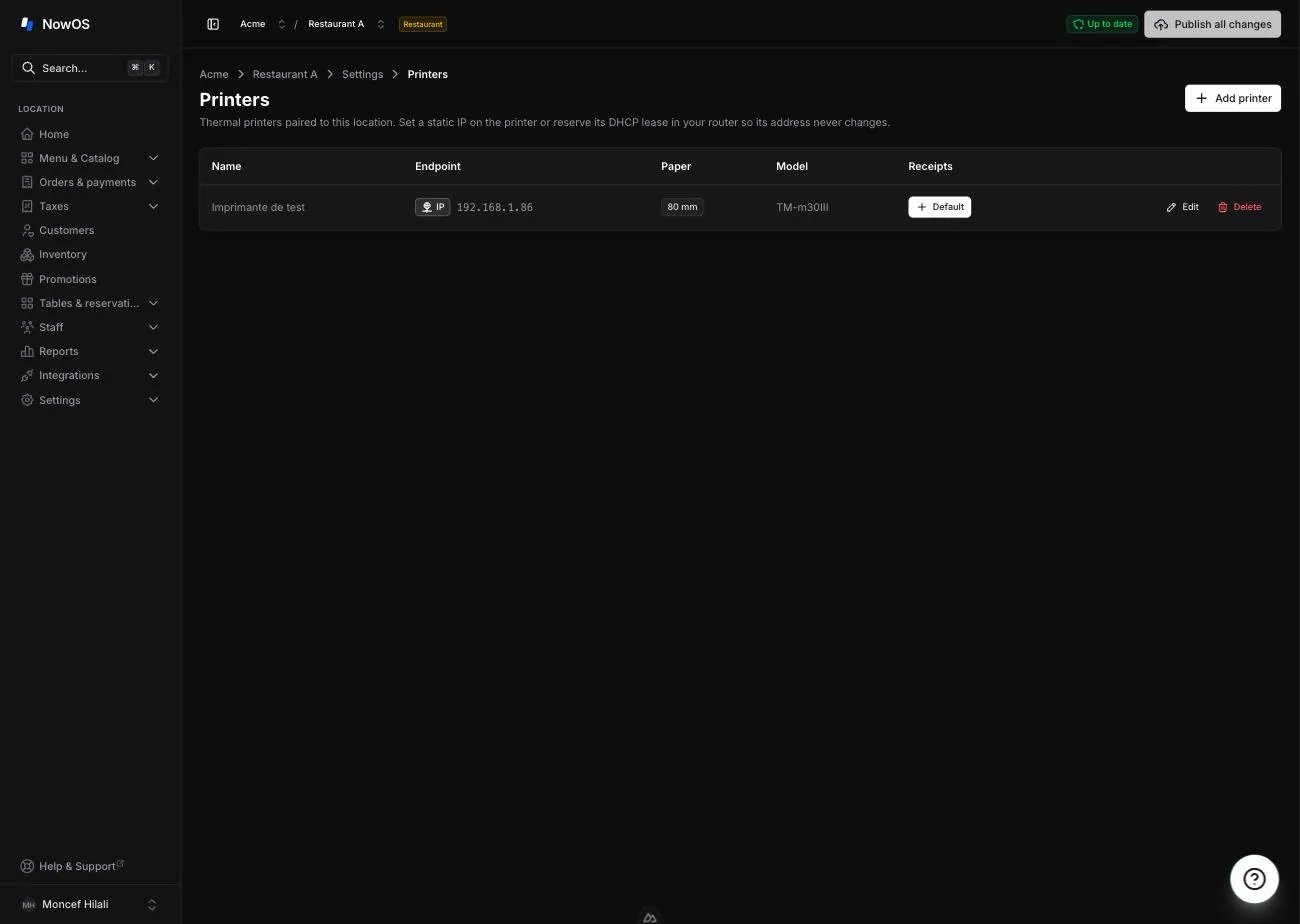
Preparation stations (restaurant mode)
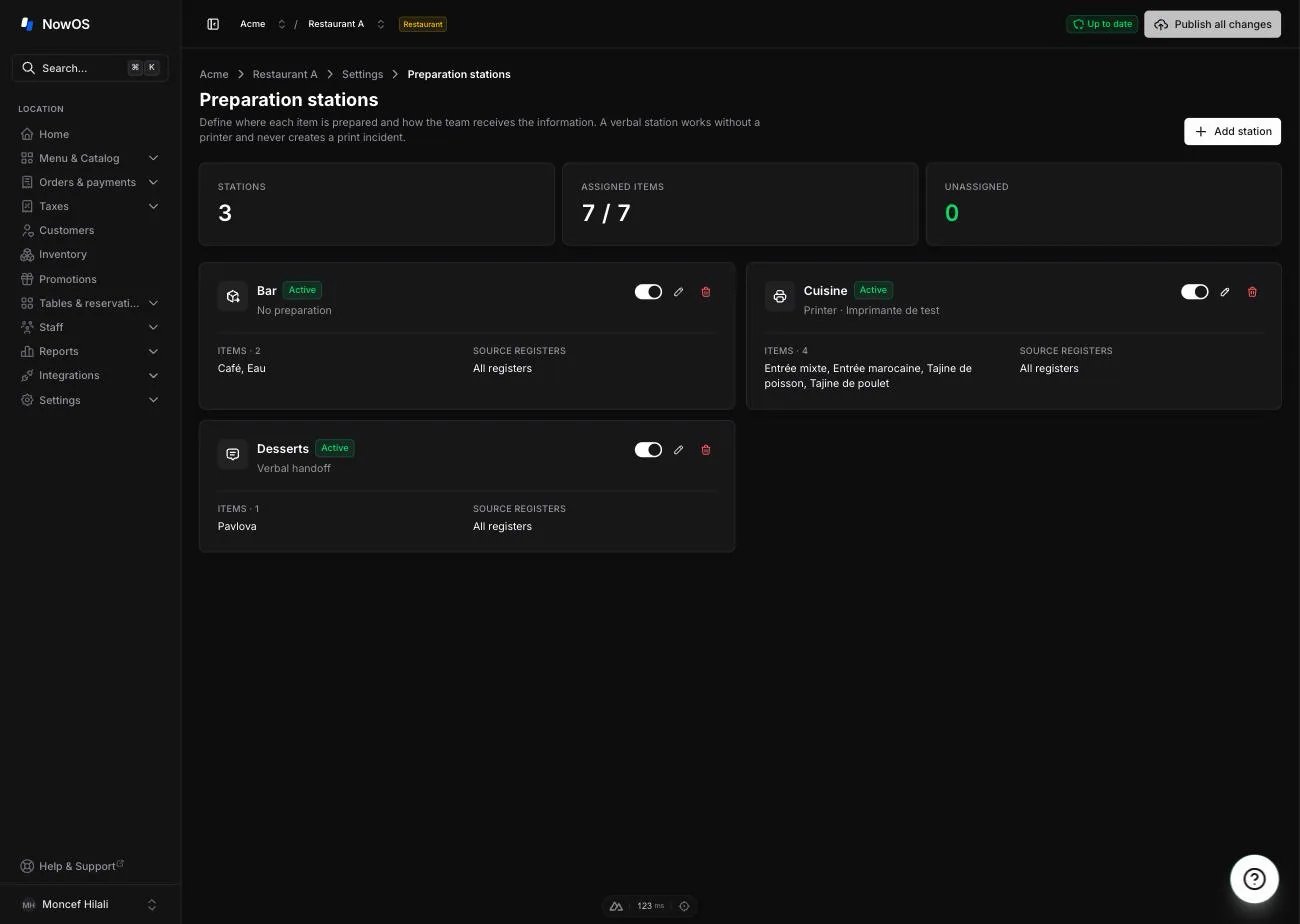
Settings → Preparation stations controls where each item goes when staff tap Send.1
Add a station
Click Add station and give it a clear name, such as “Hot kitchen”,
“Bar”, or “Pass”. You can save it empty and assign items later.
2
Choose the mode
Verbal handoff calls the order out and needs no printer. Printer
prints a ticket filtered for that station. No preparation marks items
that are already ready to serve.
3
Assign items and registers
Once the catalogue is ready, search for and select items in the
height-limited list. The count stays visible even with a large catalogue. An
item may belong to several stations. Keep All registers for the usual
setup, or select the devices whose sends should reach this station.
Devices
Settings → Devices shows the main register, its status and the paired devices, and is where you claim or release devices — see Devices.Payment methods
Settings → Payment methods defines what the register offers at checkout: cash, card, meal vouchers, cheque, bank transfer… with their names, their order and their face values. This section has its own page — see Payment methods.Integrations
Integrations → Reservations connects your reservations provider (for example EatNow) to the location. The steps are described in Tables and reservations.Coming soon
- Hours — opening hours, announced in the menu but not yet available.