

Where to find it
In the backoffice sidebar, open the Menu & Catalog section (Catalog in retail mode). Two screens matter here:- Item library (Products in retail mode): the list of all your items, with their prices. This is where you create and edit items.
- Menus & screens (POS layout in retail mode): how items are organized into screens and tiles, the way your staff will see them on the register. See POS layout.
Create an item
1
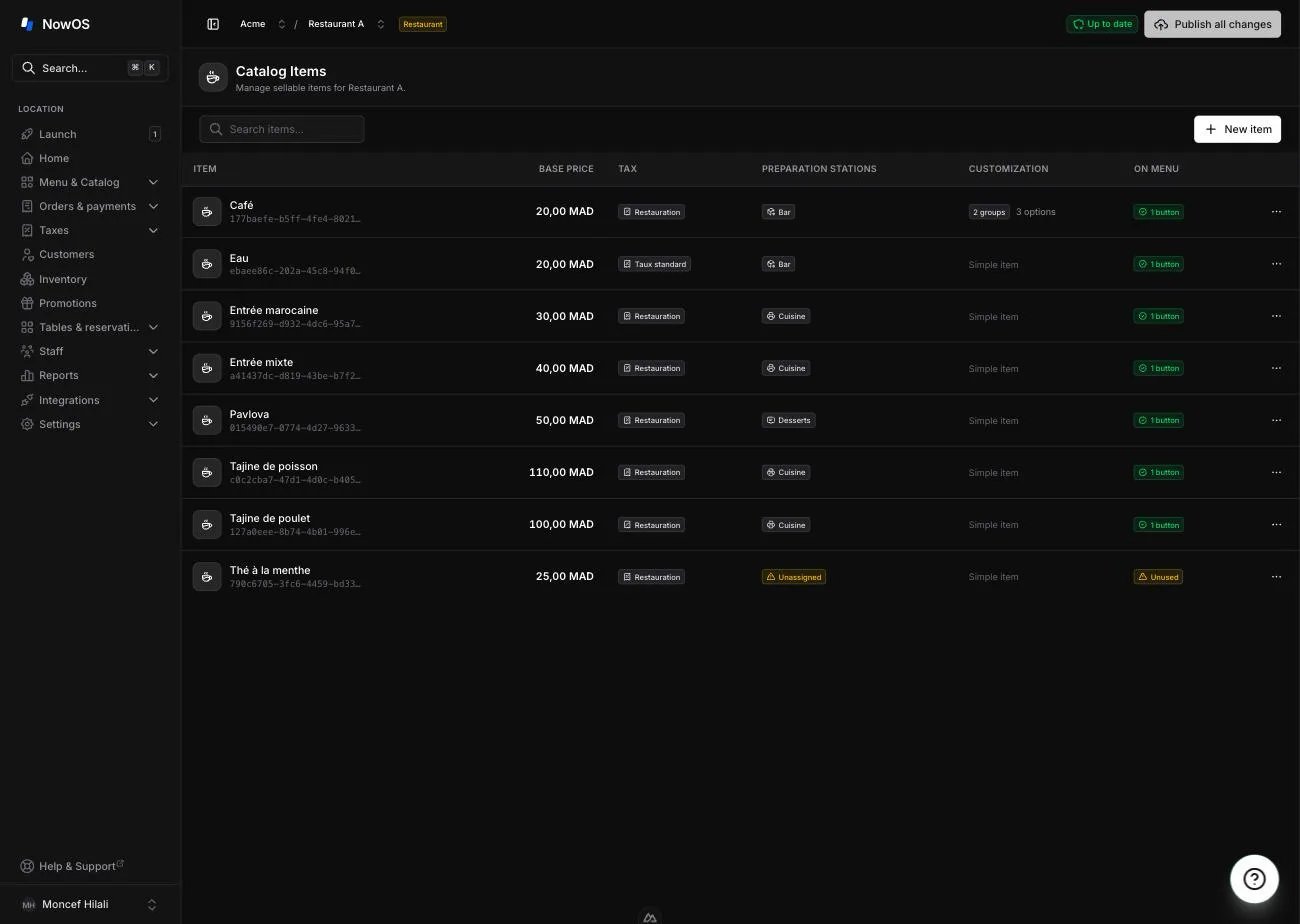
Open Item library
The list shows each item with its base price, its customization if any
(modifier groups), and an On menu badge showing how many menu tiles the
item is placed on. In restaurant mode, the Preparation stations column
shows its destinations and flags Unassigned when needed. The Tax
column flags Needs setup until a valid group is assigned. Search filters
by item or station name.
2
Click New item
The editor opens as a full page (New product in retail mode).
3
Fill in the details
- Name: the name shown on the register and on the receipt. - Base price: the item’s starting price. The label says tax incl. or tax excl. depending on your location’s tax setting — see taxes. - Tax group: the tax group applied. When only one active group exists, it is preselected. Configure before publishing keeps an incomplete draft saveable but blocks publishing. A tax-exempt item uses an explicit 0% group. As soon as a group is picked, a preview under the price shows the tax breakdown. - Color: optional. Colors the item’s tile on the register; without a color, the tile stays on the neutral surface. - SKU and Barcode: optional. The barcode can be an EAN/UPC, a supplier code, or an internal code created with the Generate internal button — handy in retail mode for scanning at the register. - In retail mode, you can turn on Variants to sell the product in several versions (sizes, formats…), each with its own price, barcode and stock — see variants. - In restaurant mode, Preparation stations lets you search for and select one or more destinations. An item without an active station cannot be sent.
4
Click Create item
The item is added to your catalog draft. It only appears on the registers
after publishing — see below.
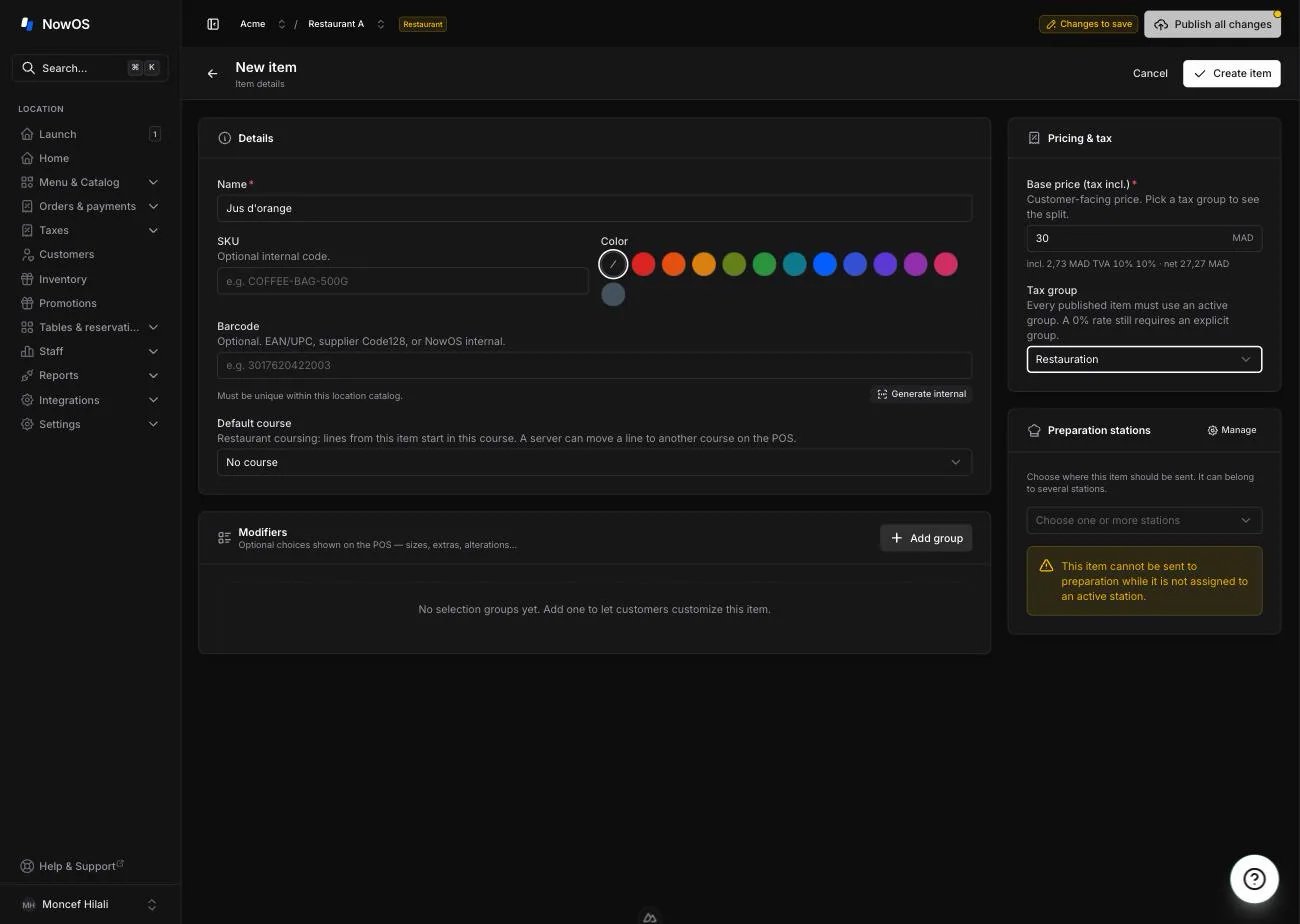
In restaurant mode, this page is also where you add modifier groups (size,
extras…). See modifiers and combos.
Edit or delete an item
- Click a row in the list to reopen the item, or use Edit item in the row’s ⋯ menu. Your changes are only saved when you click Save item.
- To delete, choose Delete item in the ⋯ menu, then confirm.
Place items on the menu
An item created in the library is not yet visible on the register: it needs to be placed as a tile on a menu screen. Items without a tile are flagged with an Unused badge in the On menu column — handy for spotting what still needs a home. Organizing screens and tiles happens in Menus & screens, see POS layout.Coursing
Restaurant mode only.
1
Turn on coursing
On the right, the Enable coursing switch turns the course mode on across
your registers. While it is off, sending to the kitchen fires everything in
one go.
2
Define your courses
On an empty menu, Use Starters / Mains / Desserts creates the three
classic courses in one click — rename them afterwards if you like. Otherwise
add them one by one with Add course. The list order is the firing
order: reorder with the arrows, delete with the trash icon, rename by
tapping the field. Finish with Save.
3
Assign your items to courses
On each course, the Items button opens the catalog list: tick
everything that belongs to that course. The counter beside the button shows
how many items are already there. Select all and Clear all apply to
the current search, so you can handle a whole family at once (“salad”,
“dessert”…).An item has only one course: ticking it here takes it out of its current
one, and a badge reminds you where it was.You can still do it item by item, with the Default course field in an
item’s editor (Item library).
4
Check the items with no course
Below the list, a line says how many items have no course at all. That is
not an error — they simply go out with the first send, which is what you
want for a drink or a coffee. Just make sure no main course ended up there
by accident.
5
Publish
Like any catalog change, click Publish all changes to push the
configuration to the registers.
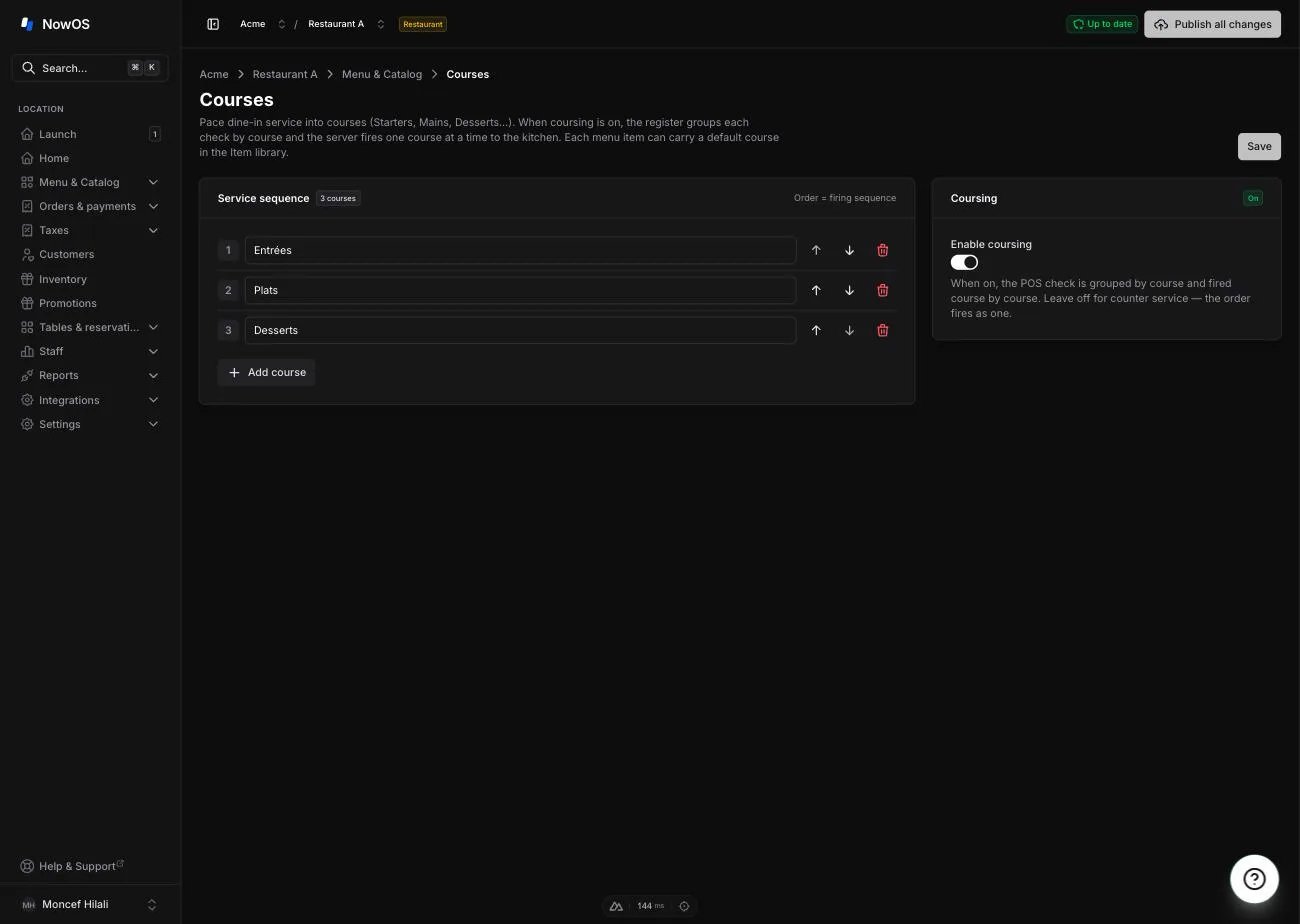
The Default course field only appears in the item editor once at least one
course is defined.
Publish to the registers
Your changes (items, prices, screens) are saved automatically into a draft, but the registers see none of it until you publish. In the backoffice’s global header, a badge tells you where you stand:- Saved changes ready to publish: your draft contains changes that are not published yet.
- Changes to save: the current page still contains local edits. Save them before publishing.
- Up to date: every saved change is already published.
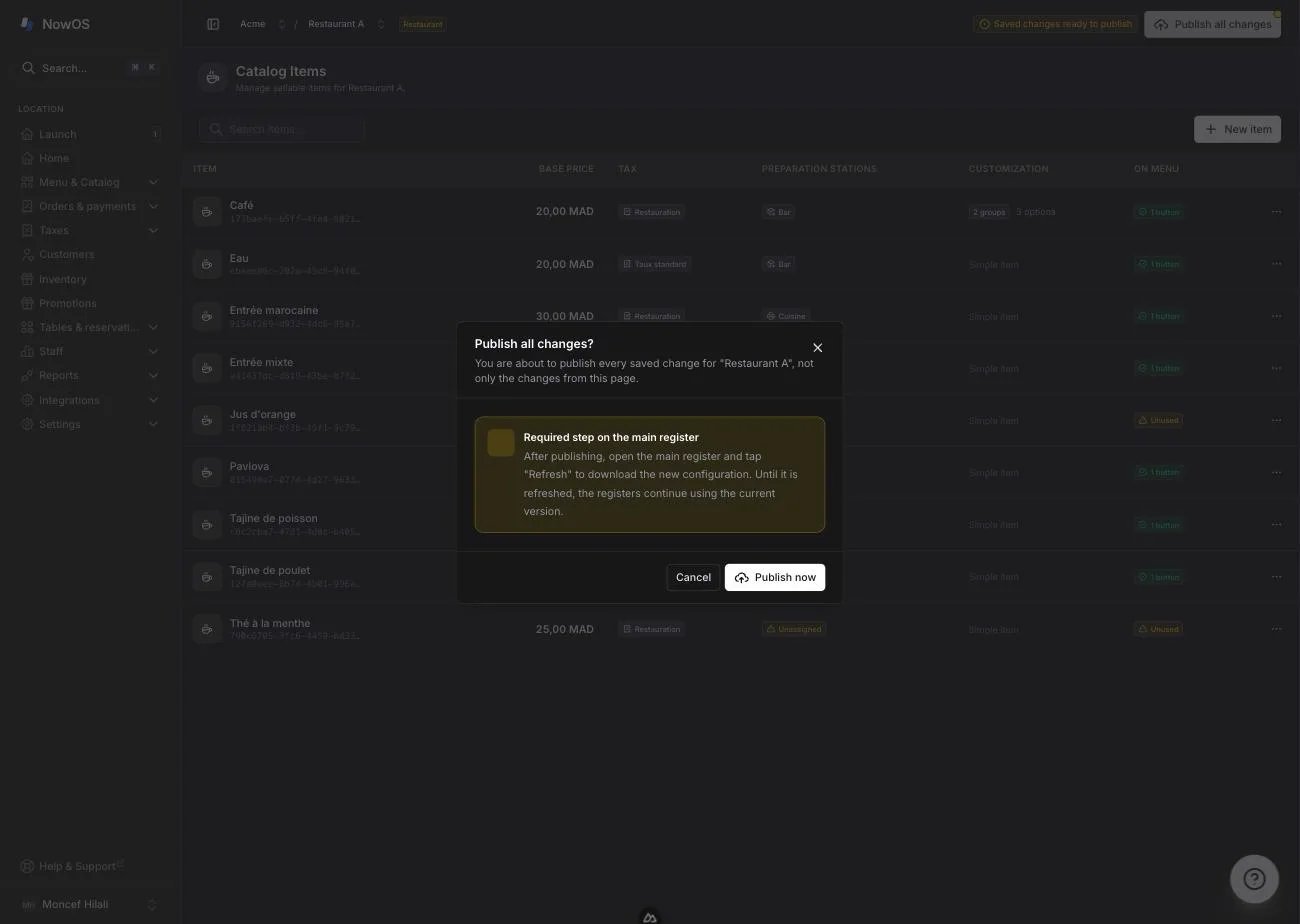
You can prepare big menu changes at your own pace: until you publish, service
on the floor keeps running on the current version. Orders already open keep
the prices they were created with in any case.