

The idea: screens and tiles
Two concepts are all you need:- A screen is a page on the register. Every location has a home screen (Home screen), and you can create subscreens — for example “Hot drinks” or “Desserts”.
- A tile is a button placed on a screen. There are two kinds:
- an item tile (Item tile, Product tile in retail mode): tapping the tile on the register adds the item to the order;
- a category tile (Category tile): tapping the tile opens another screen.
An item created in the catalog only shows up on the register once it’s placed
as a tile on a screen reachable from home. The On menu column in the item
library flags the ones still waiting to be placed — see menu and
items.
The three-pane editor
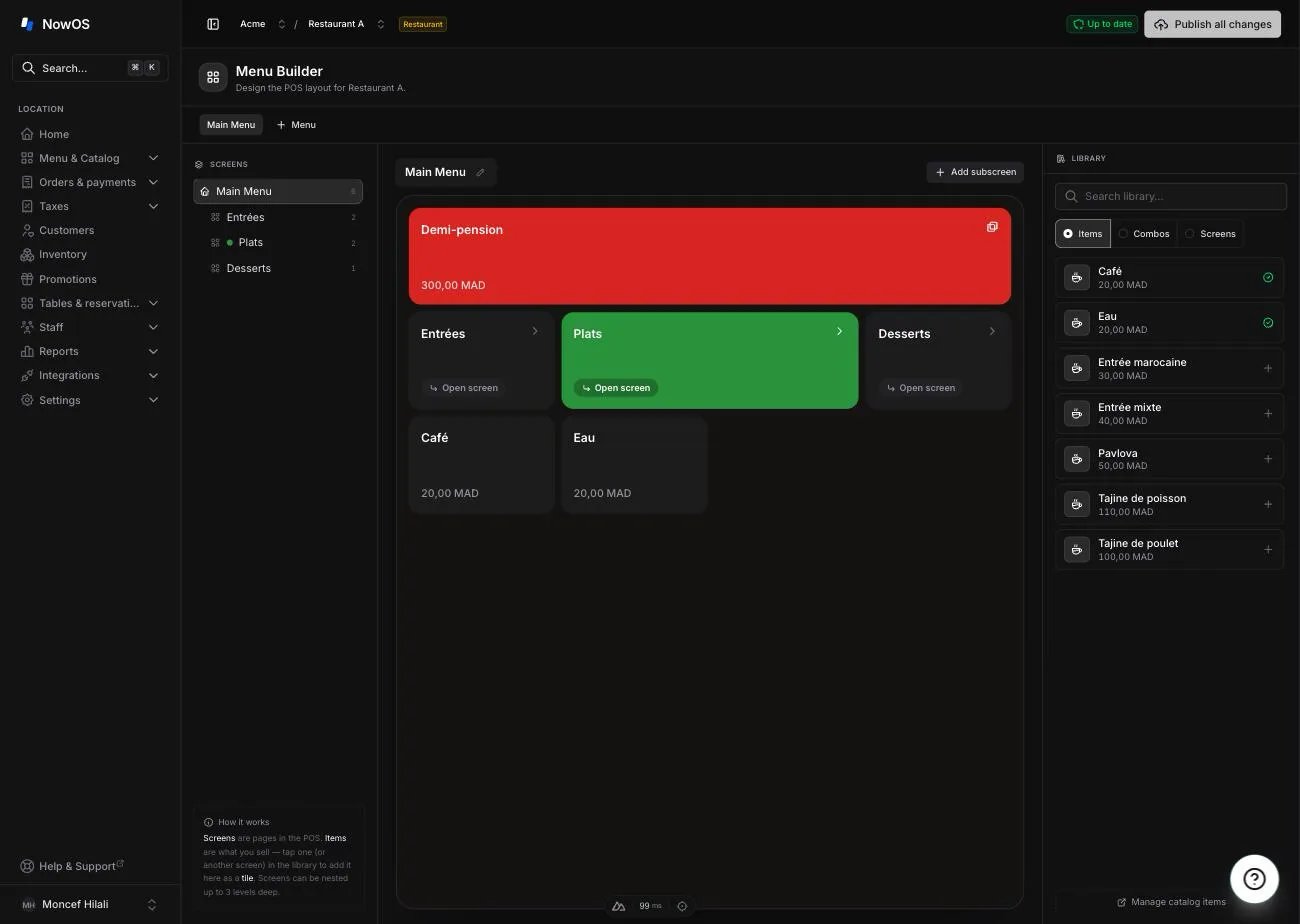
- On the left, Screens: the tree of your screens, each with its tile count. Click a screen to open it in the center.
- In the center, the preview (POS preview): a faithful reproduction of the screen as it will appear on the register, with its four-column grid. A breadcrumb above lets you move back up from screen to screen. Click a tile to adjust it, double-click a category tile to enter its screen.
- On the right, Library: the library you add tiles from. When a tile is selected, this panel becomes the tile inspector.
Multiple menus
A location can have several menus — for example a Lunch menu and a Dinner menu. Each menu has its own screens and its own tiles; they are completely independent. On the register, your staff shows one menu at a time and switches between them with a tap, see taking orders. The Menus bar at the top of the editor lists your menus. The selected menu is highlighted; everything below it — the tree, the preview, the library — belongs to that menu.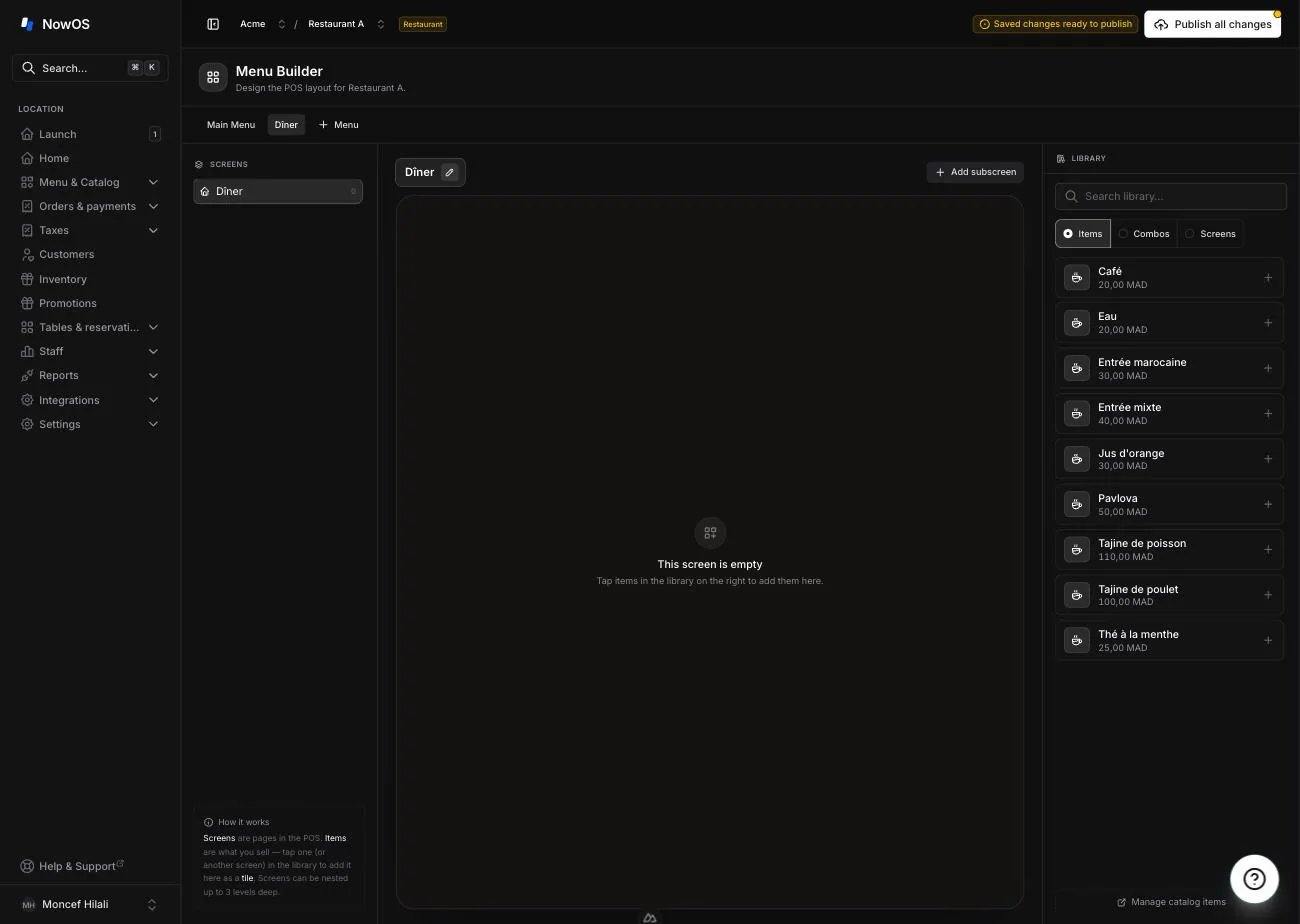
- Switch menu: click its name in the bar.
- Add a menu: the + Menu button creates a new menu with an empty home screen, then opens it. Give it its name next.
- Rename a menu: open it, then click its name or the pencil above the preview. The field enters Editing mode and selects the current name. Type the new name, then confirm with the checkmark or Enter; Escape cancels the edit.
Adding tiles to a screen
1
Open the screen to fill
Select it in the Screens tree or navigate through the preview.
2
Pick from the Library
The right panel offers three tabs: Items (Products in retail mode)
for items, Combos (Bundles in retail mode) for combos — see
combos and bundles — and Screens for screens.
The Search library… bar filters by name.
3
Click an item or a screen
It’s added at the end of the grid. An Already on this screen checkmark
flags items already placed on the open screen.
The name shown on a tile is always the name of the item or screen it points
to. To rename a tile, rename the item in the catalog or the screen in its
settings.
Creating subscreens
Two paths lead to the same result:- the Add subscreen button on the open screen’s settings card;
- the New subscreen button in the Library’s Screens tab.
Adjusting a tile
Click a tile in the preview: the right panel becomes its inspector.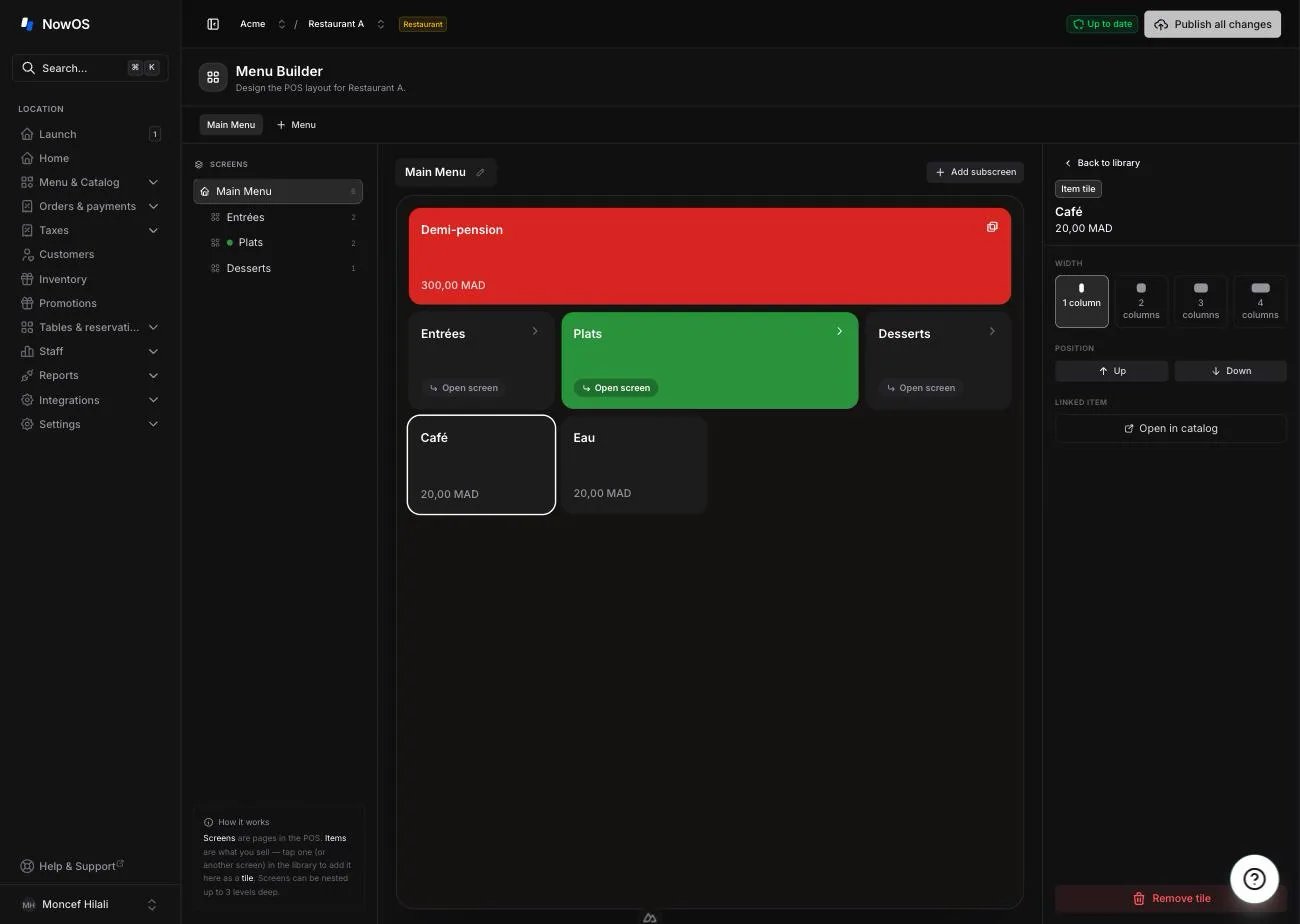
- Width: the tile’s width, from 1 col to 4 cols. The register grid has four columns, so a 4-column tile spans the full width — handy for showcasing your best sellers.
- Position: the Up and Down buttons move the tile within the grid.
- Open this screen (category tile): opens the target screen in the editor.
- Open in catalog (item tile): opens the item library to edit the item itself.
- Remove tile: removes the tile from the screen. The item or screen it points to is not deleted — only the tile goes away.
Colors
Every screen can take a color (Color picker in its settings), and so can every item (Color field in the item editor). On the register, every tile shows its own color only: a tile without a color stays on the neutral surface, even when its screen is colored. Coloring a screen only tints its category tile, not the items inside it.What your staff sees on the register
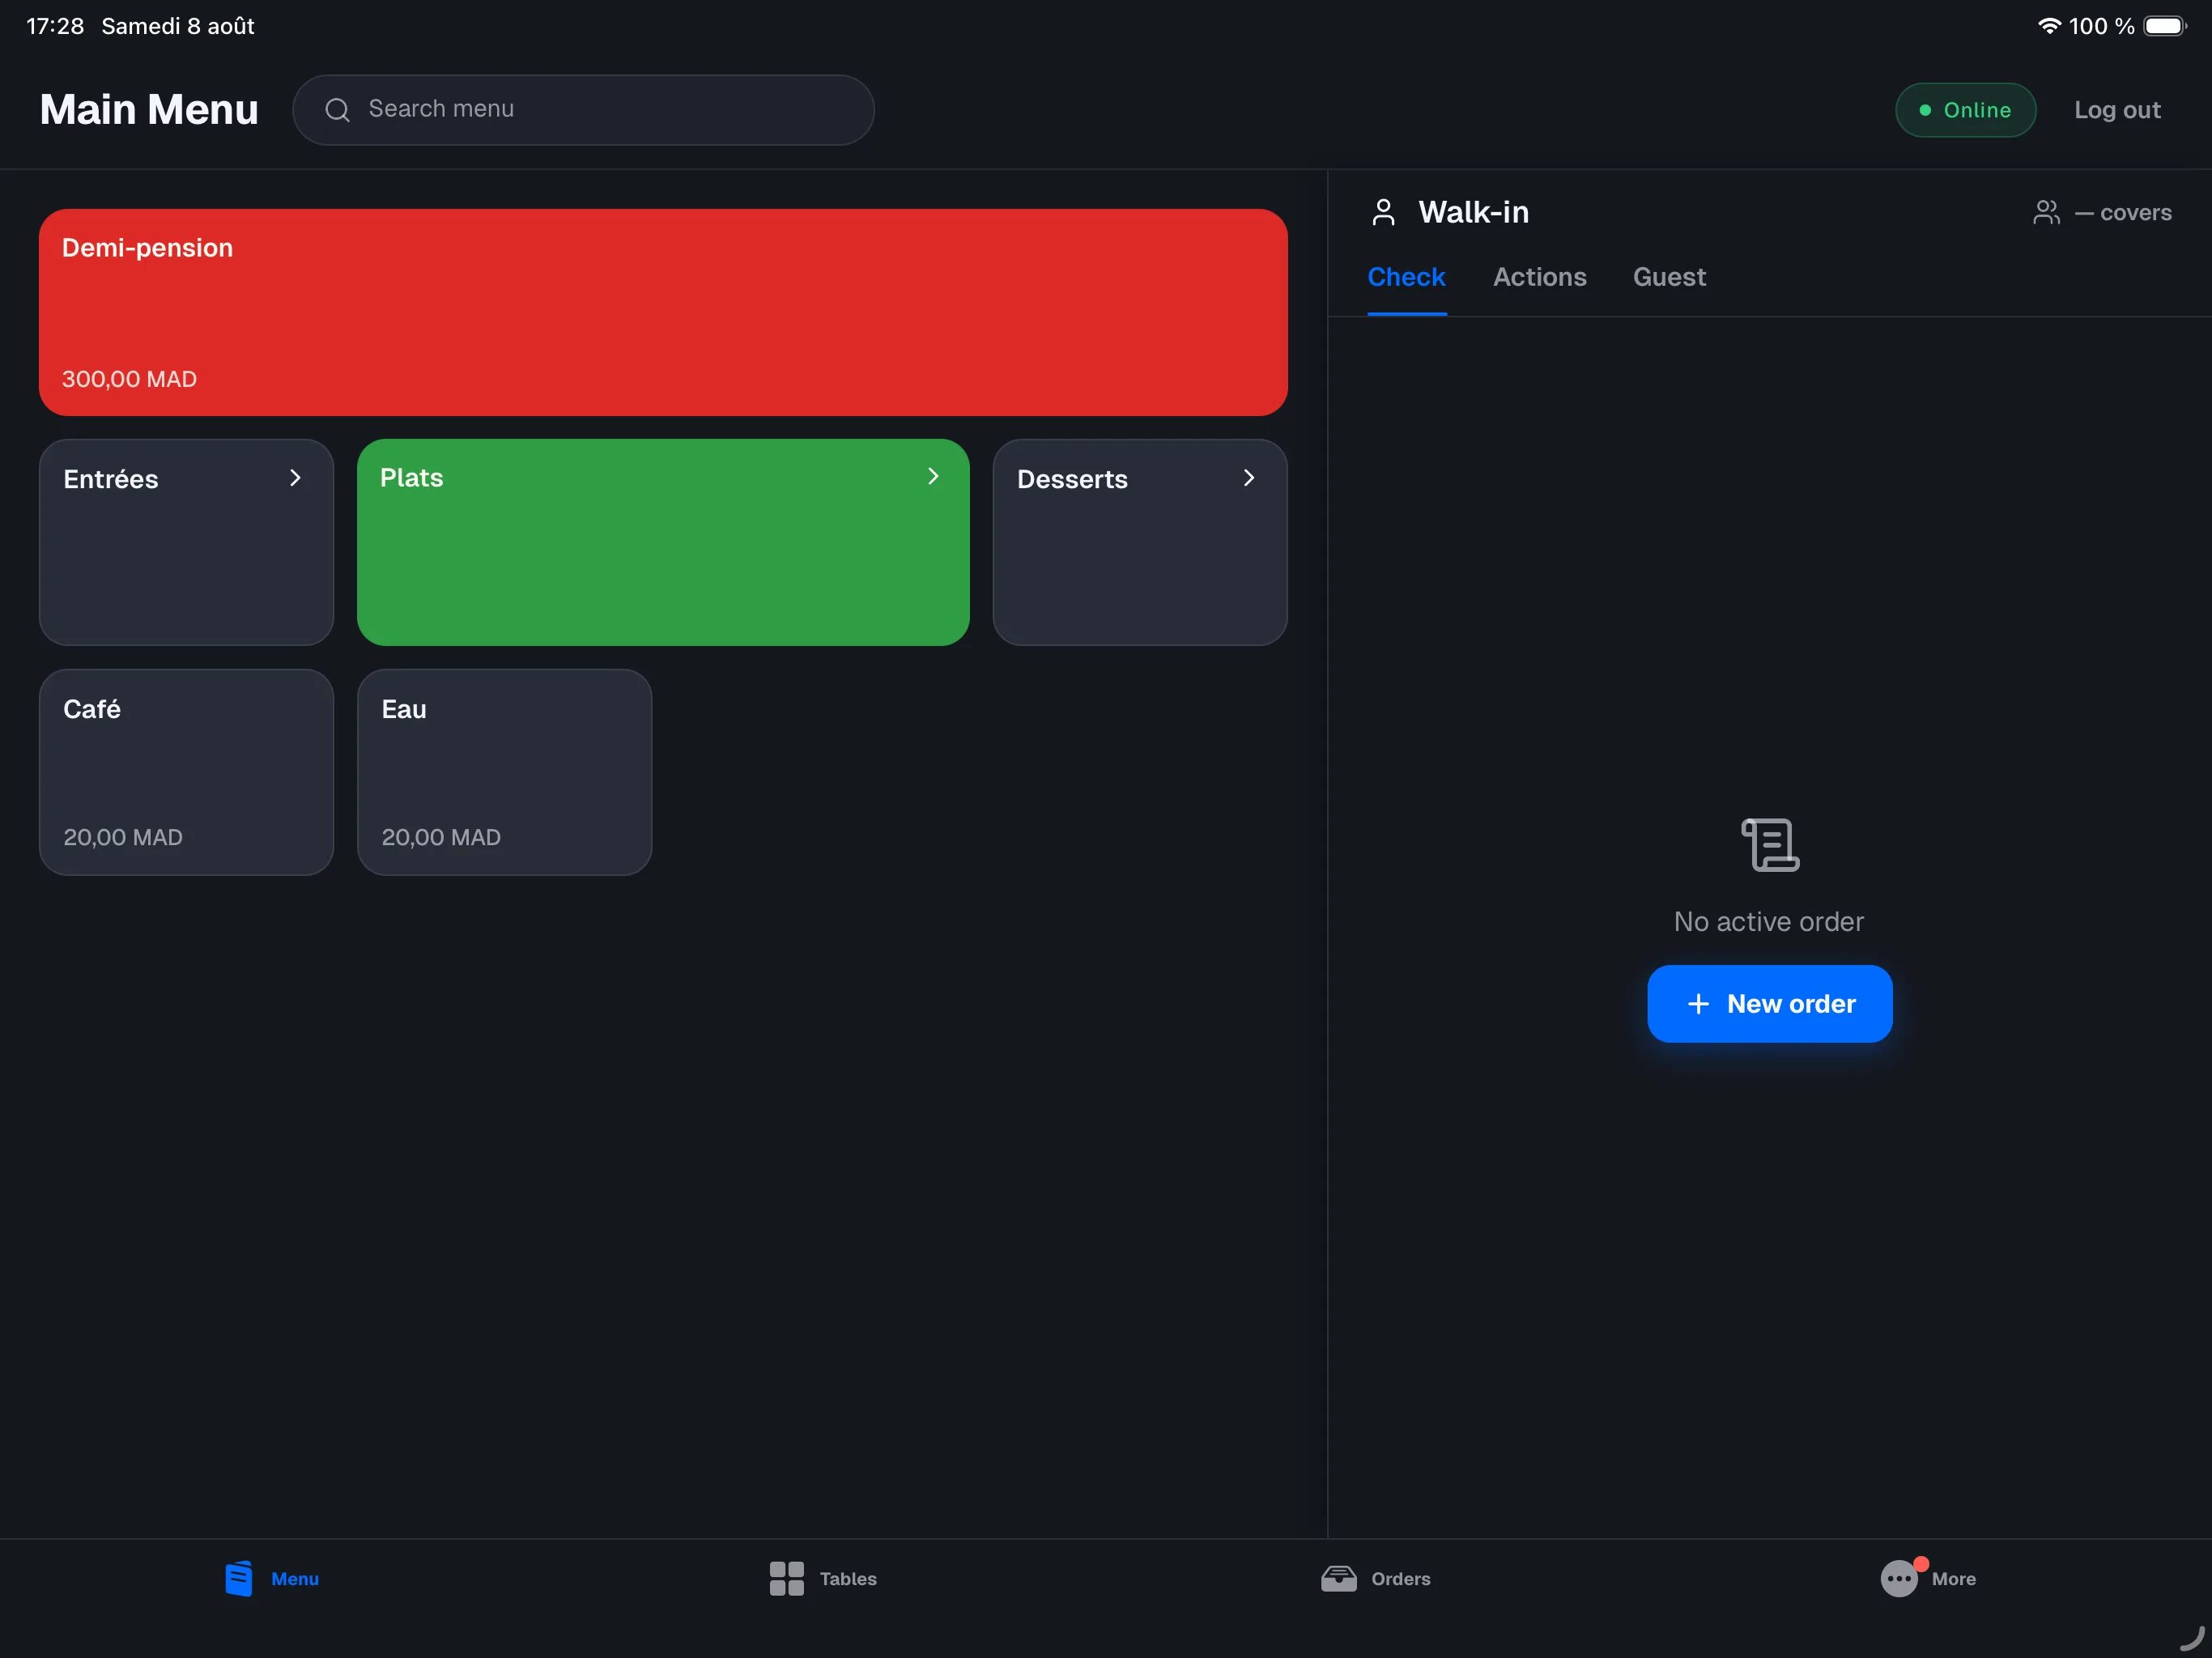
On the register, the screen reproduces your preview exactly: the same four-column grid, the same tiles, in the same order.- Item tiles show the name and price. Tapping them adds the item to the current order — see taking orders.
- Category tiles open their screen; a back arrow at the top takes you back up.
- A screen with no tiles shows “No buttons on this screen yet. Add some in the back office.”
- Just after a register is paired, the grid may read “Loading the menu…” instead: the register has not received the menu yet. It fills in on its own as soon as it arrives — there is nothing to configure.
Publishing to the registers
Your changes save automatically to a draft (a Saving draft… badge shows while saving), but the registers see none of it until you click Publish all changes in the global header. The location’s saved catalog, tax, receipt, and settings changes are published together as one block. The confirmation dialog and required refresh on the main register are covered in menu and items.Orders already open keep the prices they were created with, in any case.