

Have a question while using the backoffice?
Click the ? button in the bottom-right corner of the backoffice. Describe what you want to do: the AI support agent searches the NowOS documentation and guides you without making you leave the page you opened. You can also ask about a different screen. The active page helps the agent understand the context, but does not limit the subject of your request.A badge on the ? button alerts you to new answers. To find an earlier
question or start another conversation, open the request history. See
getting help in the backoffice.
Organization and locations
The backoffice is organized in two levels:- The organization — your business. It groups your locations and, over time, members and billing.
- The location — a place where you sell: a restaurant or a shop. Each location has its own mode (Restaurant or Retail), its own currency, menu, team, devices, and reports.

Create your account
1
Open the sign-up page
In your browser, open the backoffice, then go to the Create an
account page.
2
Fill in your details
Fill in Full Name, Email, Password, and Confirm
Password, then click Create account. The password must be at least
8 characters.
The link is valid for one hour and works only once. If it does not
arrive, check your spam folder. After the reset you are signed out of
your other devices — sign in again with the new password.
This account (email + password) is only for the backoffice. On the
register, you sign in with a PIN — see
signing in to the register.
Create your organization
If the NowOS team already set your workspace up, you will not see this
wizard. You receive an invitation by email: accept it, choose your password,
and you land straight in your organization, with your first location already
created. Skip to the organization home page.
1
Organization
Enter your business name in Organization name, then click
Continue.
2
Team
Describe your first location:
- Location name — the name of the place (for example “Café du Coin — Downtown”).
- Mode — Restaurant (table service, checks, sending to the kitchen) or Retail (cart, pay at the counter). See the two modes.
- Country — France or Morocco. Your country sets the location’s fiscal regime and pre-fills its currency and display locale.
- Currency and Display locale — default from the country; adjust them if your store uses a different format.
- Fiscal regime — derived from the country and shown read-only: Morocco (standard: gap-free numbering and tamper-proof records) or France (NF525: signed, chained fiscal documents).
- Optionally: Address, City, Zip code, Timezone.
3
Receipt identity
Fill in what prints on every receipt: Legal business name,
Address, Tax ID label and Tax ID value (SIRET, ICE…), plus
VAT number and Footer text as options. Click Finish setup.You can edit this later under the location’s Settings → Receipts.
The organization home page
Click the organization name in the top bar to open the Overview page. It lists all your locations as cards, with the city, currency, and timezone. Click a card to open the location and manage its menu, team, and settings.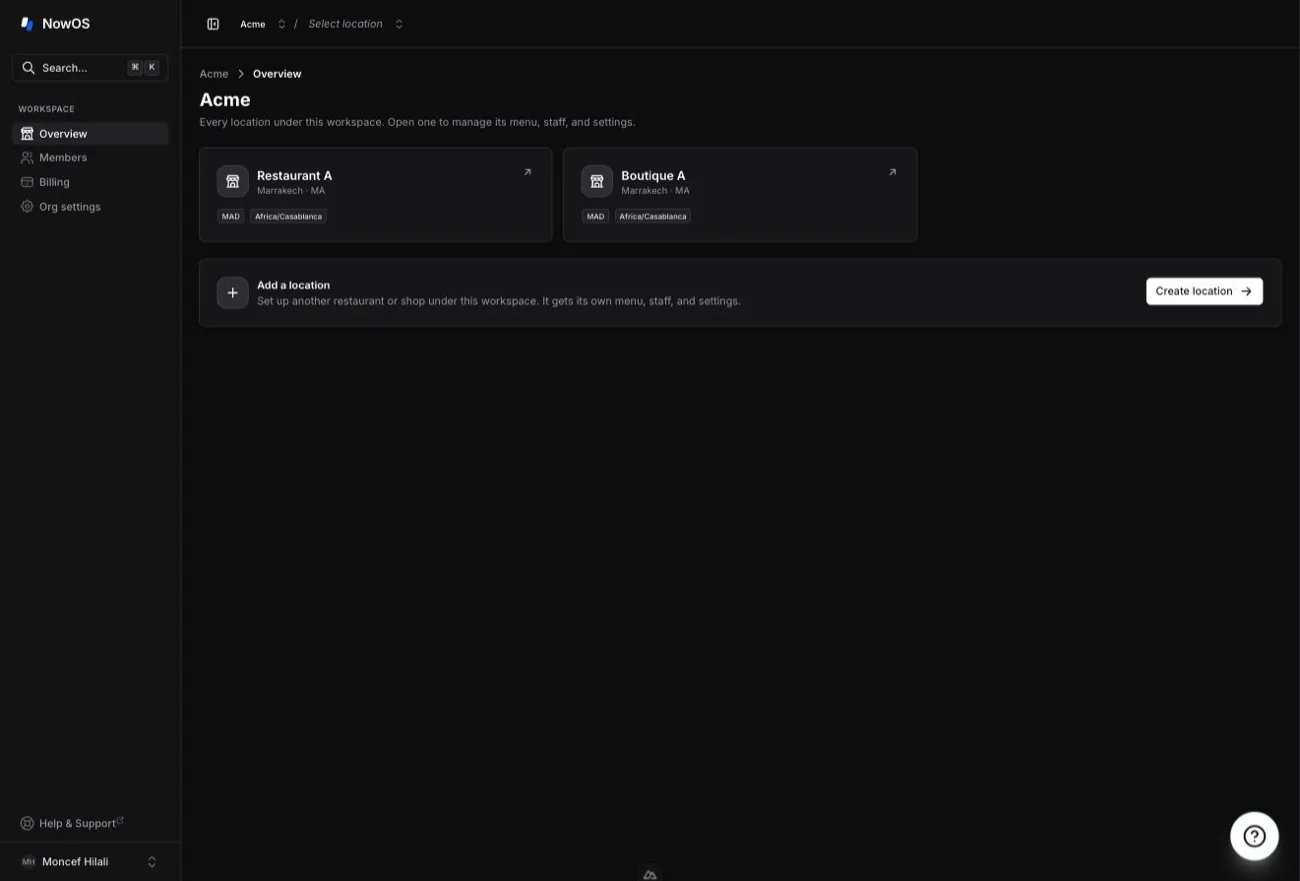
The location home page
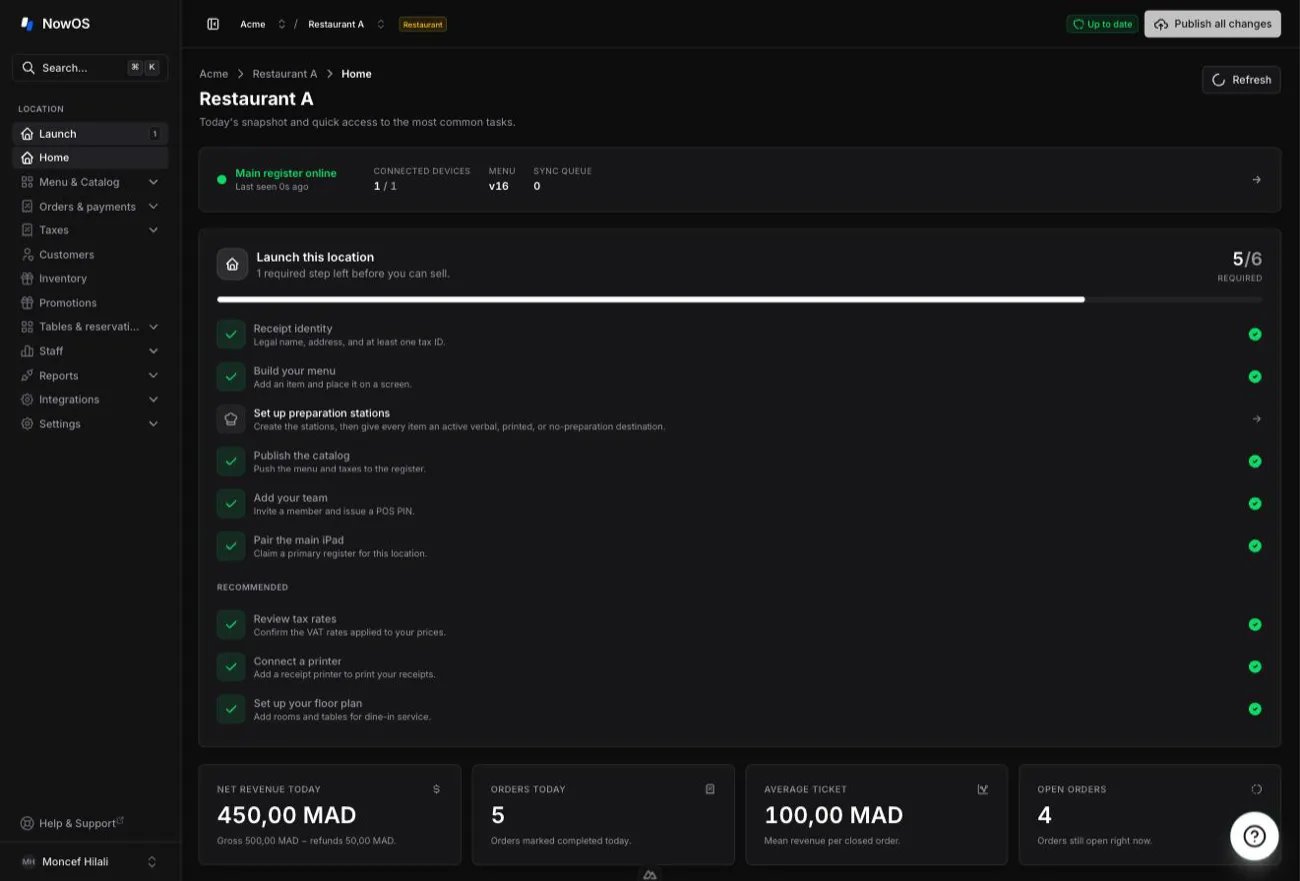
Opening a location lands you on its Home page:- a health tile for the main register (online status, connected devices, menu version) — click it to open the device details;
- today’s numbers: net revenue, orders, average ticket, open orders;
- quick actions to the menu, the team, devices, and reports.
Add a location
1
Open the location switcher
In the top bar, click the arrows next to the location name, then Create
new location. This option is reserved for organization owners and
admins.
2
Describe the new location
The Create a new location form uses the same fields as the welcome
wizard: Location name, Mode, Country (which sets the Fiscal
regime and pre-fills Currency and Display locale), and the
address as an option. Click Create location.
3
Fill in the receipt identity
After creation, the backoffice opens the new location’s
Settings → Receipts directly. Fill in the identity that prints on
receipts: without it, the location cannot publish its menu or sell.
What is managed at the organization level
All the day-to-day work happens at the location level. The dedicated
pages walk you through it:
- The catalog and the POS layout
- The team — this is where you add your managers and staff, grant backoffice access and issue register PINs
- Devices and location settings
- In restaurant mode, location settings explain how to create preparation stations, even empty ones, then assign every item before the first service
- Reports
- Backoffice access — invite a partner or an accountant into the backoffice;
- Organization settings — rename the business and find all your locations in one place;
- Billing — each location’s plan.
The Team page is the same at the organization level and at a location’s
level: at the organization level it shows everyone, at a location’s level
only that location’s register access.