

Before you start
- Access to the backoffice on a computer.
- The iPad connected to the store Wi-Fi, with the NowOS app installed (see What hardware you need).
- An internet connection for setting up the main register.
Publish your menu in the backoffice before pairing secondary devices: until
the main register has received a published menu, secondary devices can pair
but have nothing to sell. See The menu.
Designate the main register
The main register is designated from the backoffice, with a one-time token you scan on the iPad.1
Generate the token in the backoffice
Open Settings → Devices, then click Generate claim token. A QR
code appears. It is single-use and expires after 5 minutes.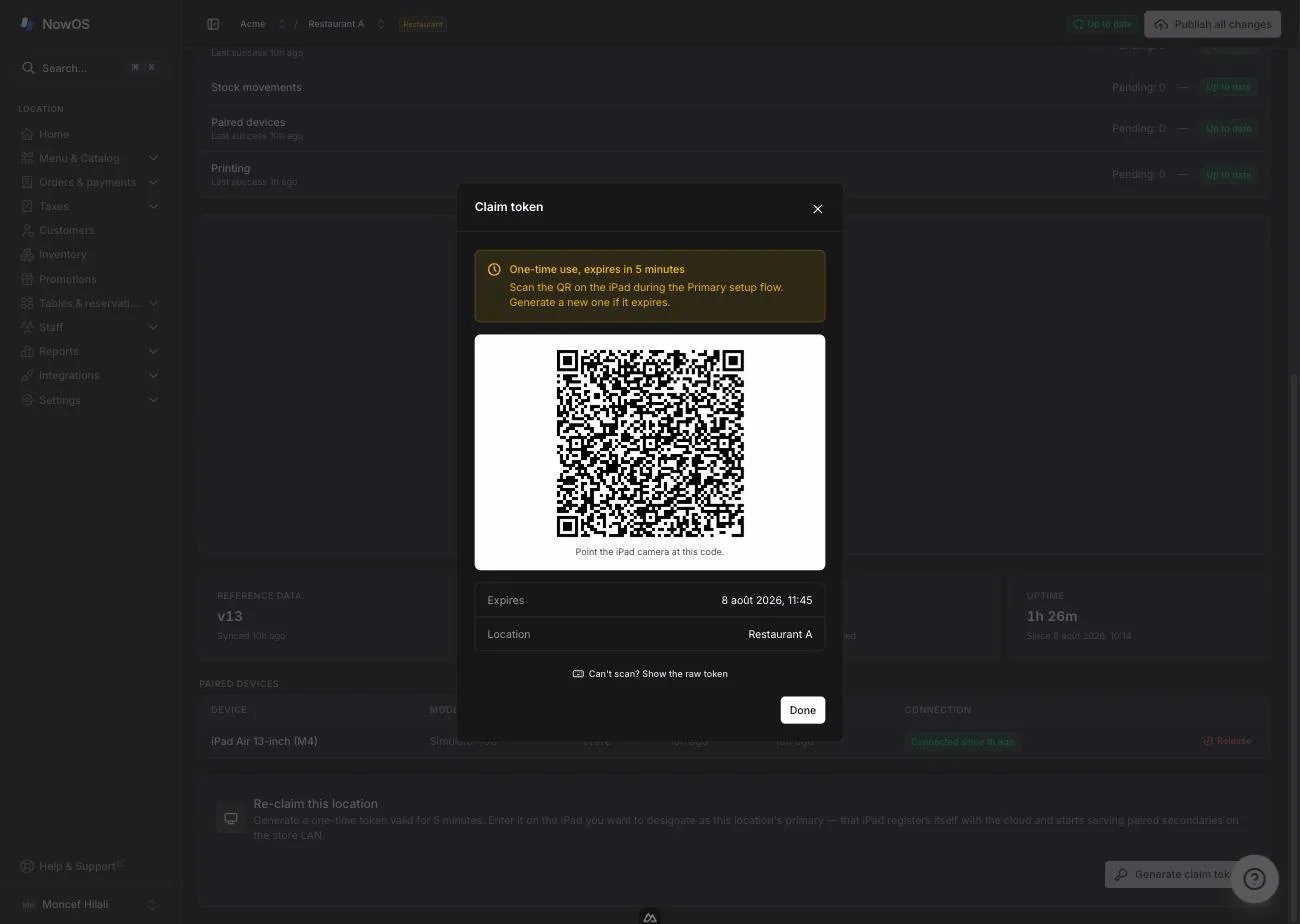
2
Choose the role on the iPad
Open NowOS on the iPad. On the How should this iPad run? screen, tap
Primary POS.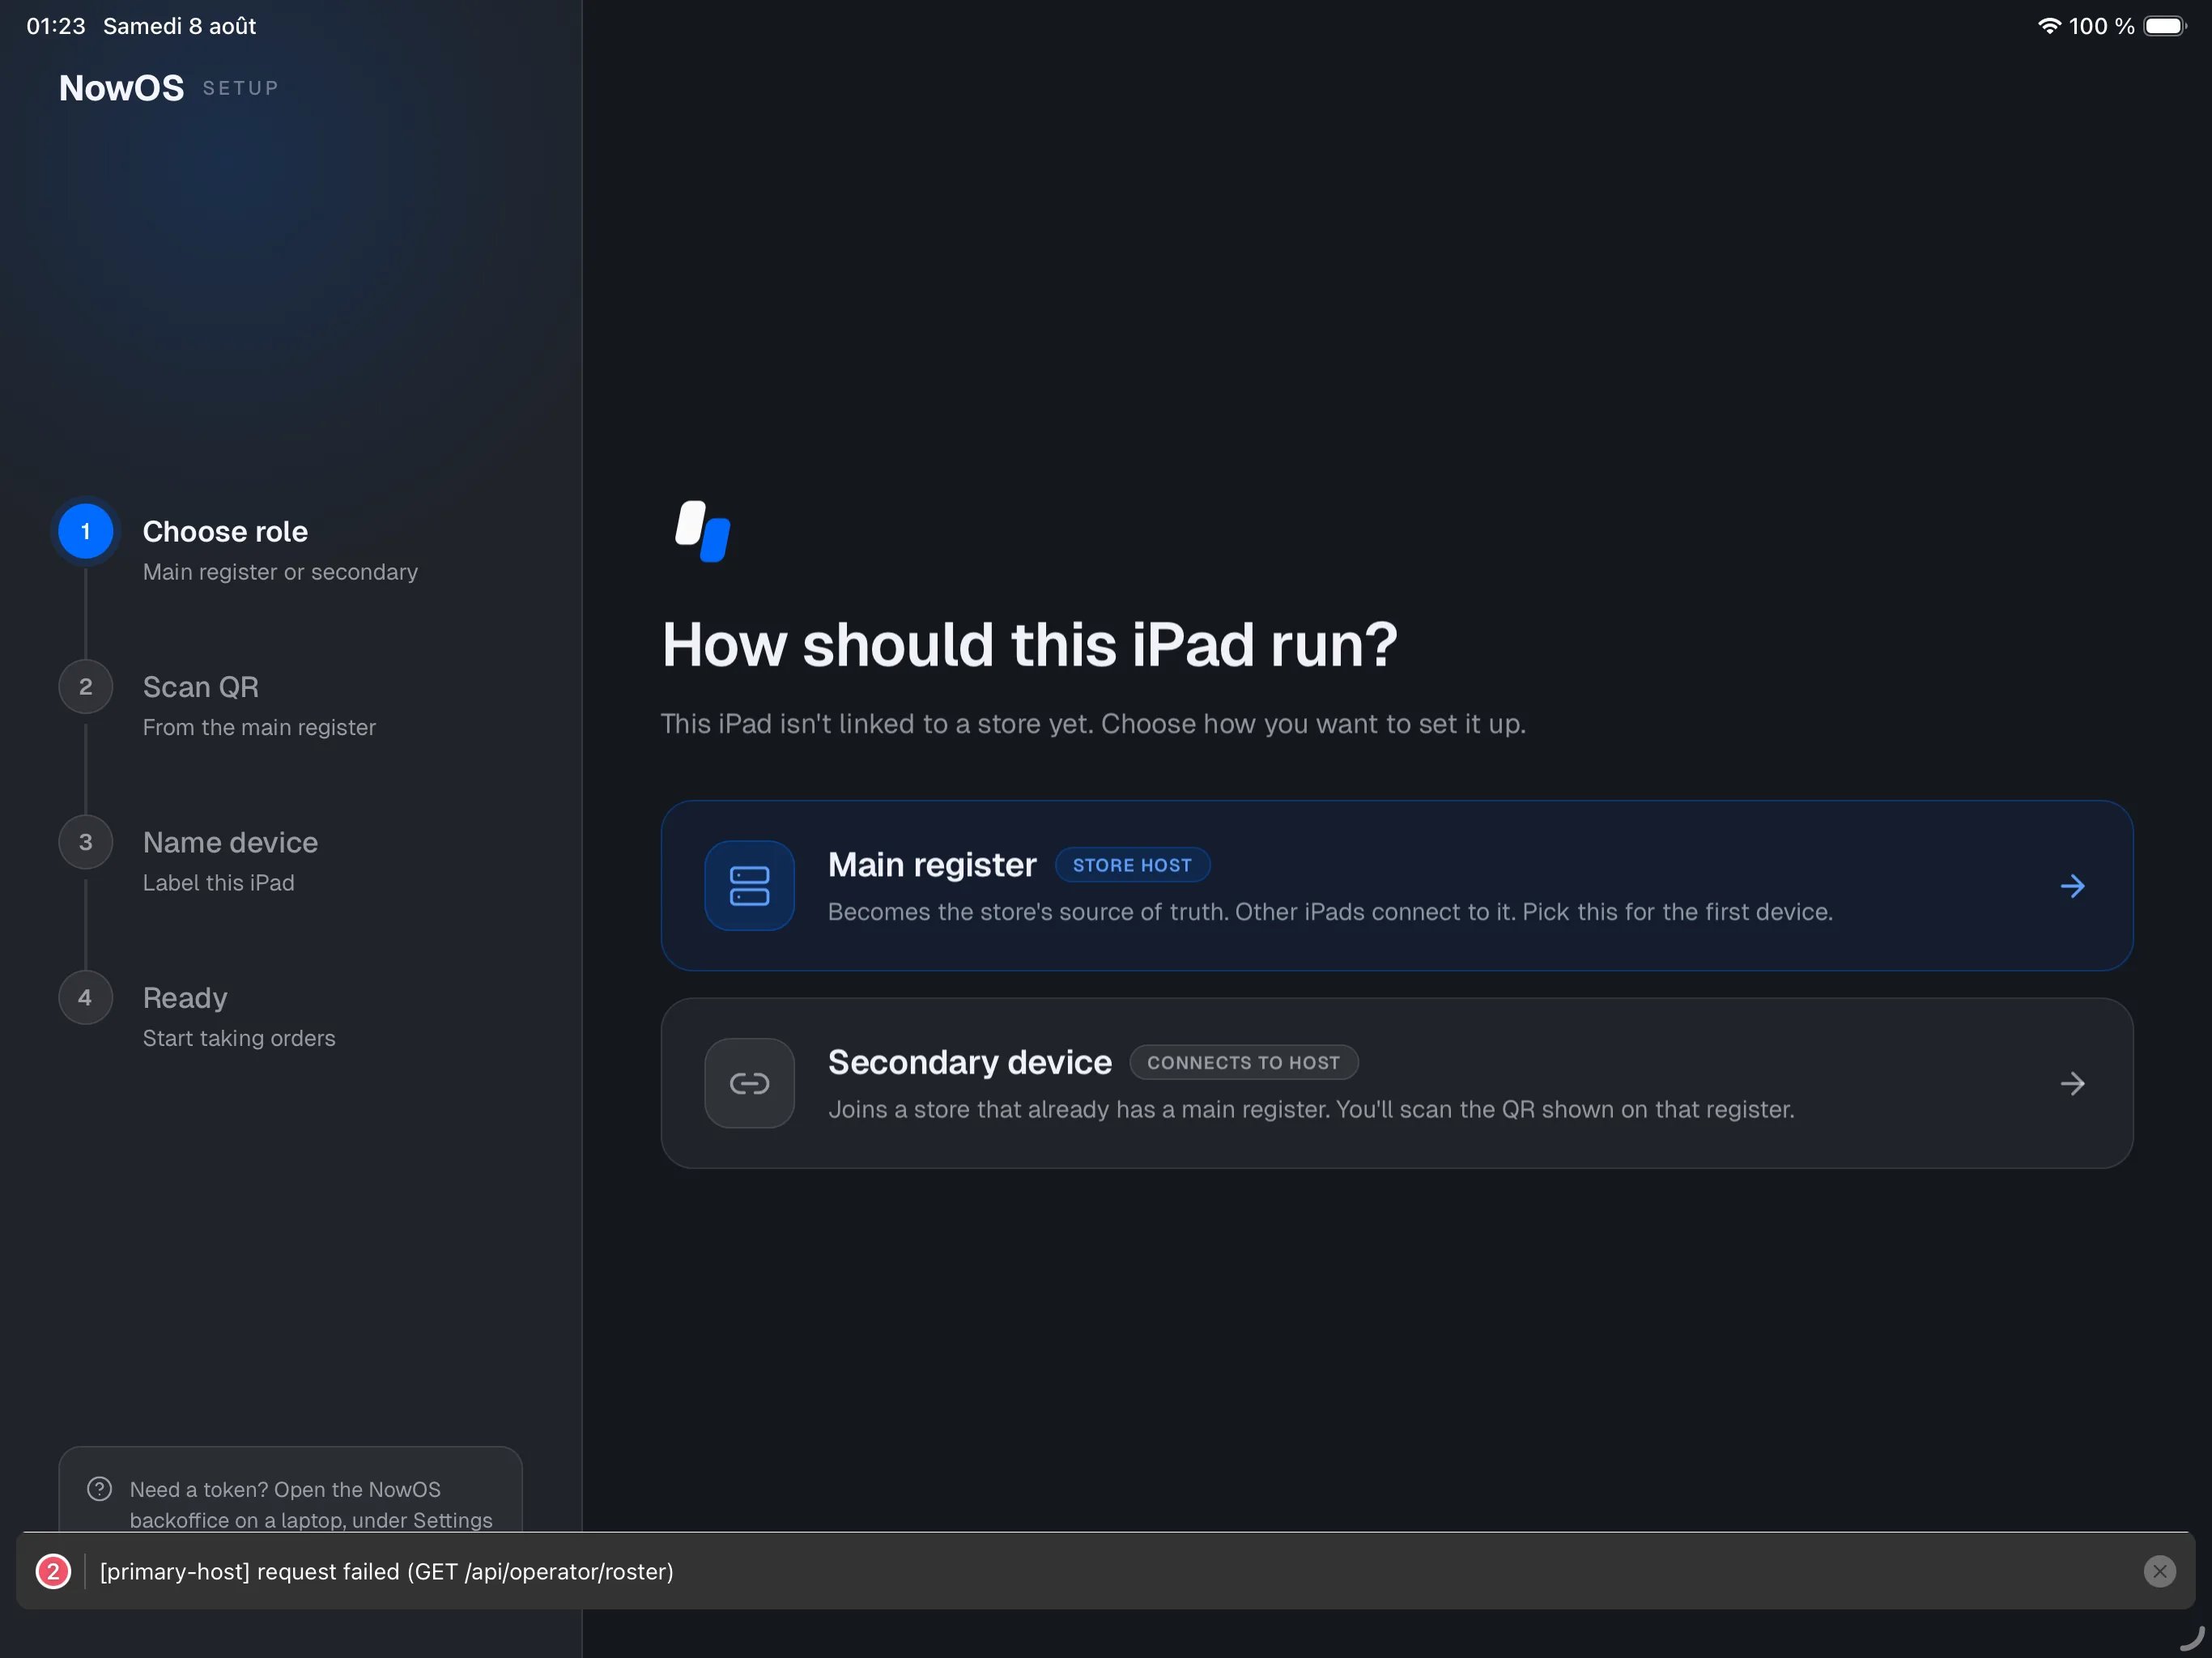
3
Scan the QR code
On the Claim this iPad screen, tap Open camera and point it at
the QR code shown in the backoffice. Can’t scan? In the backoffice, click
Can’t scan? Show the raw token, copy the token, and paste it on the
iPad in the Or paste the token field. Then tap Continue.
4
Name the main register
Give it a clear name, for example “Front counter iPad”. This name shows
up in the backoffice and on the pairing screen of the other iPads. Tap
Claim as Primary.
If the token has expired, simply generate a new one in the backoffice.
Pair a secondary device
Recommended method: scan the main register QR
The main register must be on, with the app in the foreground.1
Show the code on the main register
On the main register, signed in as a manager, open More → Add a device
and tap Show pairing QR. A QR code appears with a countdown and an
8-character code.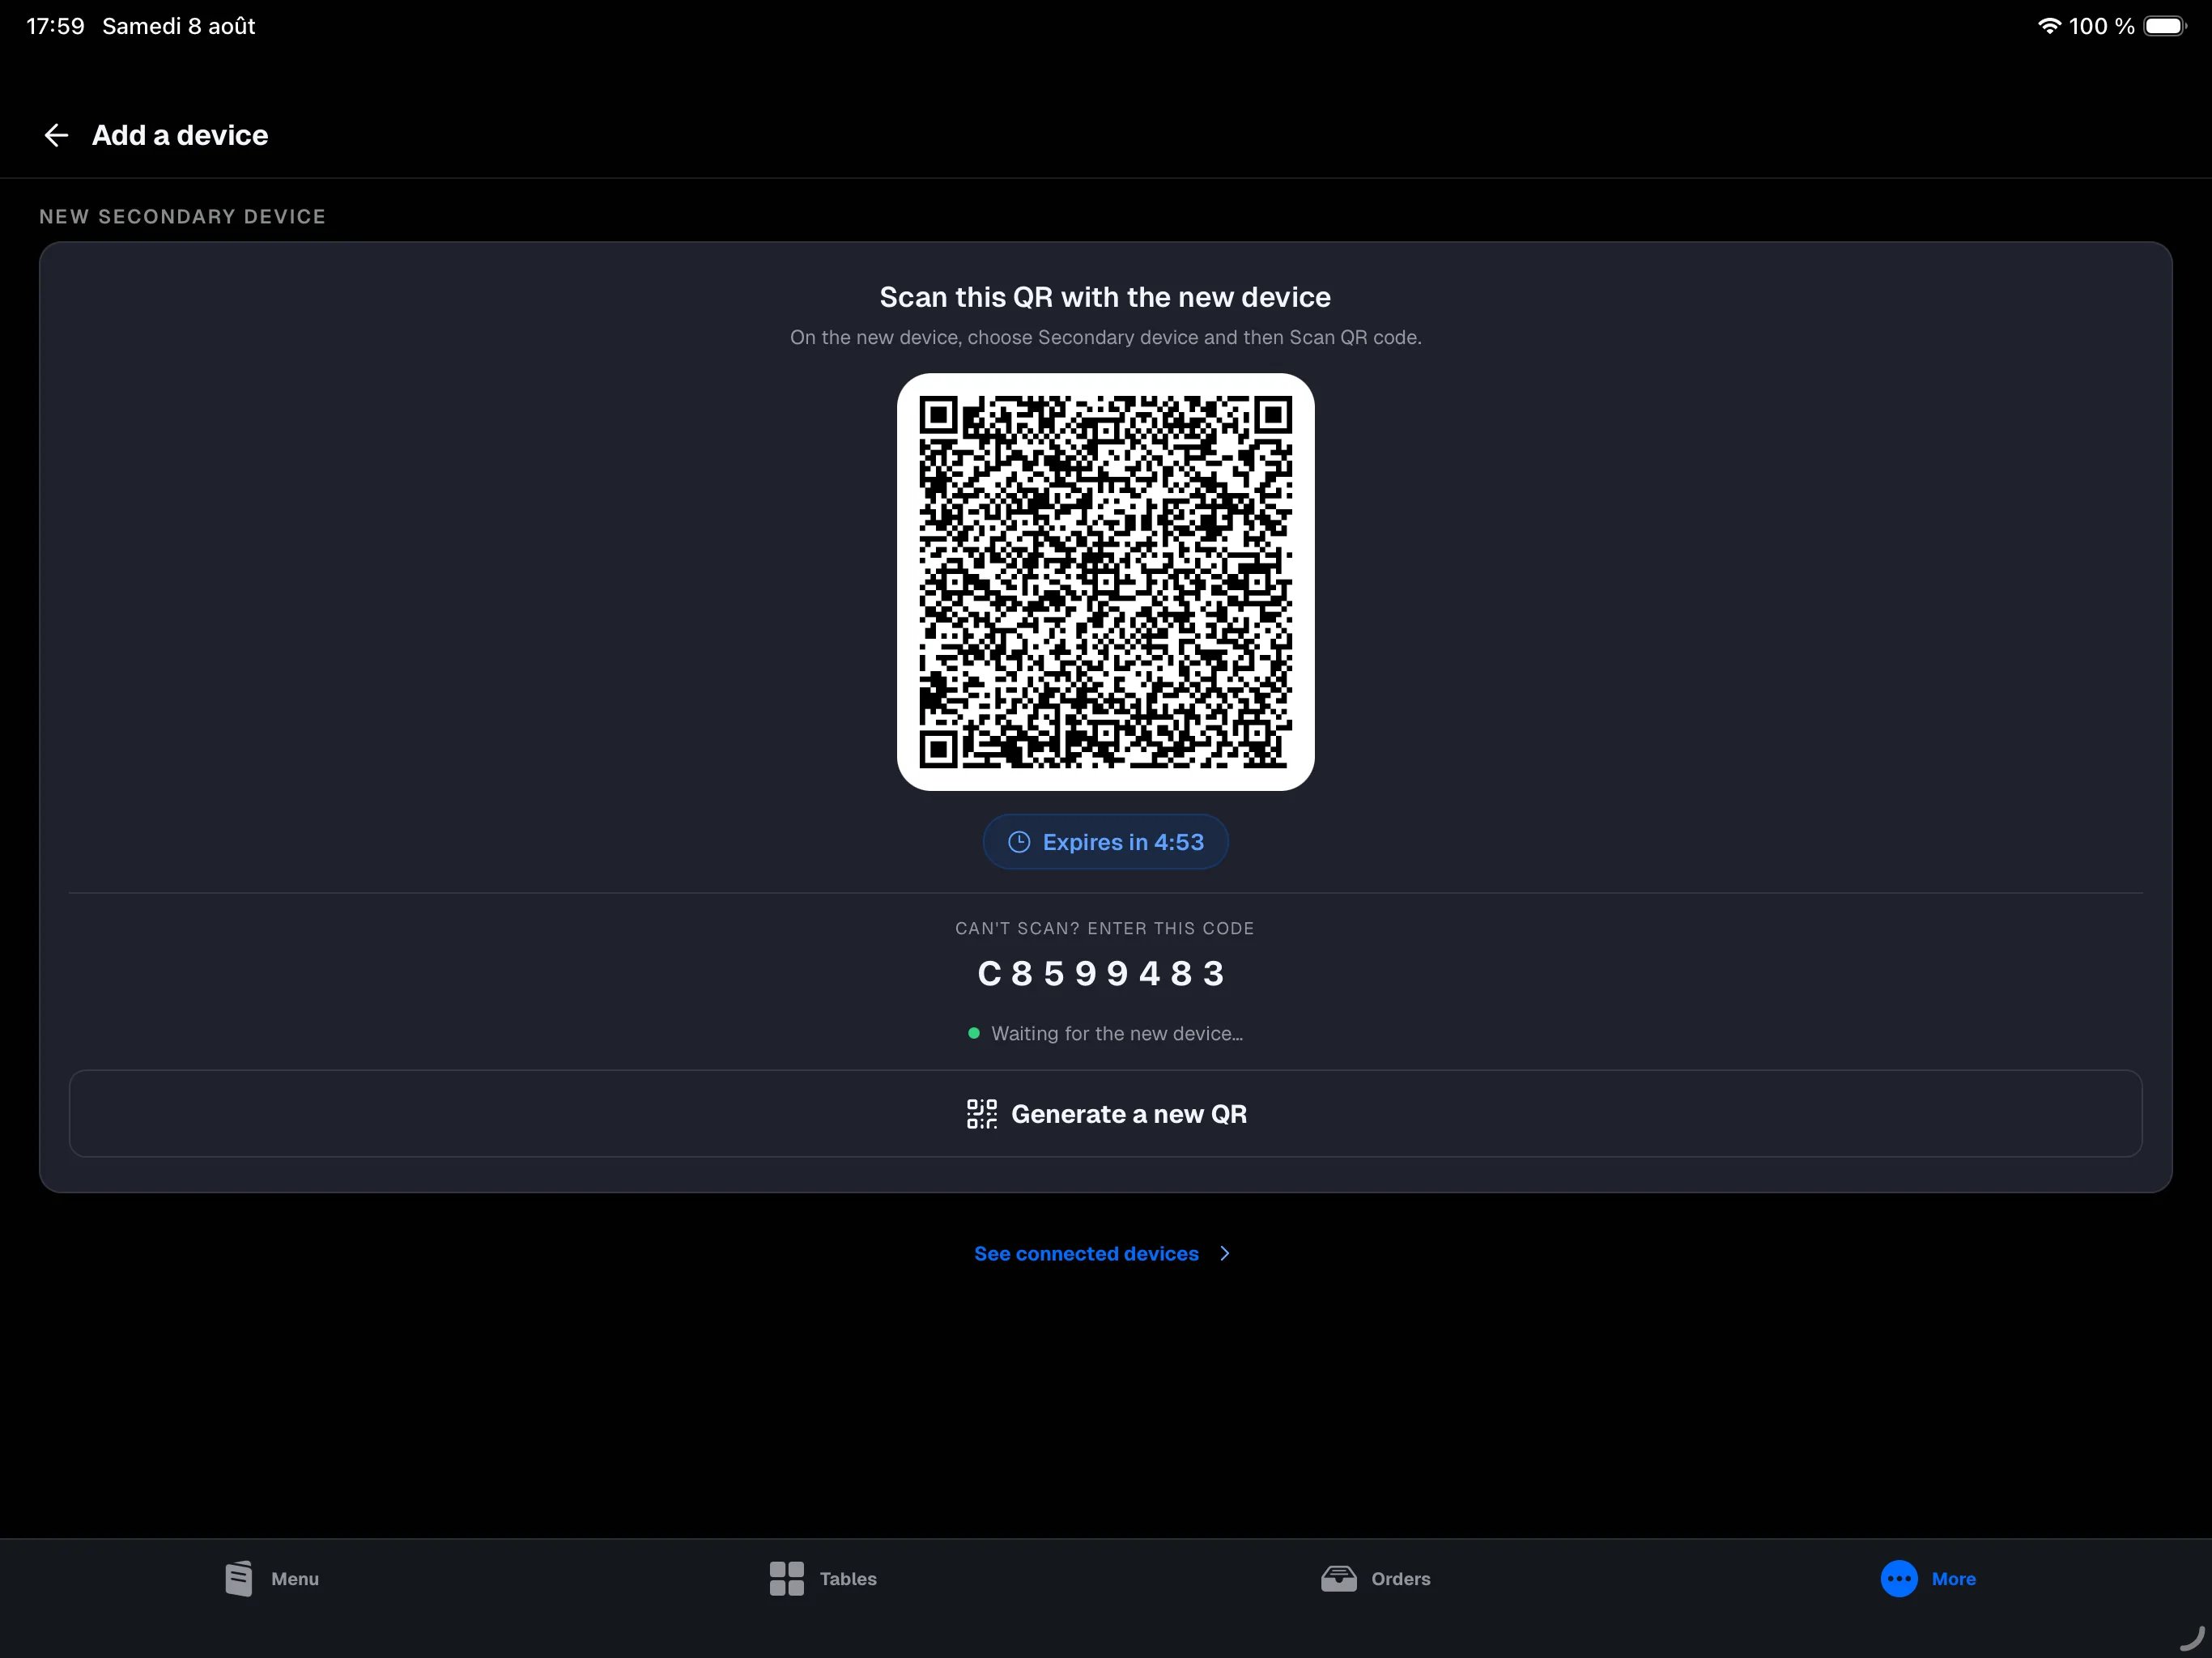
2
Choose the role on the new iPad
Open NowOS on the new iPad and tap Secondary device. This step is
automatic on iPhone: an iPhone is always a secondary device.
3
Scan the code
On the Pair this device screen, tap Scan QR code, then point the
camera at the QR shown on the main register. The QR tells the device which
register to join, so no network selection is required.
4
Name the device
Check the suggested name and edit it if needed — for example “Dining room
iPad” — then tap Pair this device. The device joins the main register,
loads the menu, and shows the staff sign-in screen. See Signing in to the
register.
Without scanning: use the code from the main register
A secondary-device code always comes from the main register. The token generated in the backoffice is only used to claim a main register; do not use it here.1
Show the code on the main register
Open More → Add a device and show a QR. Note the 8-character code
displayed below it.
2
Choose pairing without scanning
On the new device, tap I can’t scan the QR code, enter the 8-character
code, and select the main register discovered on Wi-Fi.
3
Confirm
Tap Continue, name the device, then tap Pair this device. If no
register is found, check the Wi-Fi before using the advanced network
options.
Check that everything is in place
-
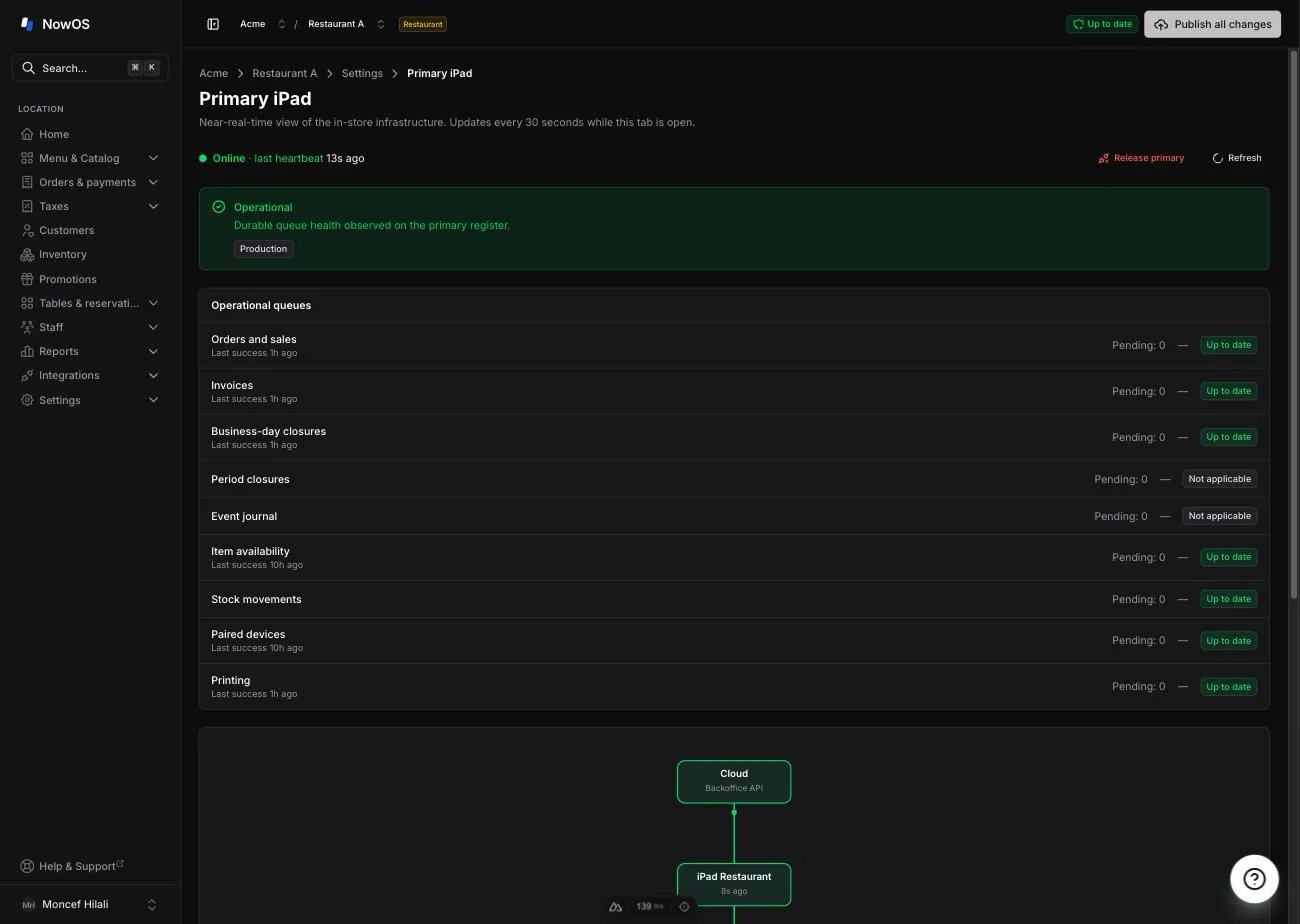
In the backoffice (Settings → Devices): the page shows the main
register’s status (Online, last sign of life) and the Paired devices
table — each device’s name, model, app version, pairing date, last
activity, and connection state.
- On the main register: More → Add a device lists paired devices under Paired devices.
- On a secondary device: More → This device shows the connection state (Primary reachable: Yes) and the device identity.
”Bringing the main register up”
Right after a claim — especially if you have just released the main iPad — the iPad may show Bringing the main register up instead of the sign-in screen. That is expected: the claim is already recorded (on the iPad and in the backoffice); only the register service still has to start. What to do:- Tap Retry.
- If the message comes back, fully close NowOS (swipe up from the bottom of the screen, then swipe the NowOS window away) and reopen the app.
- Check in the backoffice, under Settings → Devices, that the main register shows as Online.
Unpair a device
Everything happens in the backoffice, on Settings → Devices.- A secondary device: click Release on its row in the Paired devices table. The device signs out the next time it syncs; to serve again, it must be re-paired on-site.
- The main register: click Release primary.