

This section applies to restaurant mode only. In retail mode, Tables
does not appear in the backoffice menu. See the two modes.
Building your floor plan
Open Tables → Floor plan in the location’s menu to draw your rooms and tables. This is the plan your registers show in the Tables tab.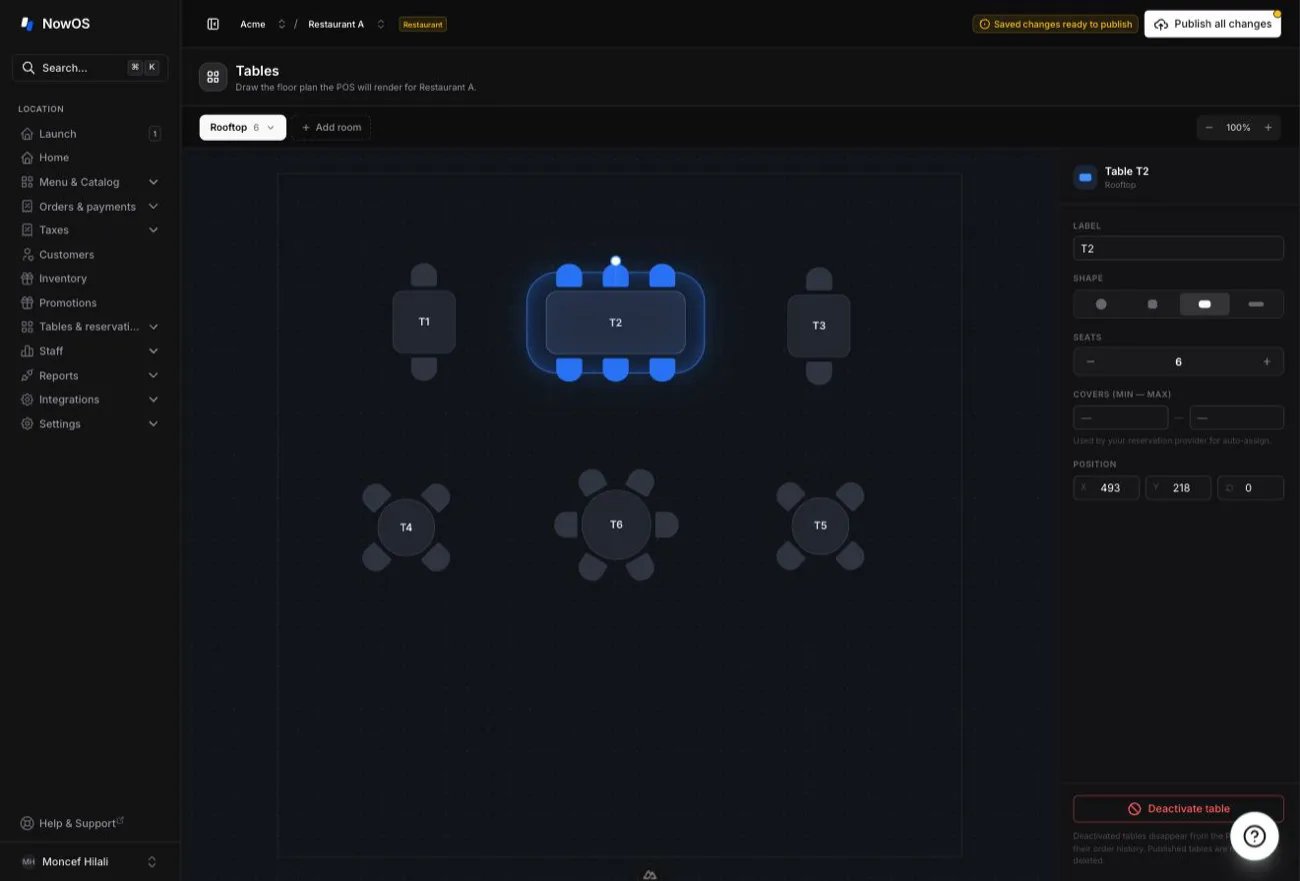
1
Add a room
A floor plan is made of one or more rooms. Use the room controls to create
rooms (for example Dining room, Terrace) and switch between them.
2
Place tables and decorations
Drag a shape from the palette at the bottom of the canvas onto the room:
square, round, rectangle or bar tables, plus walls and columns to map the
space. Drag a table to move it; use the rotation handle to turn it.
3
Set each table's details
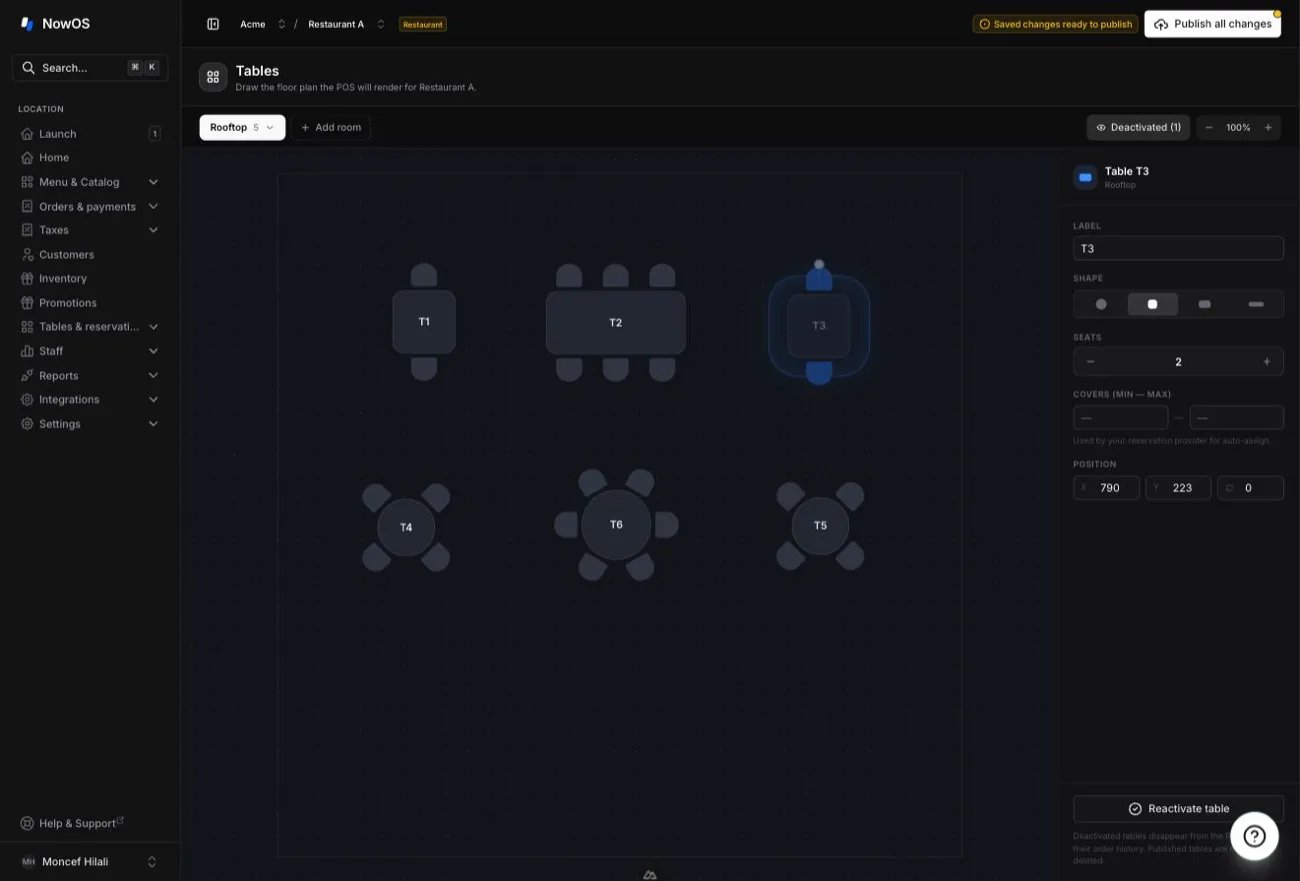
Select a table to open the inspector on the right: its label (what staff
see, e.g. T12), shape, number of seats, and position. The chairs
are drawn automatically from the shape and seat count.
4
Publish the plan
Your changes stay a draft until you tap Publish all changes in the
global header. Publishing includes the plan and the location’s other saved
changes. Confirm, then tap Refresh on the main register; until then, the
registers keep the previous plan.
Setting service timers
Open Tables → Service timers. This is where you set, per location, the two cues the register shows your team. Both are visual cues: they never block anything, and they never send anything on their own.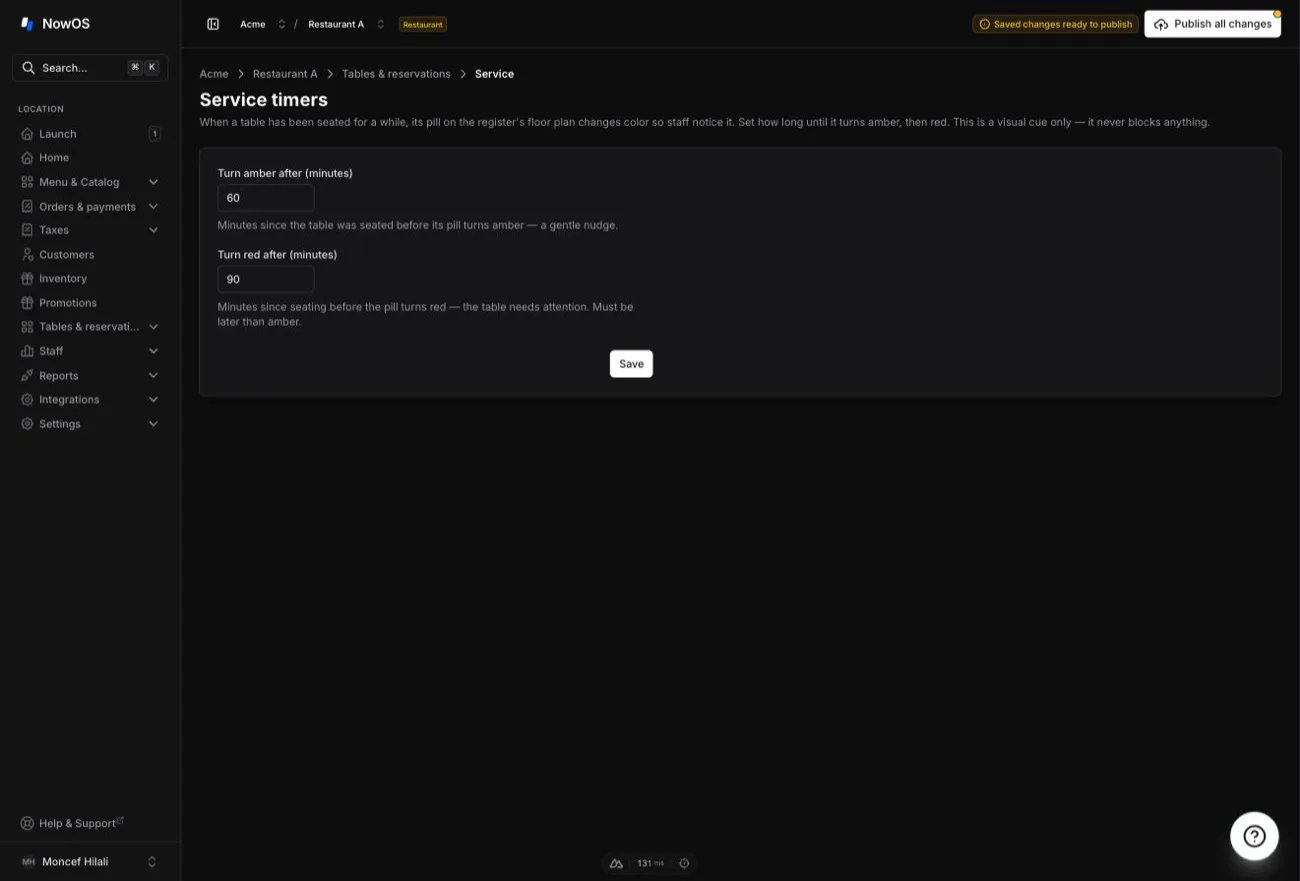
Seated tables
When a table has been seated for a while, its pill on the registers’ floor plan changes color to catch staff’s eye: azure at first, amber after a first delay, then red.1
Set the two delays
Turn amber after: minutes since the table was seated before its pill
turns amber. Turn red after: minutes before it turns red. Red must come
after amber.
By default, amber appears at 60 minutes and red at 90 minutes.
Course pacing
This second cue is about coursing only. When a check still has a course to send and the kitchen has had nothing for a while, the register flags it — on the check, on the floor plan and in the orders list. It’s a reminder: your team still decides when to send.1
Set the two delays
Flag amber after: minutes since the last send to the kitchen, with a
course still waiting. Flag red after: the same cue, in red. Red must
come after amber.
By default, amber appears at 12 minutes and red at 20 minutes. This
cue only shows at locations where coursing is on — see coursing on the
register.
1
Publish
Like the floor plan, the change stays a draft until you tap Publish all
changes. Registers apply the new delays after their next refresh.
Connecting a reservations provider
NowOS does not keep its own reservation book — it connects to a reservations provider (for example EatNow) that owns your bookings. Once connected, your bookings flow to the registers, where staff can seat them. Open Integrations → Reservations in the backoffice.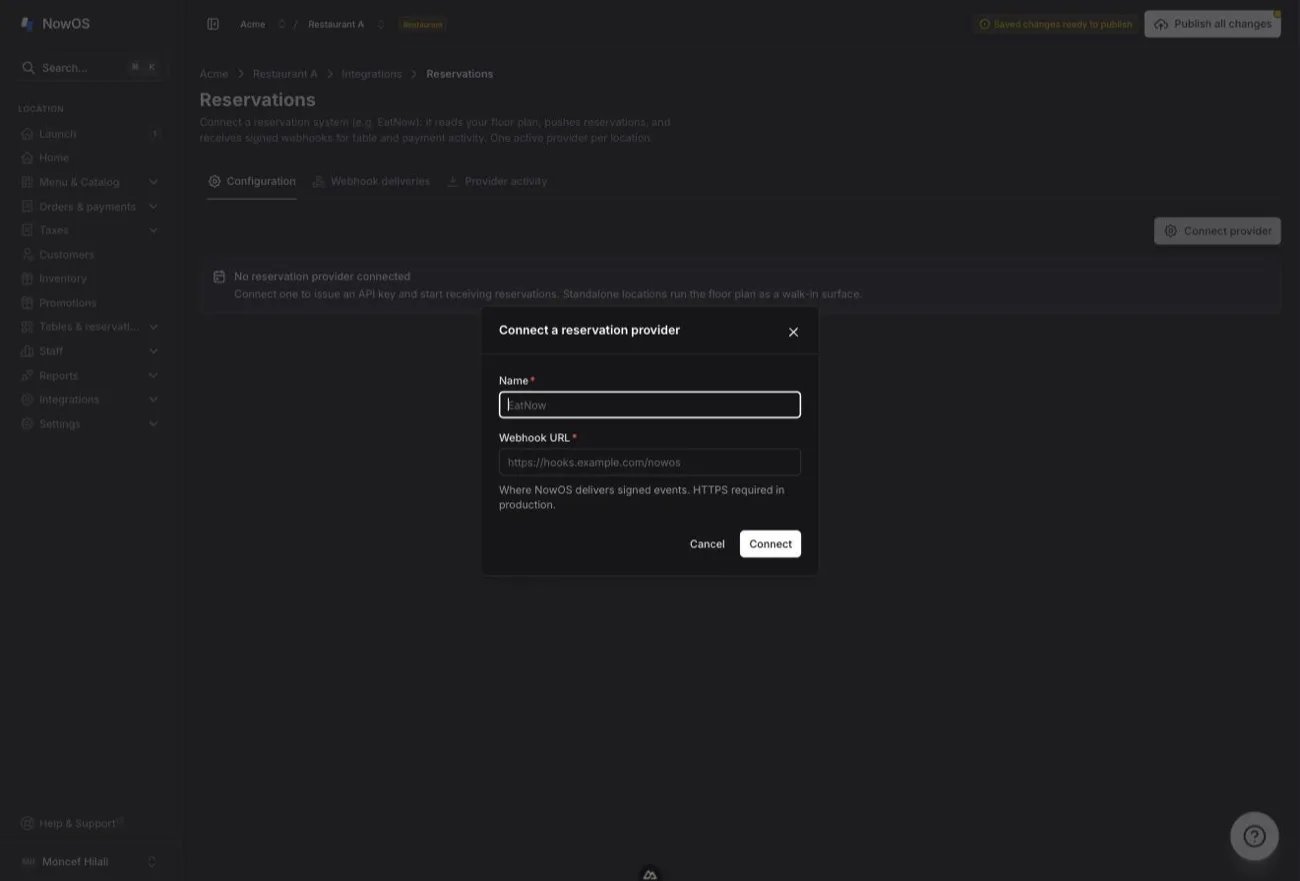
1
Connect the provider
Give the connection a name and confirm. NowOS shows an API key and a
webhook secret.
2
Copy the credentials
They are shown once. Copy them and paste them into your provider’s NowOS
integration settings, along with the webhook URL the page gives you. If you
lose them, rotate the key to get new ones.
3
Map your tables
Your provider matches its tables to the ones in your published floor plan.
Publish the plan first so the tables exist to map against.
Connecting a provider is a one-time setup, usually done with your provider’s
support. The Webhook deliveries and Provider activity tabs on this
page trace the events sent to the provider and the calls it has made — handy
for troubleshooting. Day to day, you and your staff only deal with the
bookings themselves — on the register and on the page below.