

This page applies to restaurant mode only. In retail mode, the Tables
tab does not appear on the register. See Modes.
The Tables tab
At the bottom of the register screen, between Menu and Orders, you will find the Tables tab. It shows the floor plan your backoffice published — the rooms and tables drawn there, exactly as drawn. See Tables & reservations in the backoffice to set the plan up.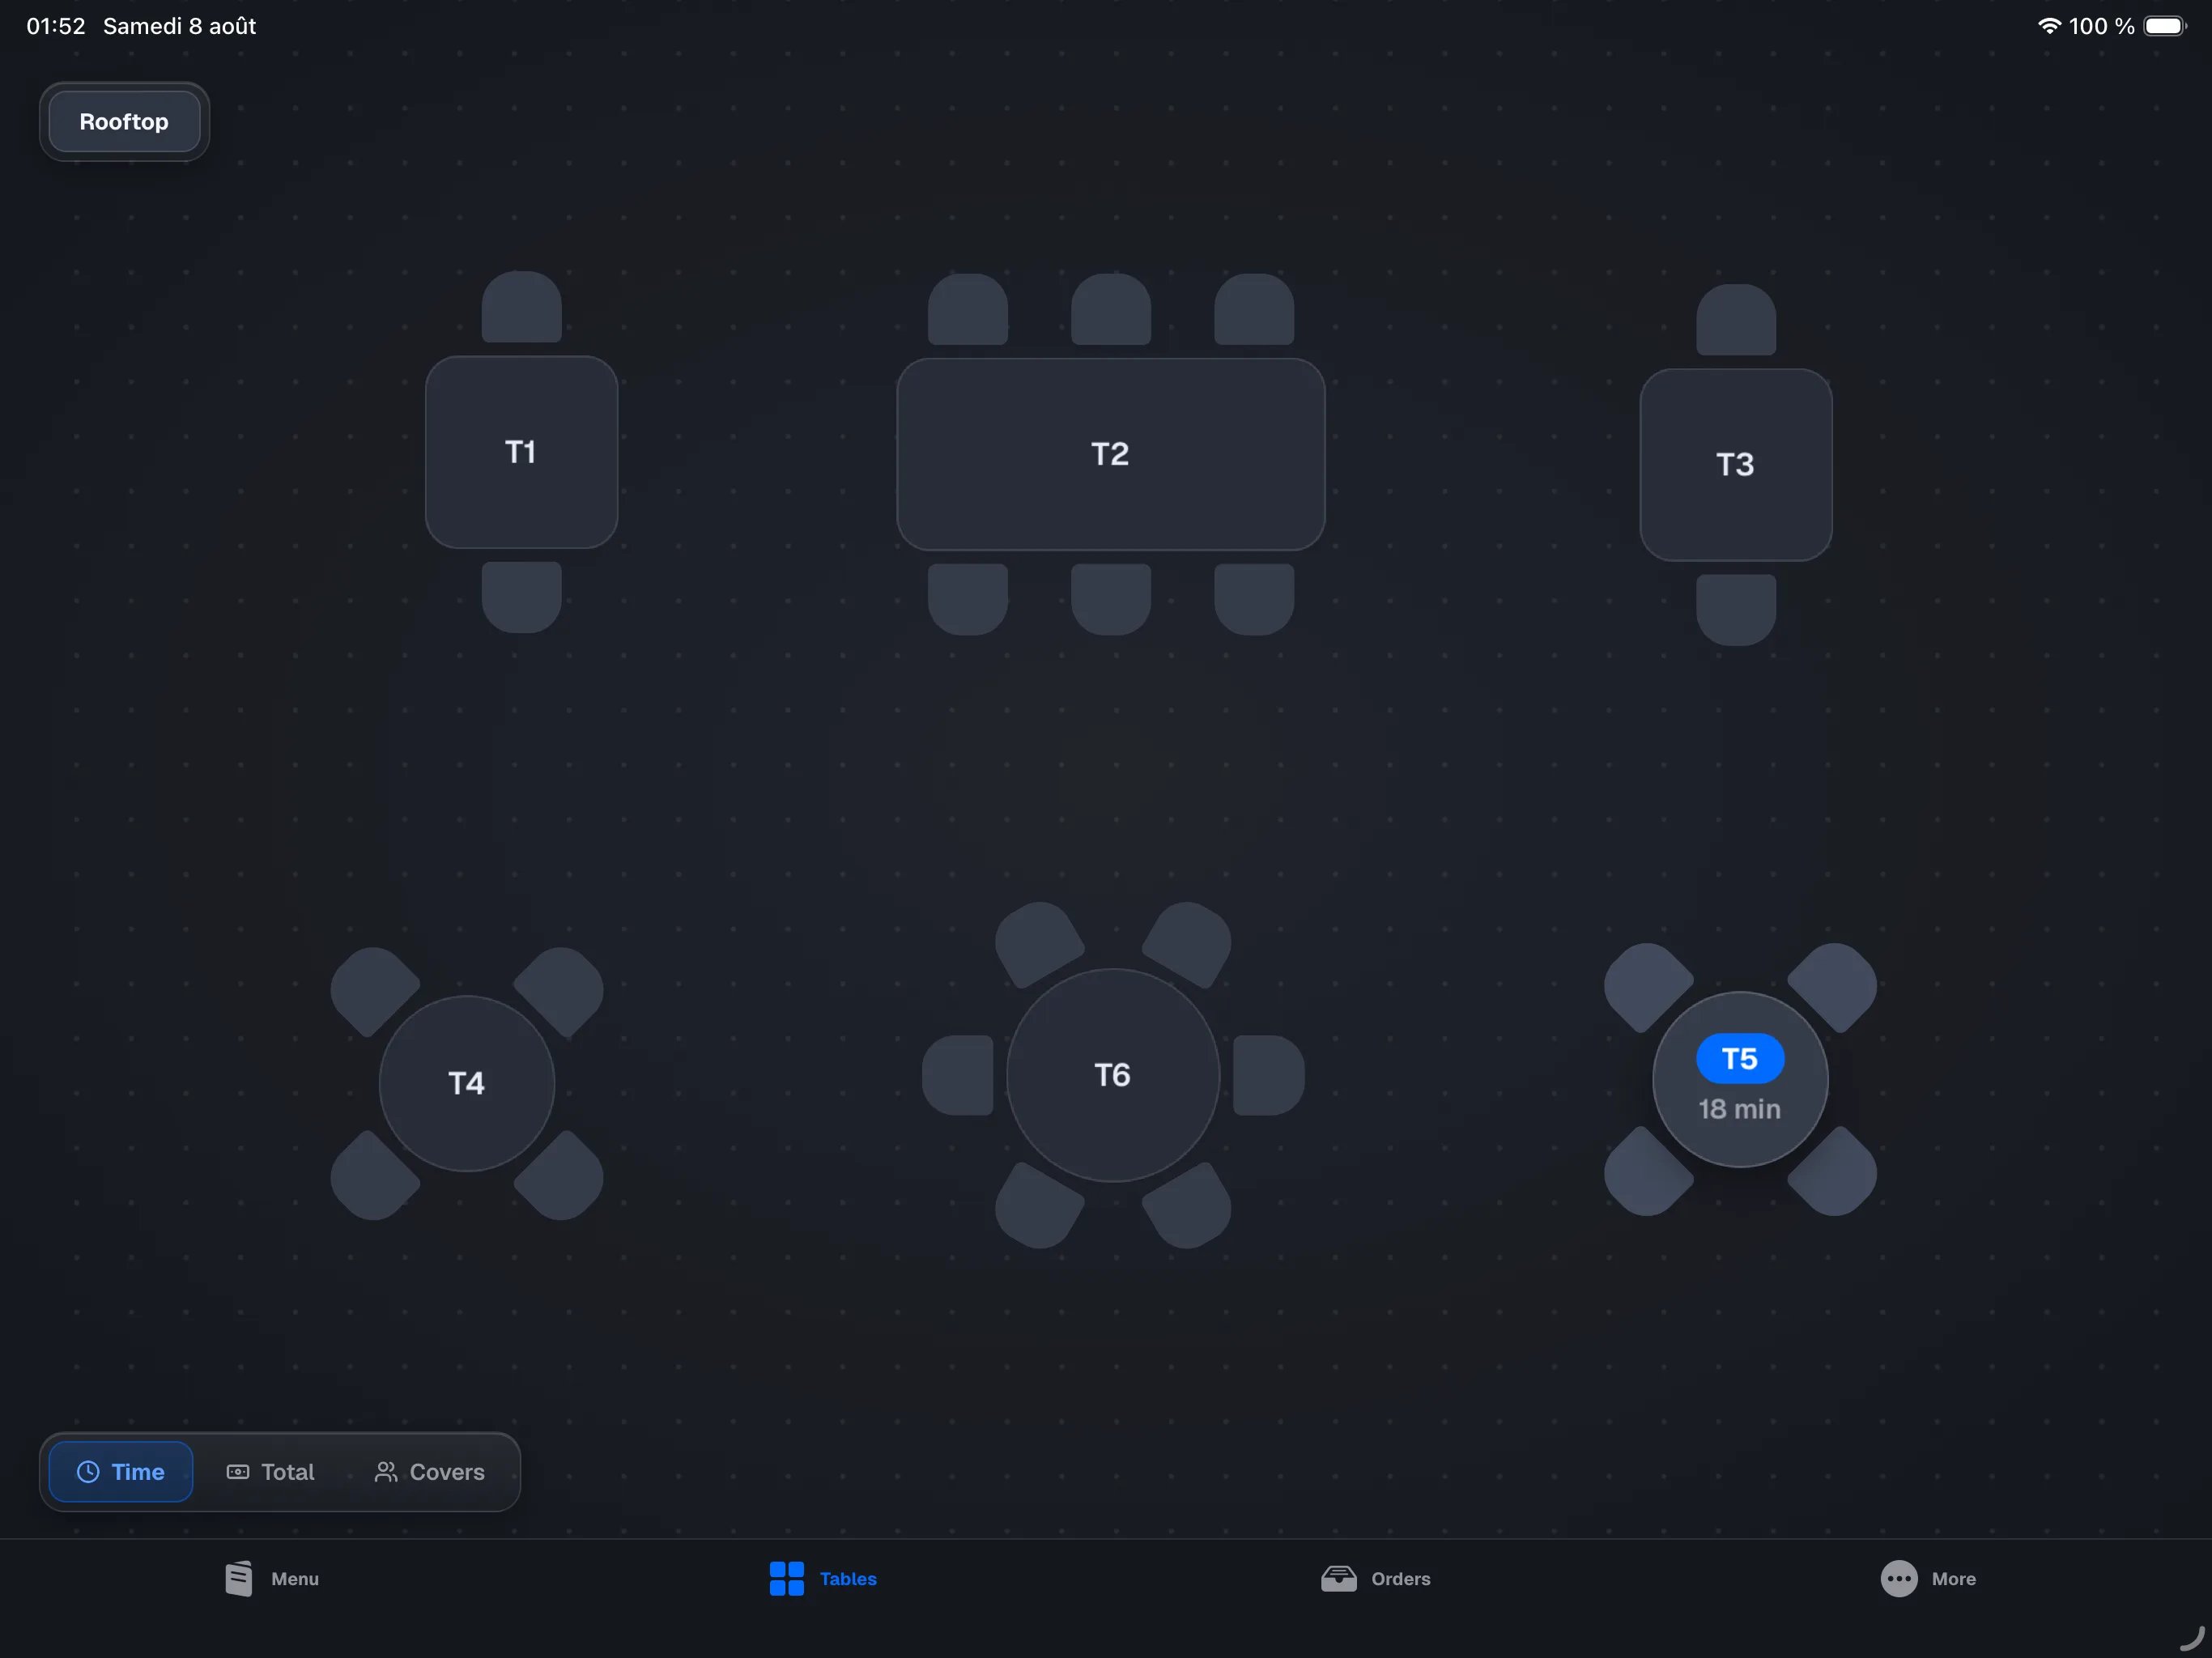
Reading the floor plan
Each table shows its status at a glance:- Free — a plain table with its label.
- Occupied — a lifted table with a colored pill. The pill counts how long the order has been open and changes color as time passes (azure, then amber, then red) so a slow table stands out. How long until amber and then red is set per location in the backoffice (see Tables and reservations).
- Reserved — a free table with an amber ring and the guest’s name underneath, when an upcoming reservation holds it (see below).
Seating a walk-in
1
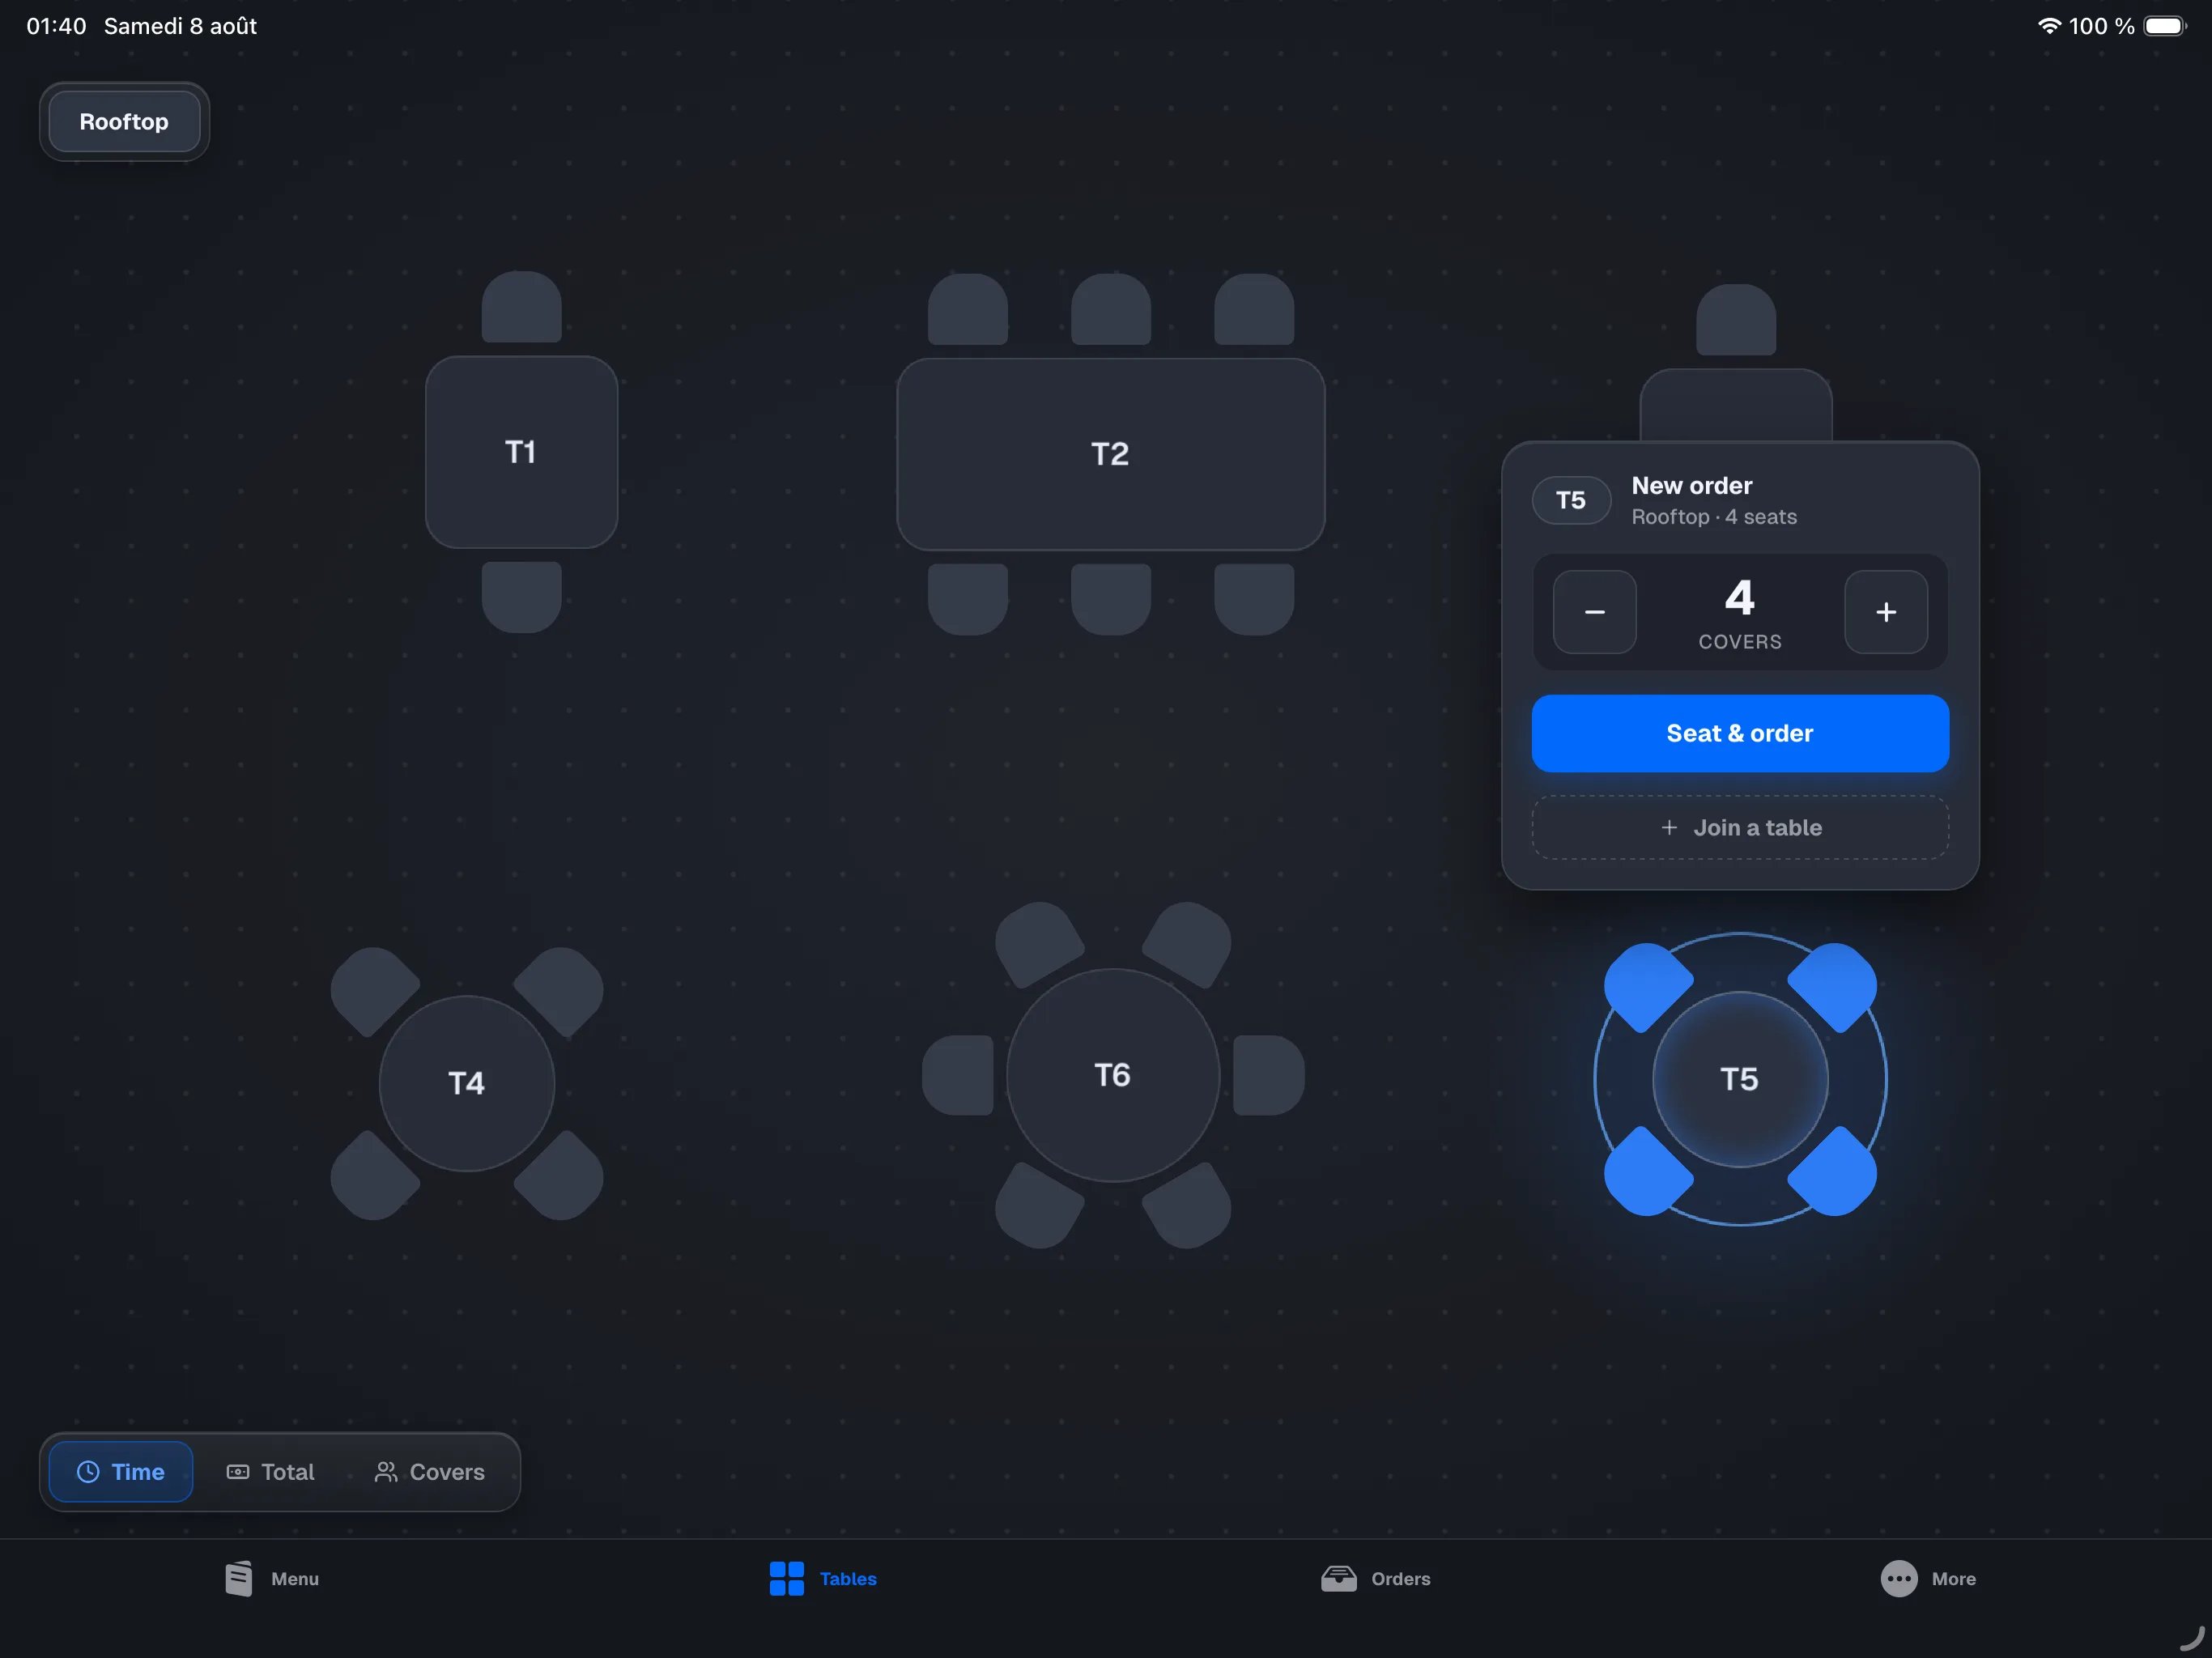
Tap a free table
A small card opens with a covers stepper, pre-filled with the table’s seat
count.
2
Set the covers
Tap + or − to match the party size.
3
Tap Seat & order
The order opens on that table and the register jumps to the Menu tab,
ready to take the order.
Moving or charging an open table
Tap an occupied table to open its card: it shows the order total, time and covers, with three actions.- Move — switch to selection mode and pick the new table(s); the order moves there.
- Charge — jump straight to the pay sheet for that order.
- Open order — open the order on the Menu tab to keep adding items.
Reservations
Reservations appear only when a reservations provider is connected to the
location (for example EatNow). Your bookings are managed in the provider; the
register mirrors them and lets you seat them. See Tables &
reservations to connect one.
The Reservations panel
When a provider is connected, a Reservations button appears at the top-right of the floor plan, with a count of the bookings still to seat. Tap it to slide out the reservations panel. The panel lists the service’s bookings grouped by time, with a Now line marking the current moment. Each row shows the time, the party name and covers, the status, and badges for anything worth knowing at a glance — VIP, a prepaid amount, a card imprint, or allergies. A booking that is past its time and not yet seated is flagged in red (for example 12 min late). By default the panel shows the open business day’s service. The ‹ › arrows next to the title step to the previous or next day. Tap a row to highlight its tables on the plan.Searching for a booking
Tap the search icon at the top of the panel to look a booking up by guest name or phone number. Search spans every loaded day, not just the day on screen, and groups the results by day (Today, Tomorrow, then the date) with each booking’s time. Tap Cancel to return to the day’s list.Reserved tables on the plan
A confirmed booking that holds tables shows them with an amber ring and the guest’s name under the table. If you try to seat a walk-in on a reserved table, the covers card warns you who it is held for — you can still seat them if you choose.Opening a reservation
Tap a row to open its sheet in the panel — and highlight its tables on the plan. The sheet gathers everything you weigh before acting: the status, any lateness, any prepayment, the details (table, covers, phone, occasion, allergies, internal note) and the actions. The status (confirmed, arrived, seated…) is kept up to date by the provider and by what you do on the floor.The internal note follows the guest all the way to the kitchen. The note
written on the booking in your provider becomes the order note as soon as
you seat the table: it shows under Actions → Note and prints at the top of
every kitchen ticket. Edit it at the register and the change travels back to
the provider. Last edit wins, either way round.
Marking a guest arrived
The guest walks in, but their table isn’t ready — or they’d rather have a drink at the bar first. Tap Mark arrived at the foot of the sheet: the provider is told, the panel row is badged Arrived, and no table is taken. Arriving and being seated are two different things. Marking an arrival opens no order — you seat the guest when their table is ready.Seating a reservation
When the booking already holds tables and they are free, seating is a single gesture.1
Open the sheet
Tap the booking in the panel.
2
Adjust the covers if needed
The Covers at table row steps with − and +. Four booked, six
turned up: fix it here, not afterwards.
3
Tap Seat on…
The button names the tables, and the line under it states what happens:
Opens an order for 4 covers on B. The order opens right away, linked to
the booking.
Changing a booking’s table
Seating means sitting the guest down now and opening their check. Re-planning the room before service is something else: you decide where each booking will go, without opening anything. Open the sheet and tap Change table (or Assign a table if the booking has none yet). The plan switches to selection mode with the current tables already ticked, you tap the ones you want, then Assign here. No check is created. The change travels to your provider too. It is the same change as if you had made it in your booking tool: the two stay in agreement about the table. If another booking already expects that table at an overlapping time, the register says so and lets you decide — two services on one table happens every night. Once the guest is seated the button disappears: it is then the order that moves, from the Actions tab (see Order actions).When the register warns you
The sheet flags what is worth a look before seating:- The table is taken — the banner names the order holding it and for how long. The button becomes Seat on another table.
- The booking isn’t from the current service — you can still seat it, but the button drops its recommended colour and says it will open an order today for a booking from another day.
- The booking is still far off — the due time and the wait are spelled out. Seating a very early guest stays possible.
Fixing a seat
Seated the wrong party? Open that booking’s sheet and tap This is the wrong booking under Open order. The order goes back to being a plain walk-in — it keeps its tables, covers and contents — and the provider expects that guest again.Marking no-show or cancelled
Below the seating button, the sheet offers two gestures:- No-show — the guest never came.
- Cancel booking — the booking is cancelled.