

What you need to refund
- Be on the main register. On a secondary device, the Refund row shows Main register only.
- Have internet. A refund is the only register operation that requires an internet connection: without one, the row shows Unavailable offline. Try again once the connection is back.
- Be signed in as a manager. The Refund row is visible to the whole team but locked for non-managers: it then carries the Manager PIN badge. To use it, a manager signs in from the lock screen with their PIN.
Opening the refund screen
1
Find the paid order
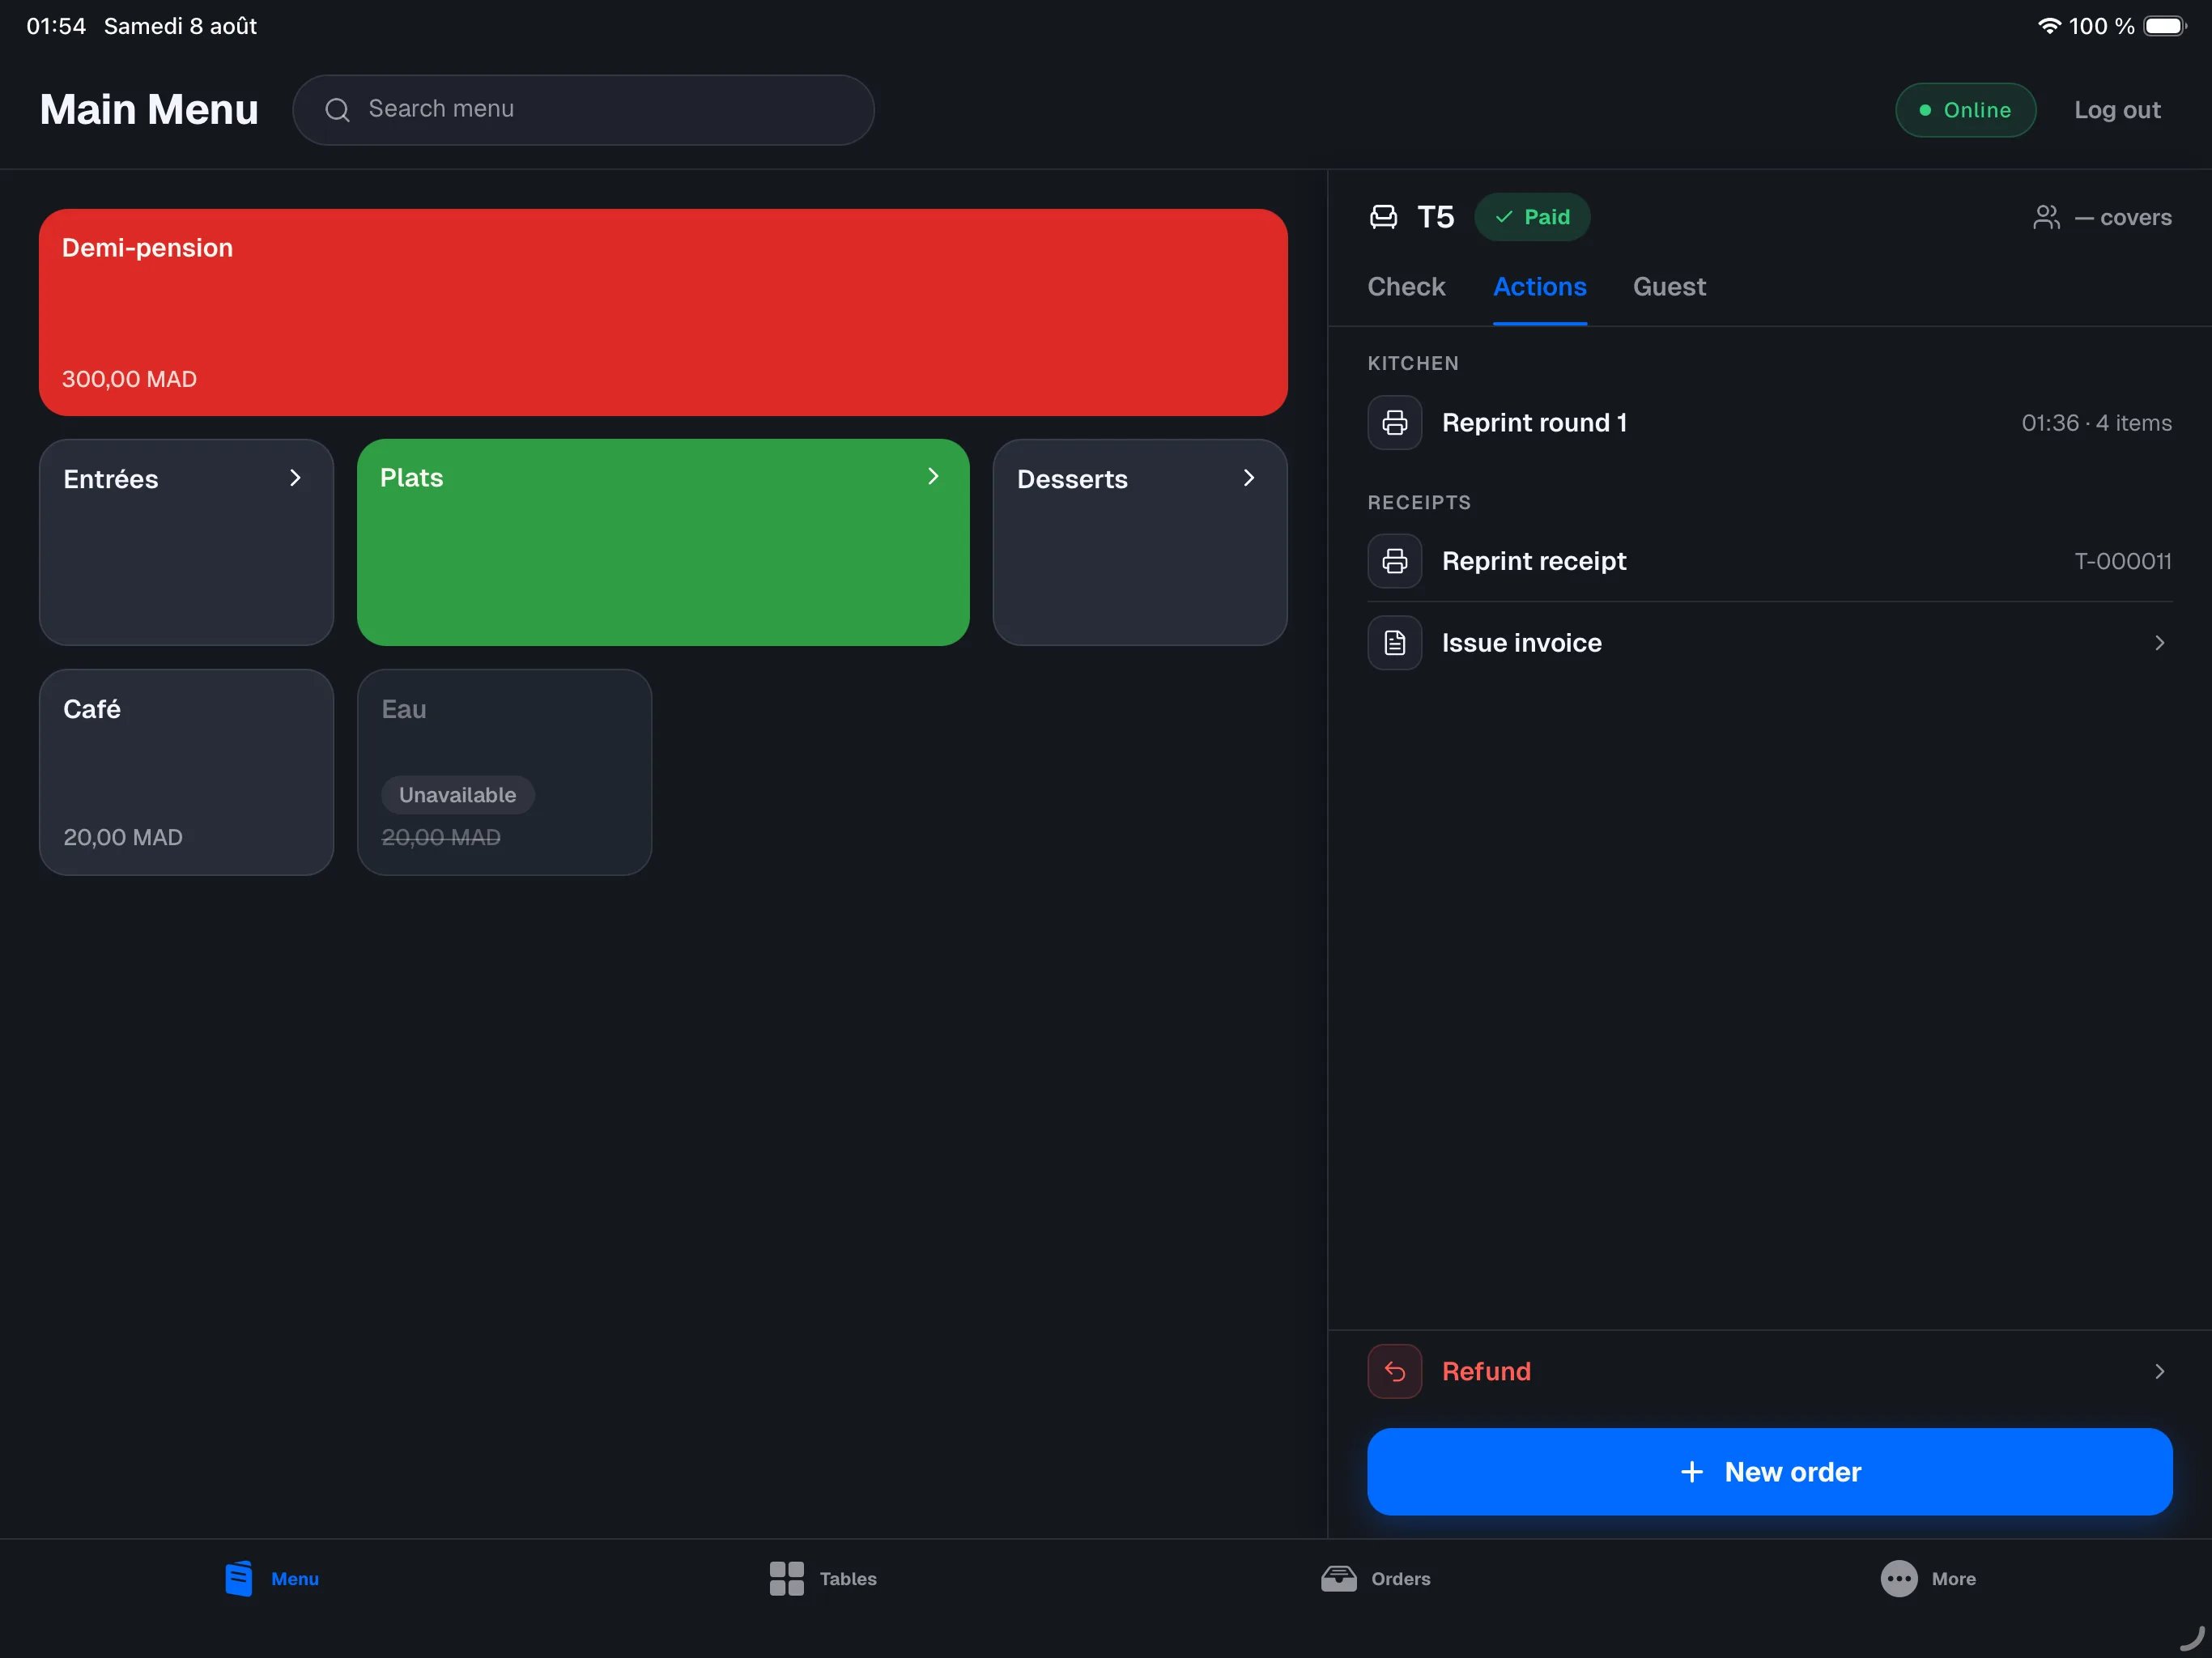
Open the orders list and tap the order in question.
2
Open the Actions tab
At the bottom of the panel, tap the red Refund row. If the order had several checks, one row shows per receipt (Refund #12, Refund #13…) — pick the sale to refund.
3
The Refund screen opens
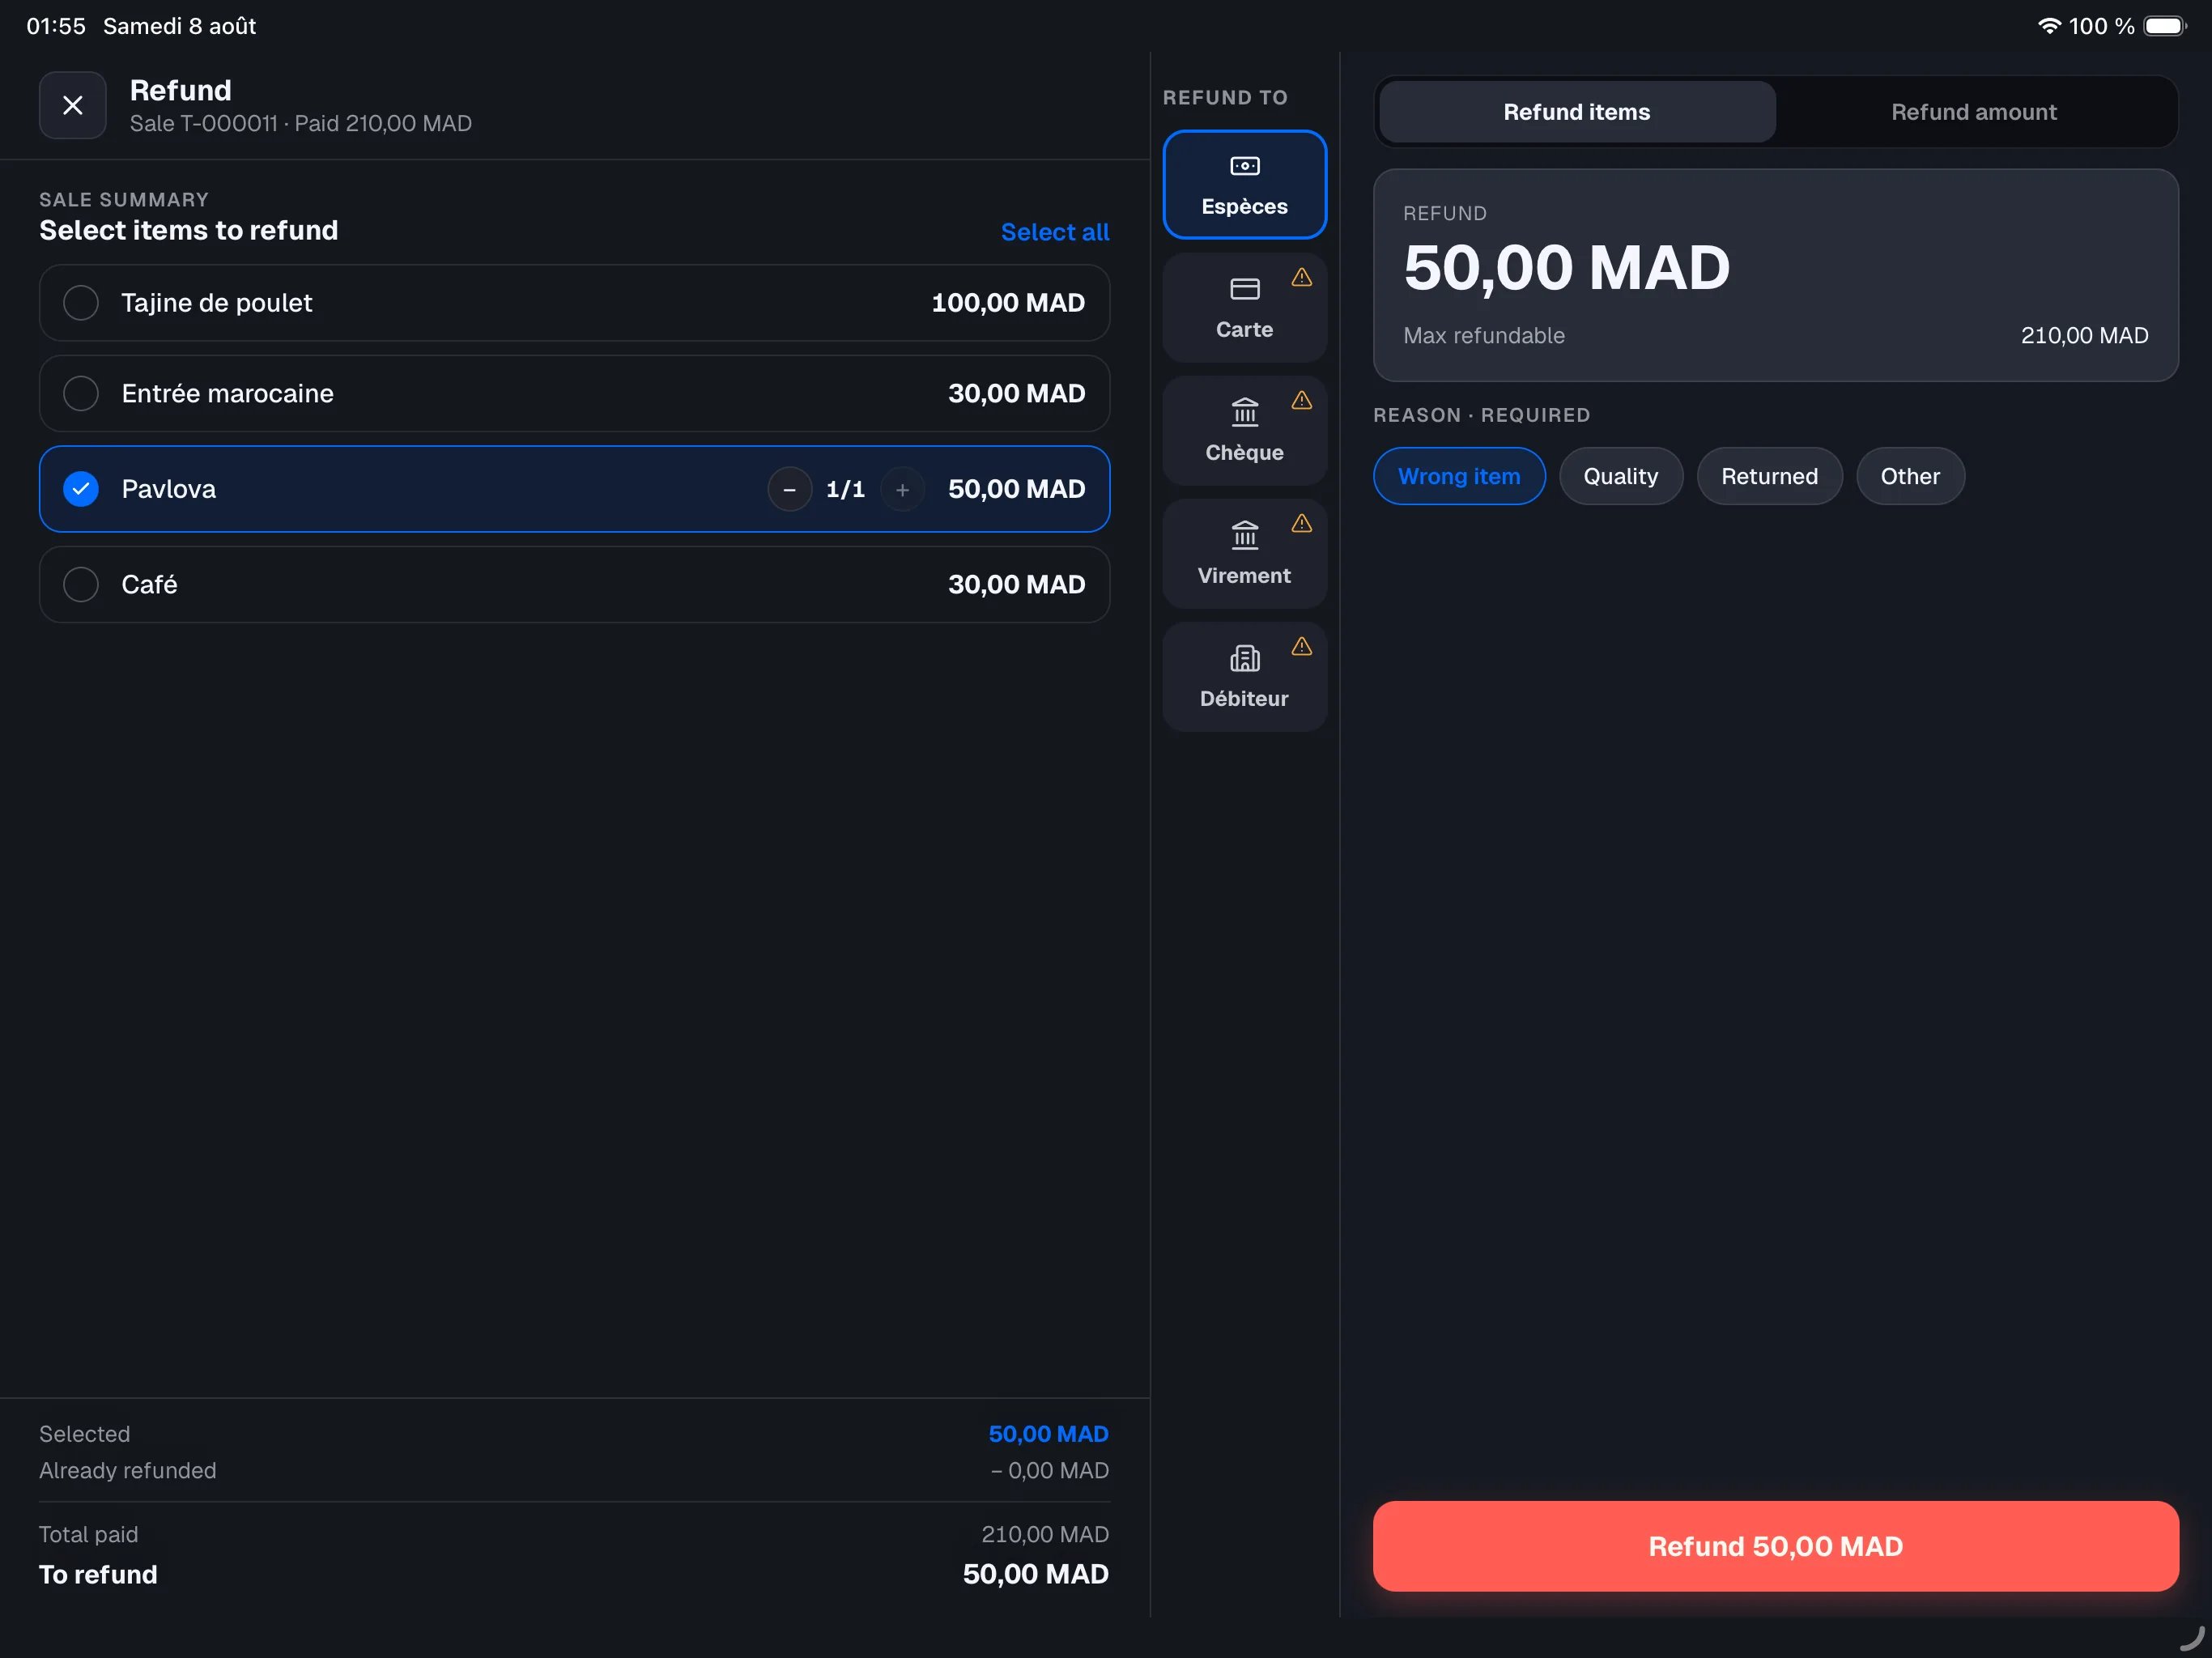
On the left, the sale’s items with the summary (Total paid, Already refunded, To refund). On the right, the refund options.
Refunding items
This is the default mode (Refund items): you point at the items the customer is returning.1
Select the items
Tap each line to refund — it gets checked with its full remaining quantity. Adjust the quantity with the − and + buttons (the counter shows, for example, 2/3). Select all selects everything at once.
2
Check the amount
The right panel shows the computed amount under Refund, with the Max refundable cap right below.
Refunding a free amount
For a goodwill gesture or a refund that doesn’t map to specific items, tap Refund amount at the top of the right panel. Enter the amount on the keypad, or tap a quick chip (All for everything remaining, or a common amount). Items are not marked as refunded — only the money is returned.Whatever the mode, the total refunded on a sale can never exceed what the customer paid. The Max refundable cap accounts for every refund already issued; an amount above it turns red and cannot be submitted. If the sale carried a discount, the cap is the net-of-discount amount: an 800 sale brought down to 720 by a discount refunds up to 720, not 800.
Choosing how the money goes back
Under REFUND TO, the payment-method column — the same one as at checkout — lists your configured methods. The original payment method is pre-selected, but you can change it — for example, refund a card payment in cash. If you pick a method that was not used to pay this sale, the register asks for an override reason (mandatory): why the money goes back a different way. That reason is written on the credit note.NowOS is not connected to your card terminal: for a Card refund, process the refund on your terminal as usual, then confirm in the register. NowOS records the amount.
Return items to stock
If the sale contains products whose stock is tracked (retail mode), the refund screen shows the Return items to stock option, on by default. Leave it on when the customer brings the goods back — each tracked item is then credited back to stock. Turn it off when the goods are damaged, lost, or kept. The option doesn’t appear for a free-amount refund, which never restocks.Giving the reason — mandatory
Under REASON · REQUIRED, tap a reason: Wrong item, Quality, Returned or Other. No reason is preselected, and the refund button stays unavailable until you pick one. If you pick Other, a text field appears and must be filled in. The reason shows on the refund ticket and feeds your reports — it’s what lets you track why money leaves the drawer.Submitting
Tap the red Refund button followed by the amount. The register sends the refund, which is checked and numbered before being confirmed. If the refund is rejected (a Refund rejected message with the explanation), fix the selection — the most common case is an amount above Max refundable.After the refund
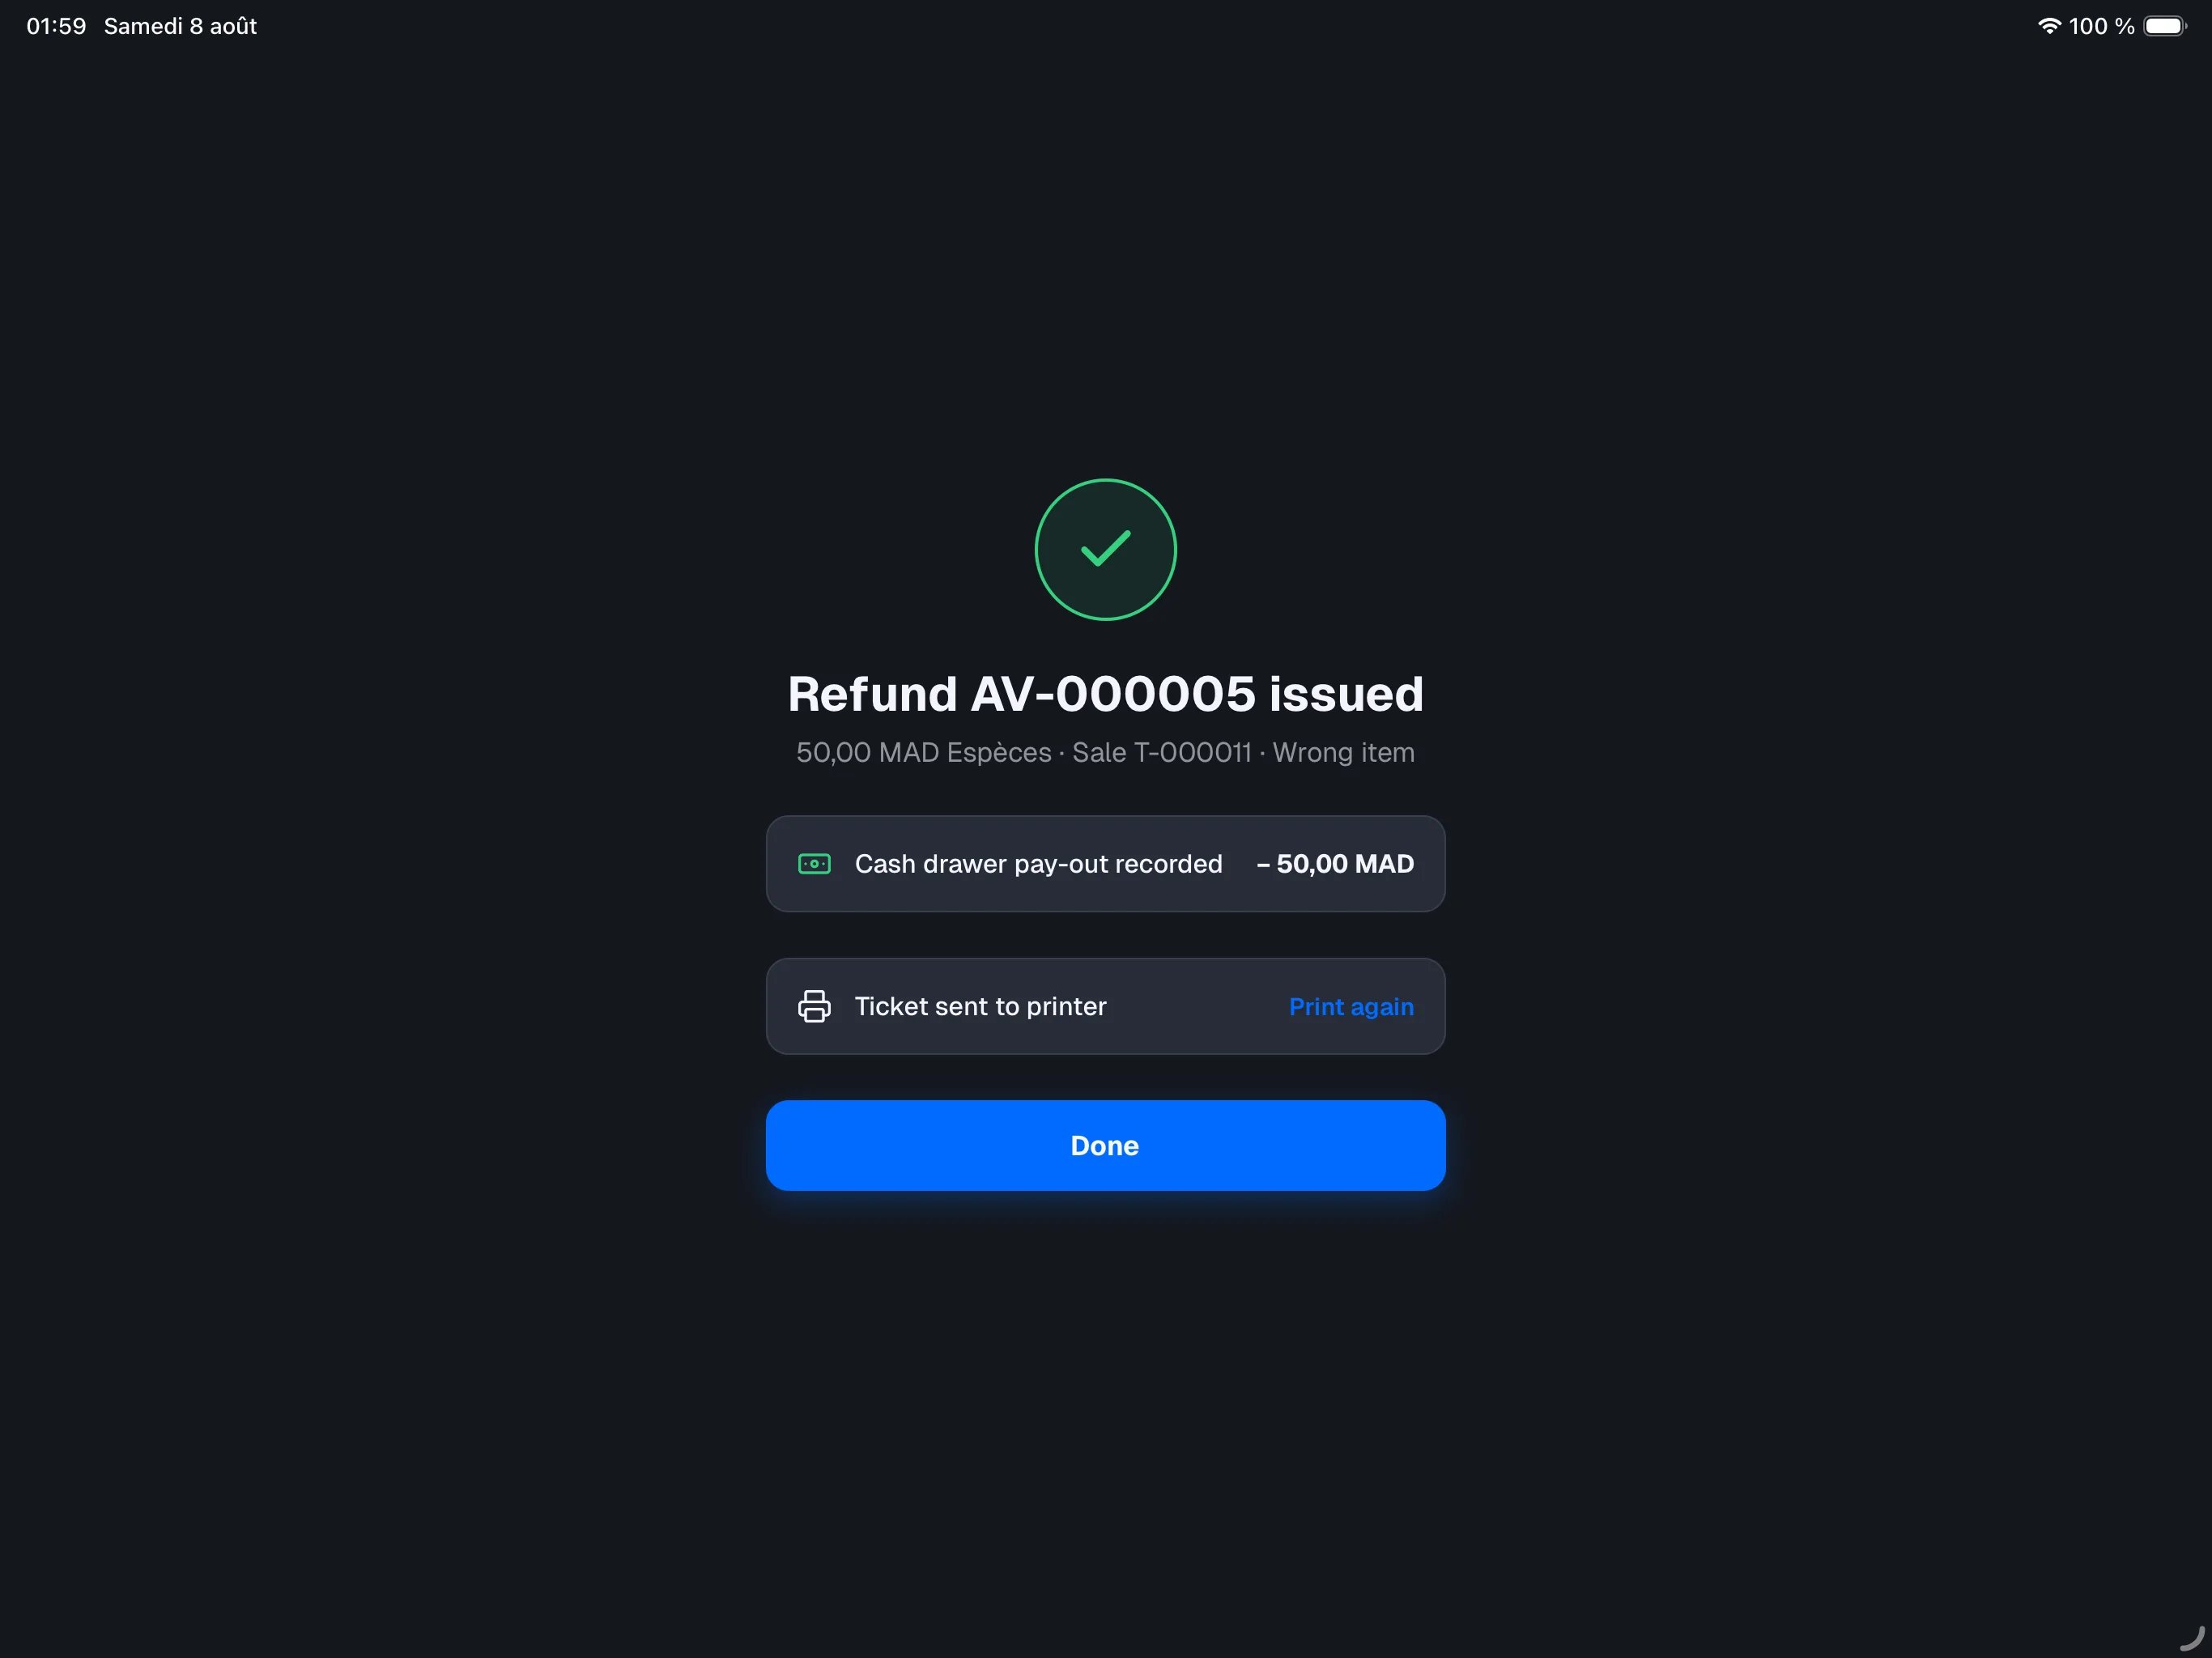
The confirmation screen shows Refund #N issued, with the amount, the refund method and the reason. Depending on the case, it also confirms:- Cash drawer pay-out recorded — for a cash refund, the register automatically records the matching pay-out (labelled Refund #N) on the current business day. Your evening blind count stays correct without writing anything down. If no business day is open, the register asks you to record the pay-out manually.
- Refund ticket sent to printer — the refund ticket prints automatically for the customer. Print again prints another one. If the message No receipt printer configured for this device. shows, see Receipts and printing.
Where refunds show afterwards
On the register (main register):- the paid order shows a REFUNDS block under its totals, with each refund and the remaining Net — the original items and totals never change;
- in the orders list, the order keeps its Paid status with a ↩ marker;
- for a cash refund, the pay-out appears in the day’s cash movements, visible at close of day.
- each sale shows its refund history;
- Reports → Refunds sums up refunds over the period, with gross and net revenue and the breakdown by reason and method — see Reports.
The backoffice can also issue refunds — see Orders, sales, and refunds. Careful: a cash refund issued from the backoffice does not record the drawer pay-out automatically — remember to record it on the register so the evening count stays correct.