

To give an item away, apply a 100% discount. For breakage or loss, that is not a discount — use a stock adjustment instead. In a restaurant, the discount lives in the order’s Actions tab — see Managing an order.
Apply a discount
1
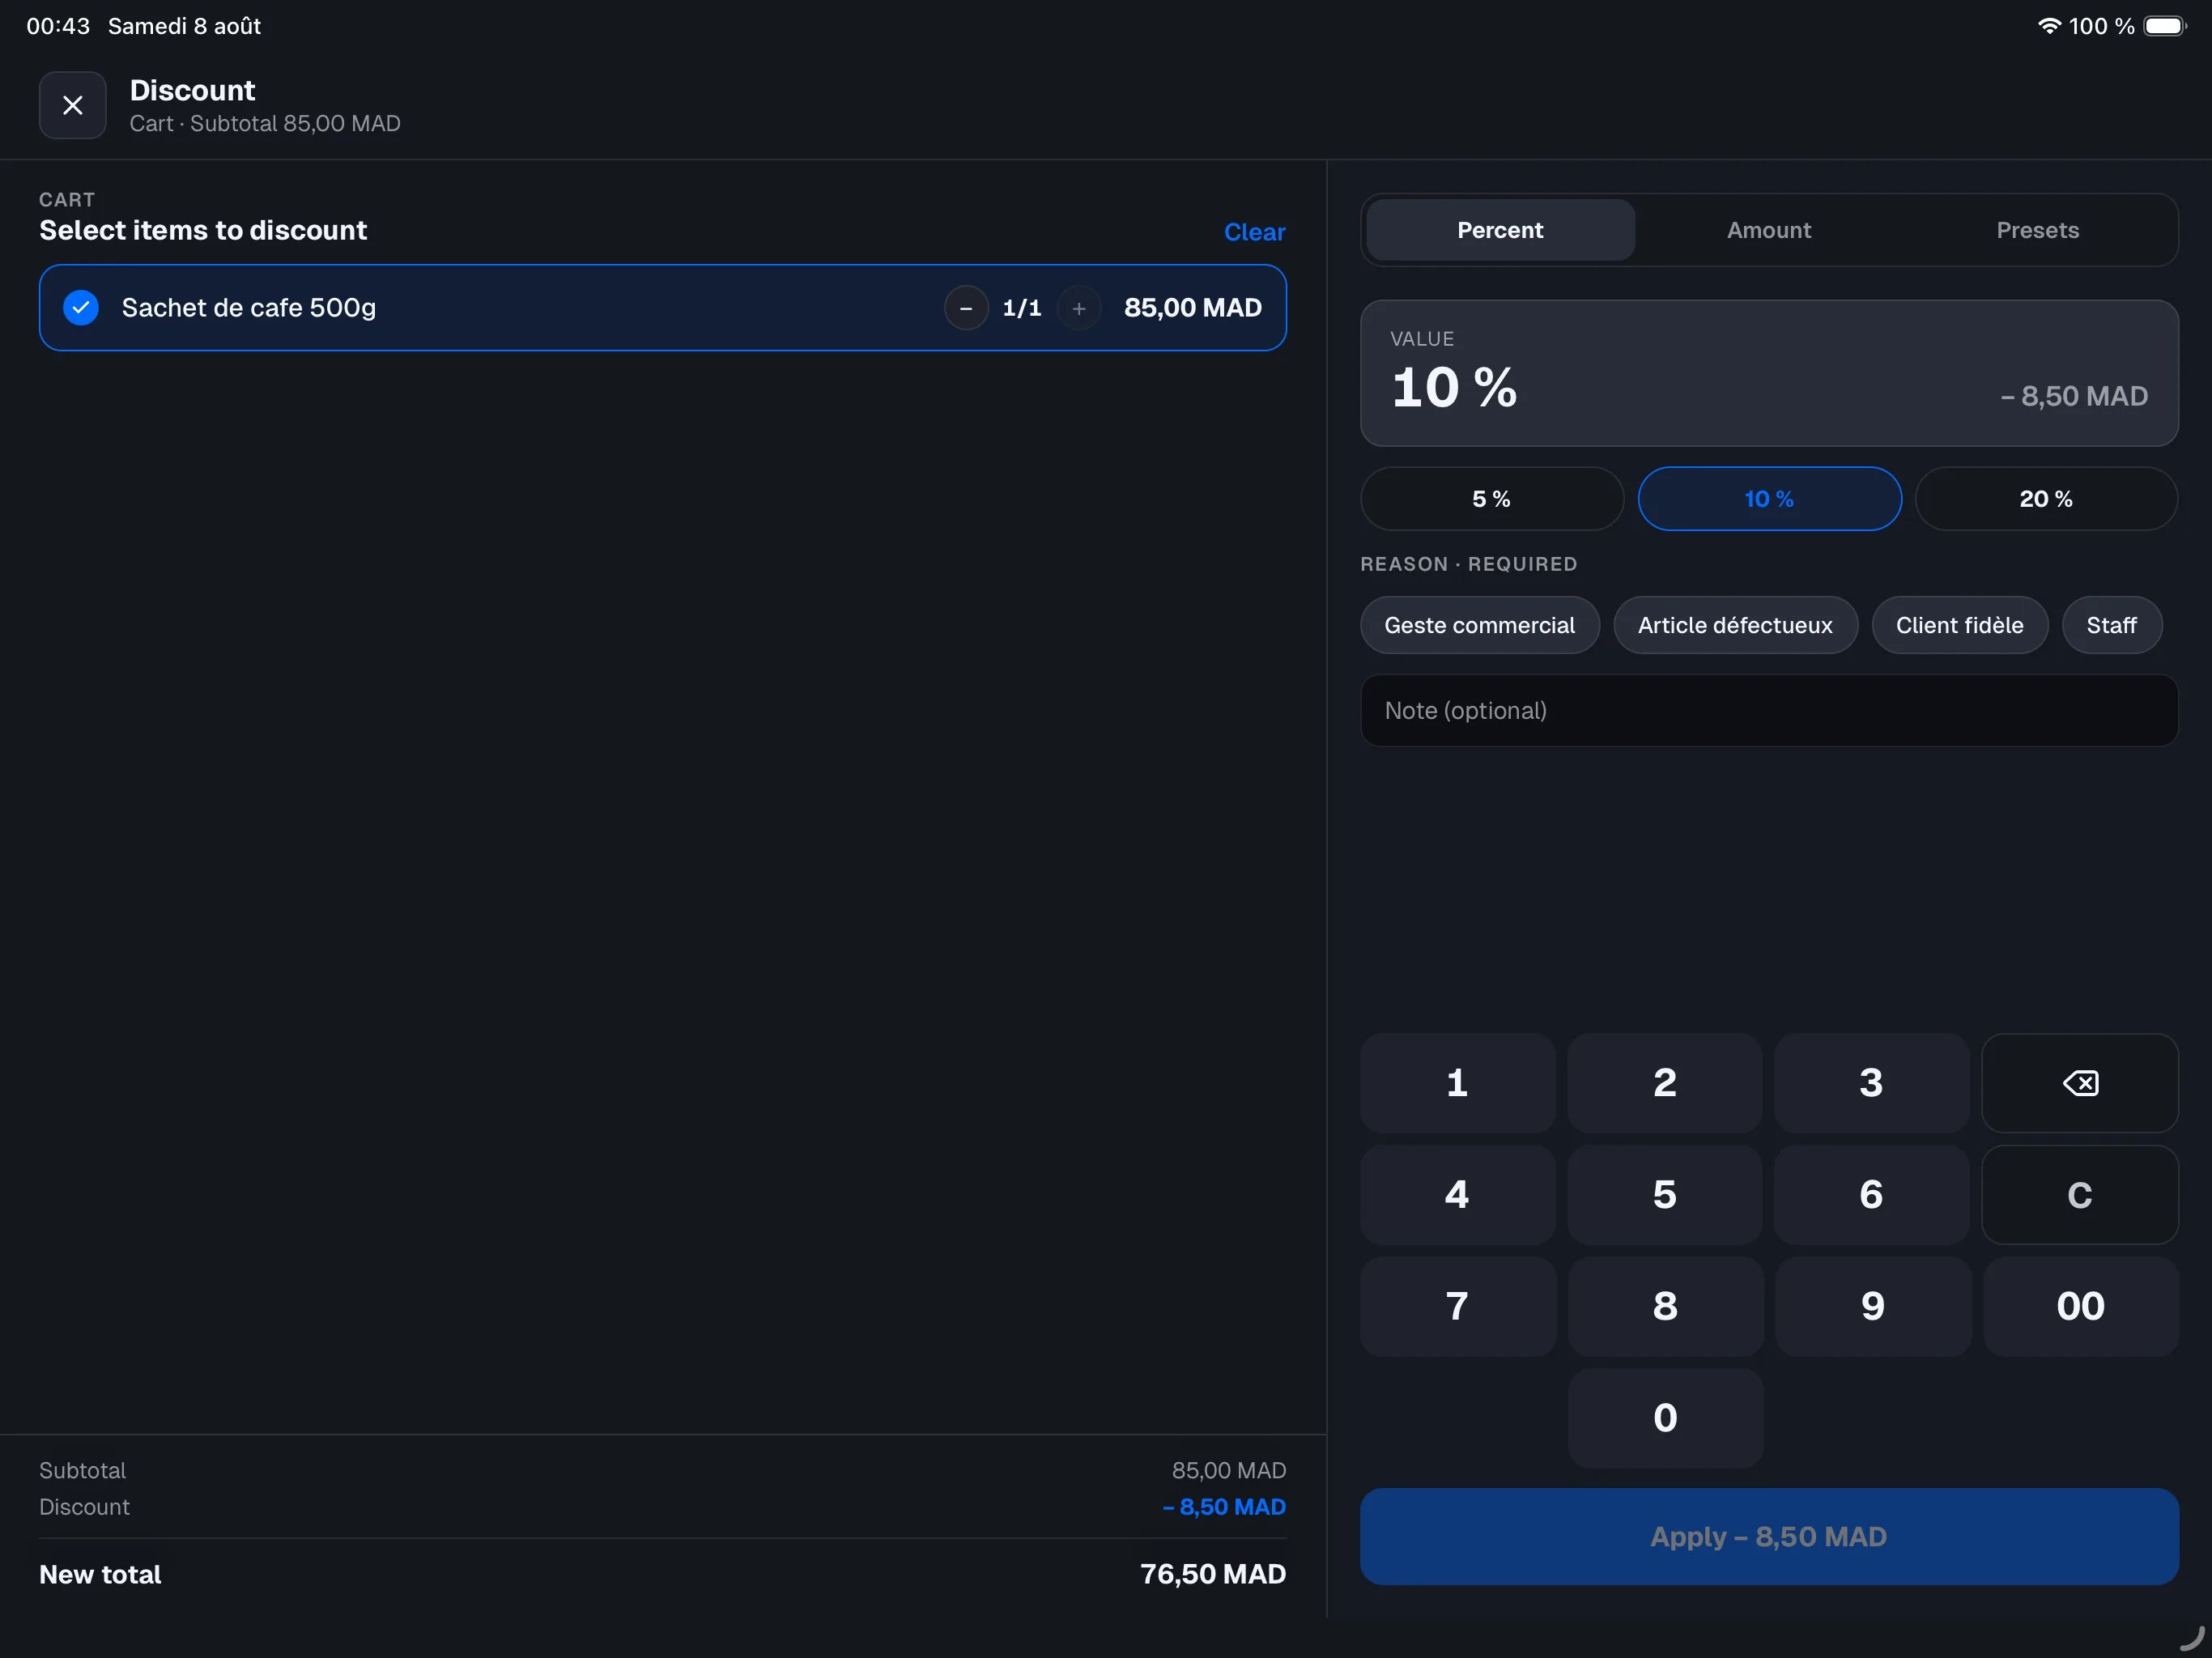
Tap Discount
In the cart, the Discount button sits next to Pay. The discount screen opens with every item already selected — ready for a whole-cart discount.
2
Choose the type
Three tabs, top right:
- Percent — type a percentage on the keypad, then choose a reason (required) from the list your shop has set up; you can add a free-text note. No reason is preselected: Apply stays unavailable until you tap one.
- Amount — type a fixed amount, then a reason (and an optional note).
- Presets — tap a named discount prepared ahead of time (see below); a preset already carries its name as the reason, so there’s nothing to pick.
3
Target items (optional)
By default the discount covers the whole cart. To target specific items, unselect the ones that shouldn’t get it on the left; the − / + stepper sets how many units of a line are discounted. The new total updates live.
4
Tap Apply
The discount shows on the cart with its reason, and the new total applies right away — to the cart and to payment.
Presets
A preset is a named, one-tap discount: its percent (or amount) and its reason are already set, so you just tap it and Apply. Presets are prepared in the backoffice (e.g. “Loyalty club − 10%” in a wine shop, “End of line − 30%” in a grocer) — see Discounts.- The Presets tab lists every active preset; a search helps when there are many.
- A lock on a preset means it needs a manager (see below). The others apply in one tap.
Manager approval
To keep discounts from being given away too freely:- A free discount (Percent / Amount tabs) always needs a manager.
- A preset needs a manager only when configured to (the lock); the others apply with no PIN.