

The selling screen
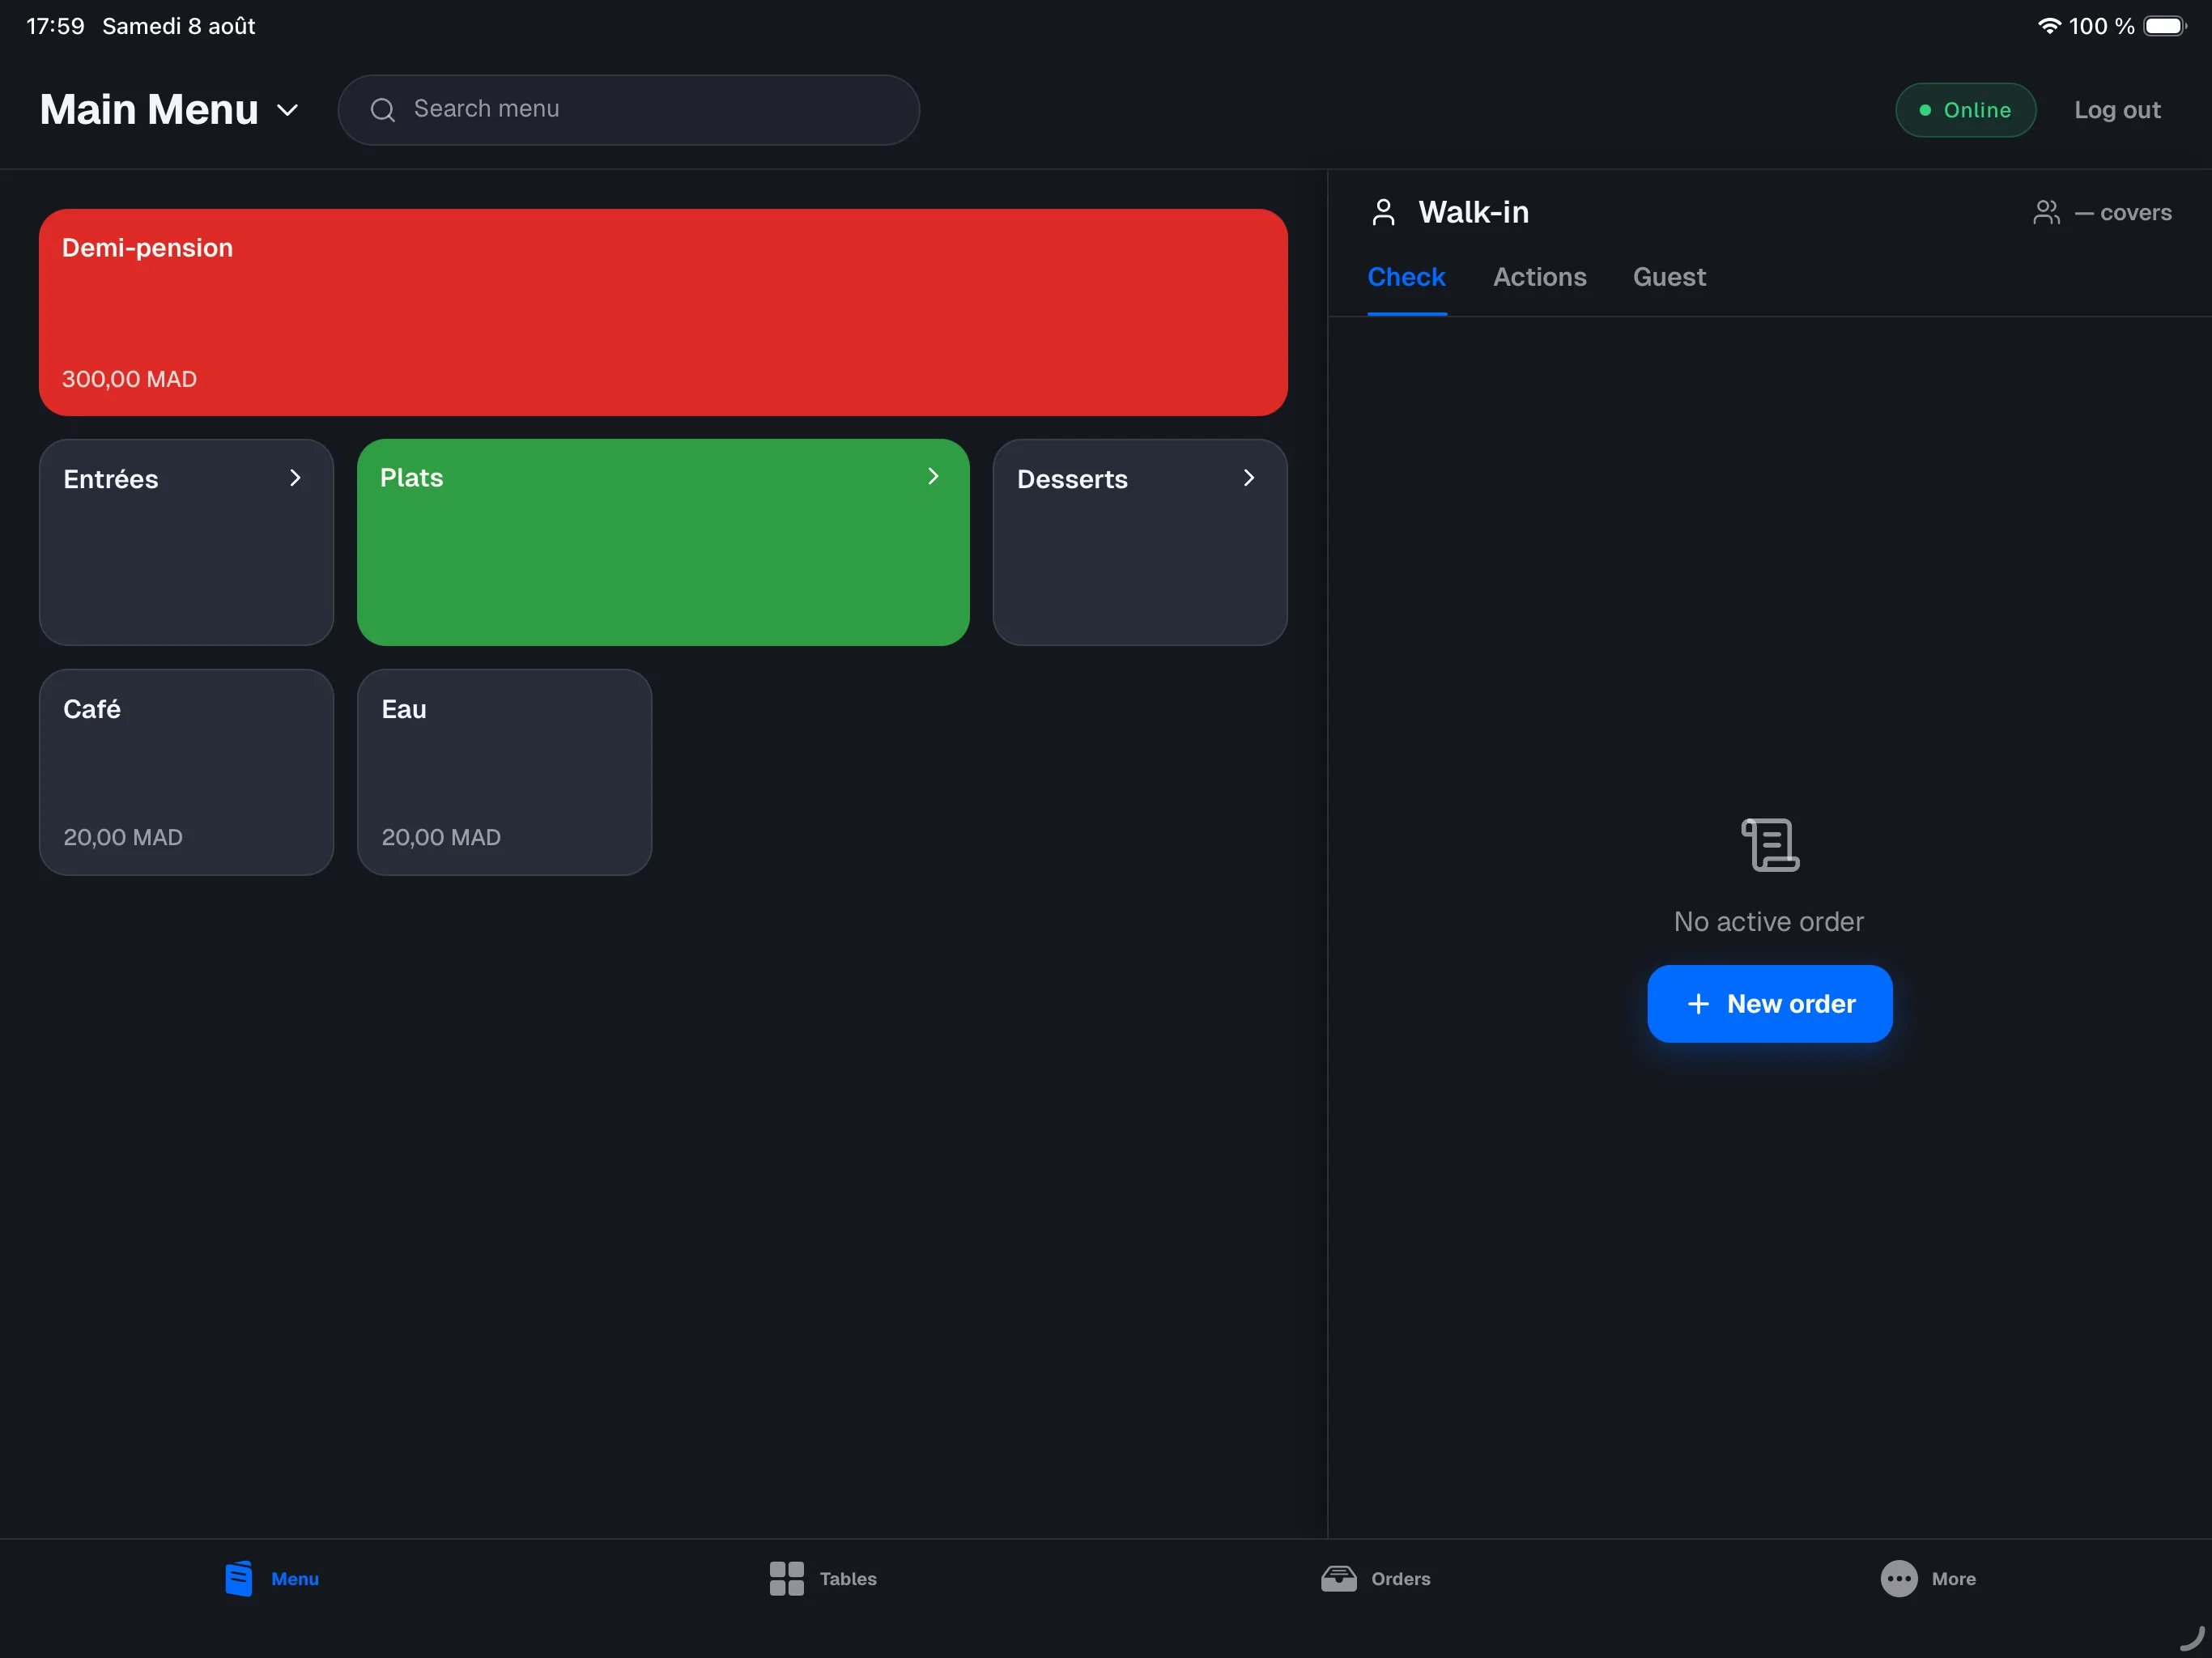
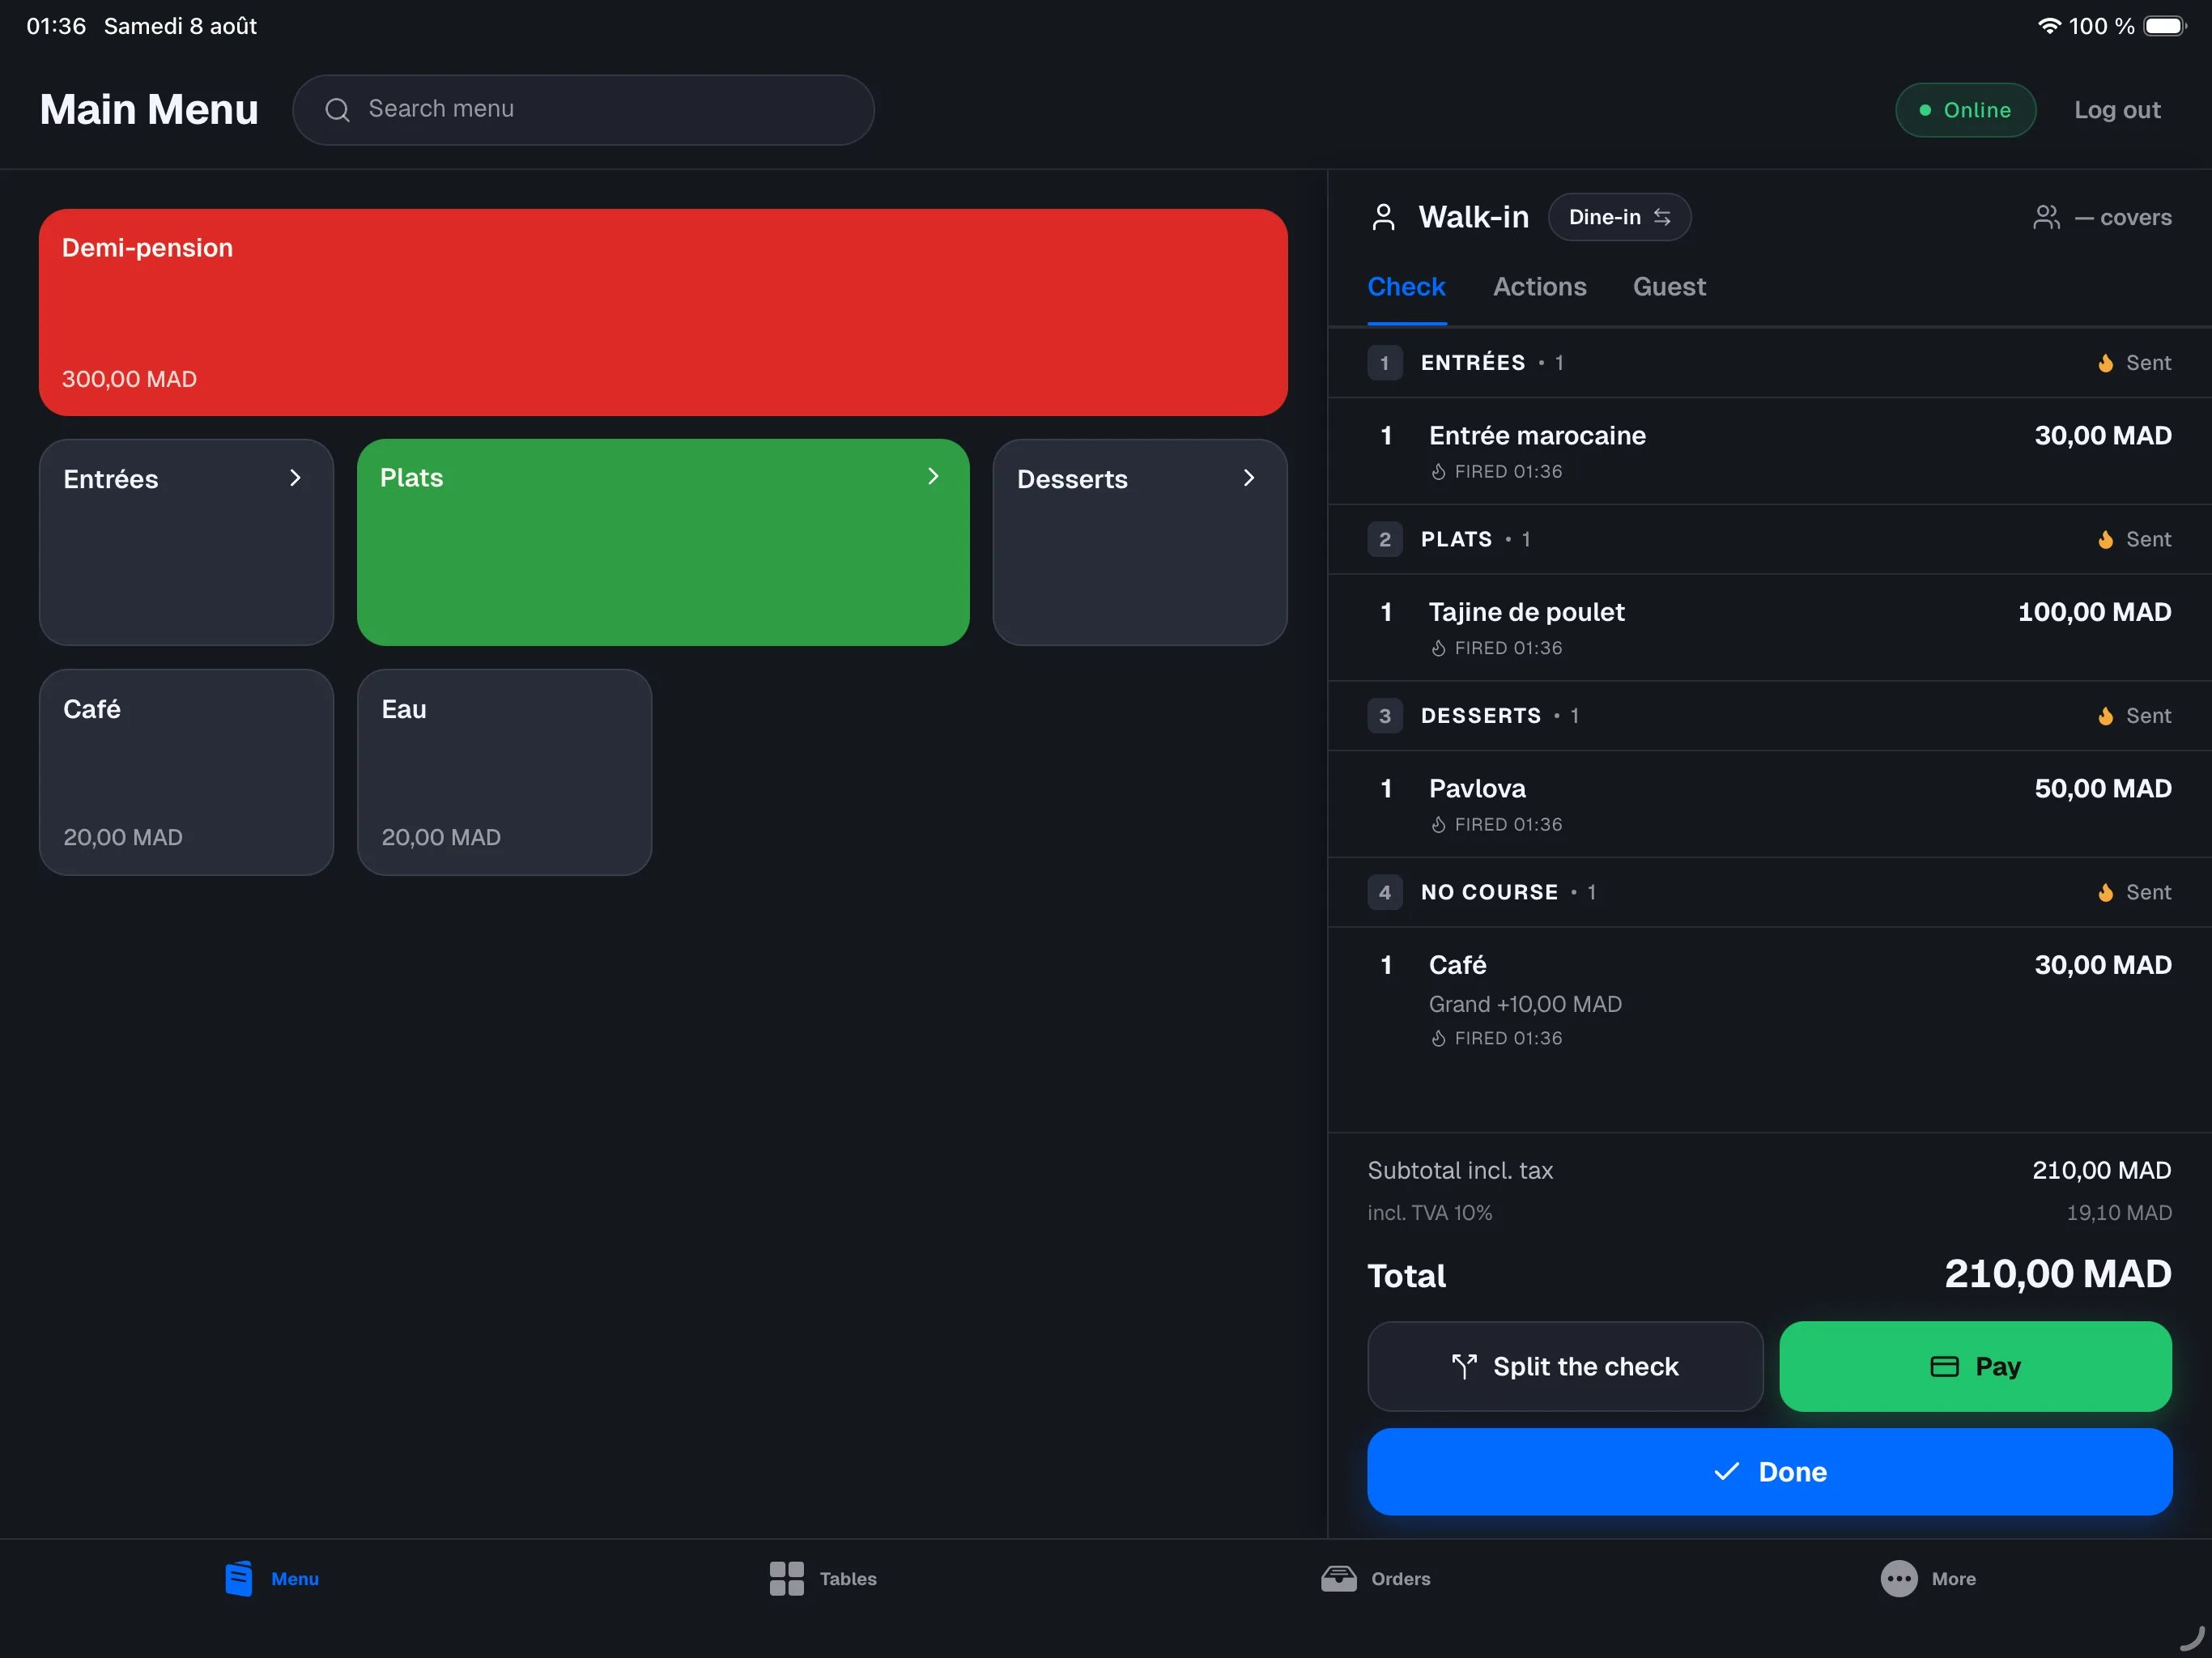
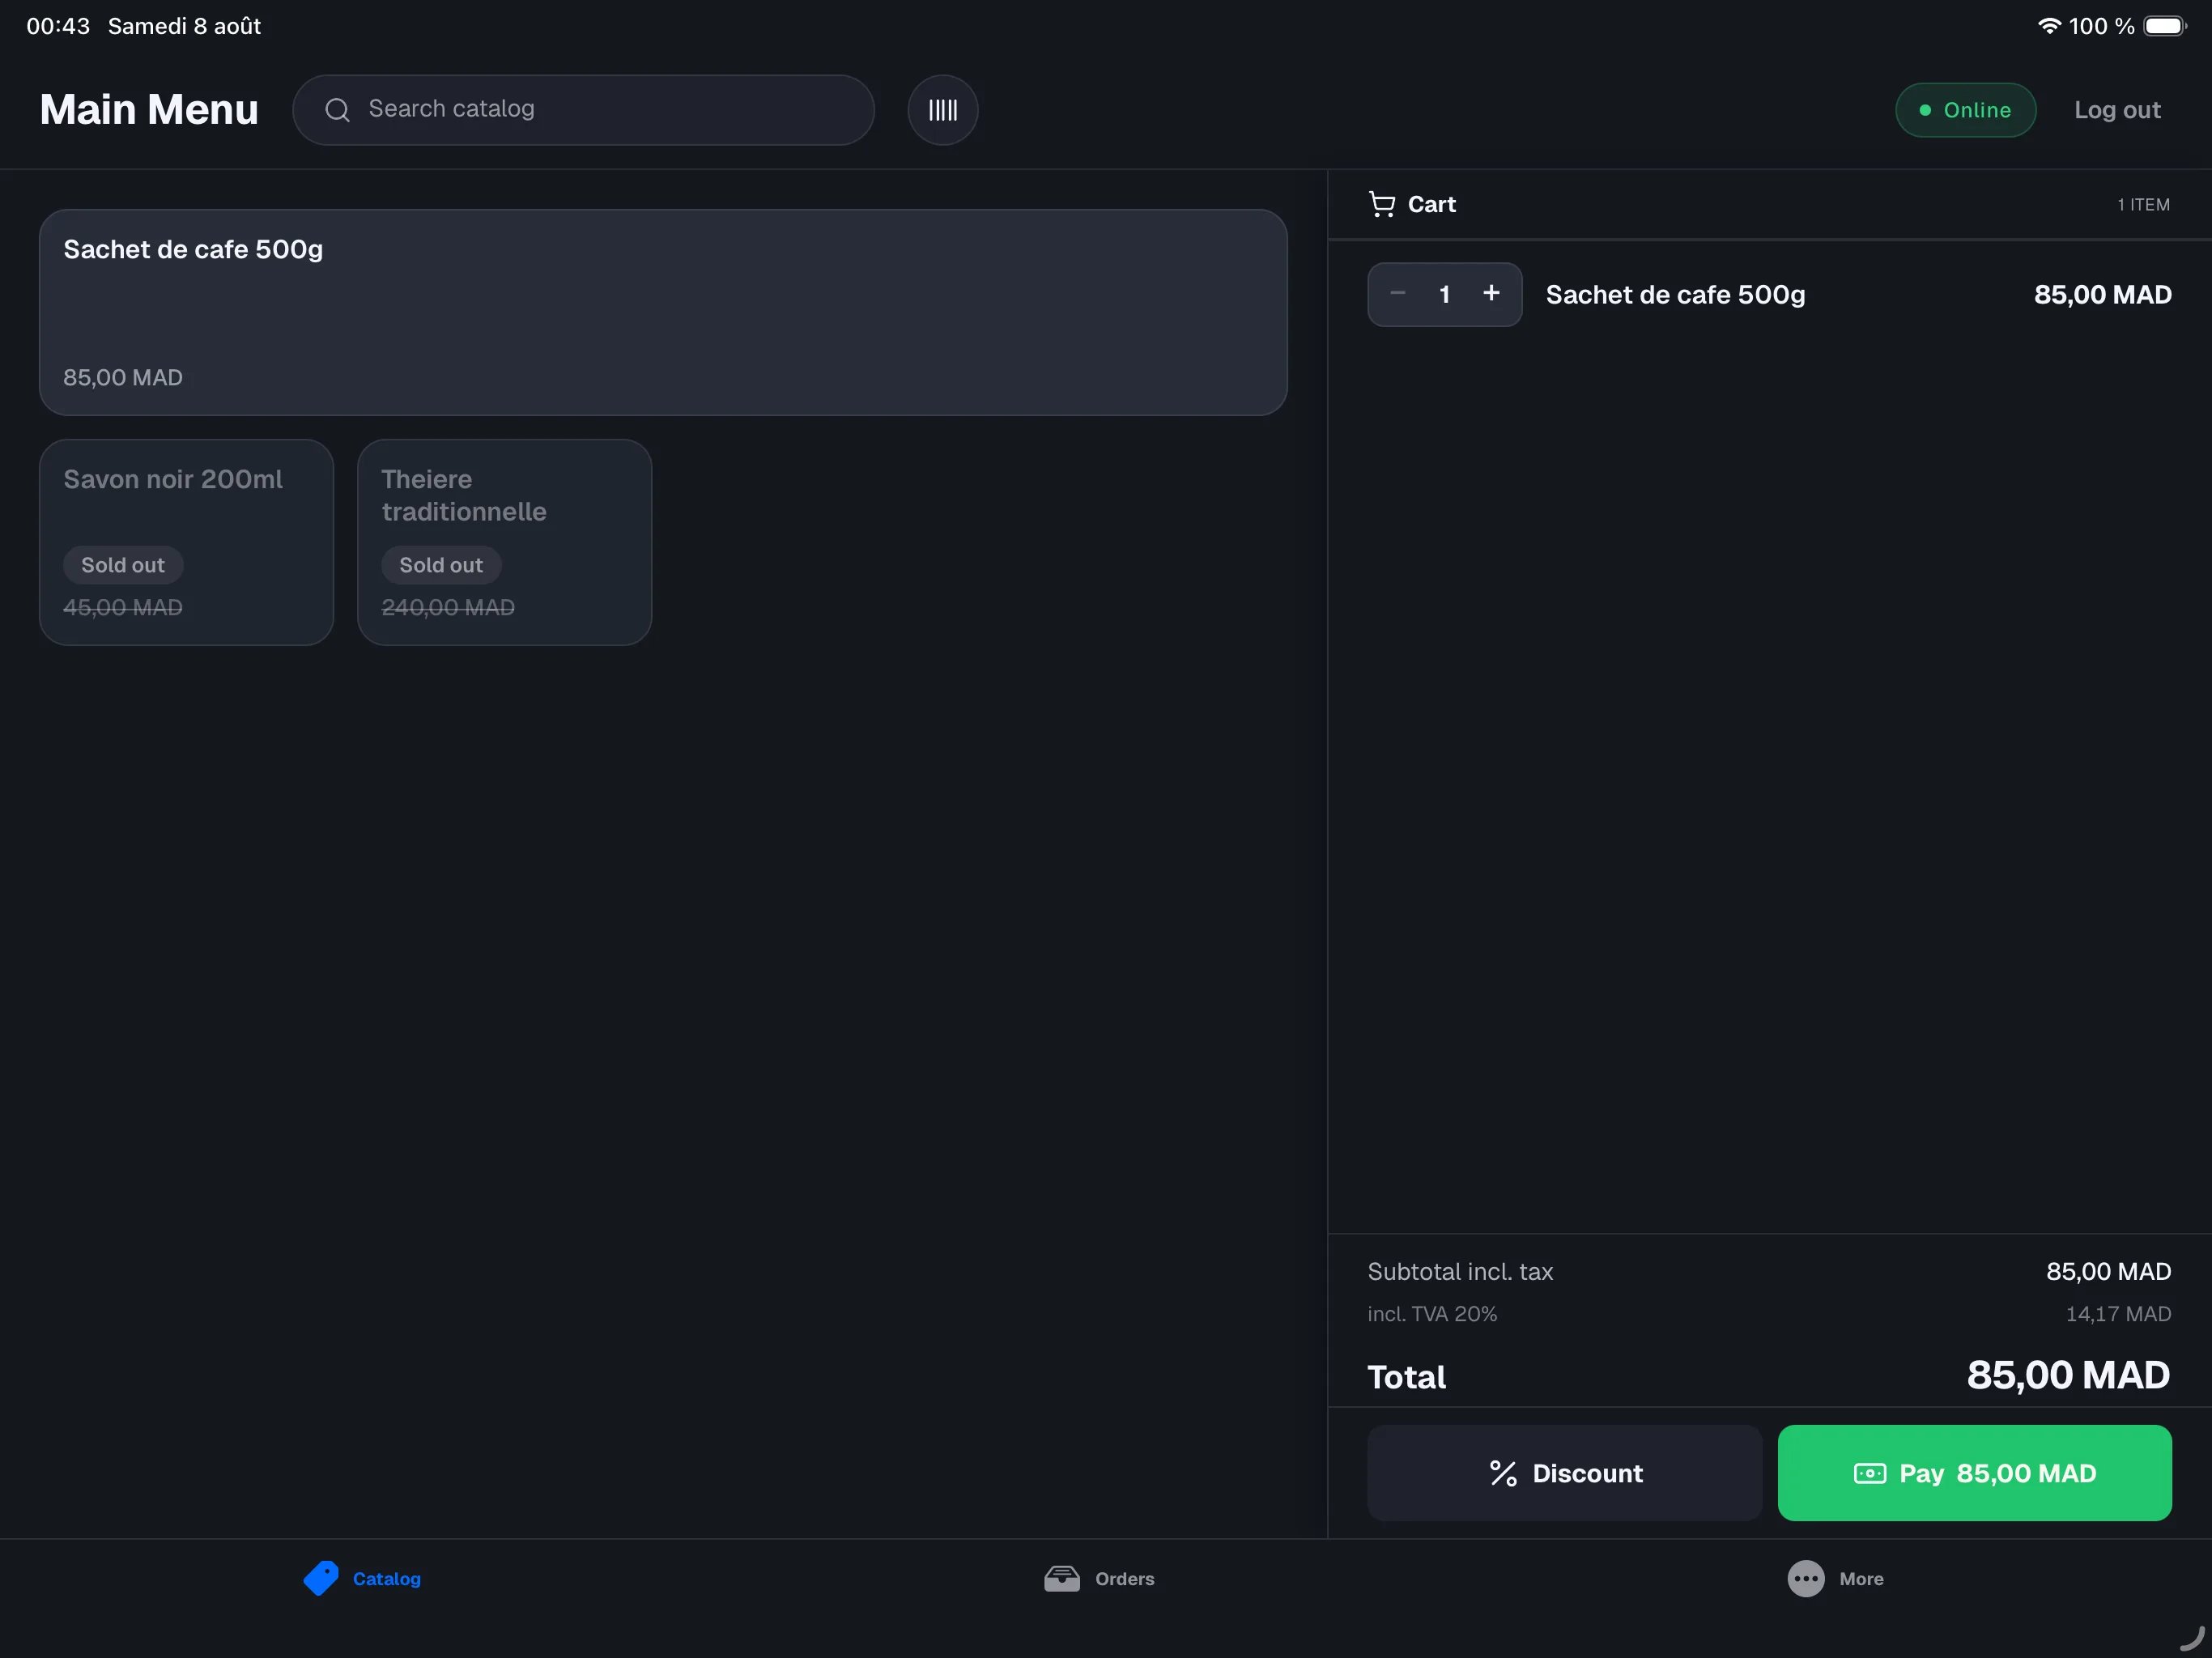
The selling screen is split in two:- On the left: the menu grid (the Menu tab in restaurant mode, Catalog in retail mode). The buttons and their layout are configured in the backoffice — see POS layout.
- On the right: the check for the current order — every item you add appears as an order line, with the total at the bottom.
Browsing the menu
- If several menus are set up (for example Lunch and Dinner), the title at the top left shows a chevron: tap it to pick which menu to show. The register switches fully to the chosen menu.
- Tap a category button to open its sub-screen. The back arrow at the top left goes up one level; tapping the Menu tab at the bottom again jumps straight back to the root screen.
- The search bar at the top finds any item by name, wherever it lives in the menu.
- In retail mode, a scan button next to the search opens the camera: scan a product’s barcode to add it straight to the cart.
If the device can’t reach the main register, item buttons are temporarily
disabled — you can still browse the menu, but not change an order. See
connectivity.
Adding items
1
Tap an item
Tap an item in the grid: it is added to the current order. If there is no
order in progress, a new one starts automatically. You can also tap New
order in the right panel. A badge on the item tile shows how many are
already in the order.
2
Pick modifiers when prompted
If the item has modifiers (size, cooking, extras…), a choice screen opens
before the item is added — see below.
3
Adjust the quantity
On every unsent line, the − / + stepper adjusts the quantity (minimum
1). To remove the line, swipe it to the left and tap Delete.
Modifiers
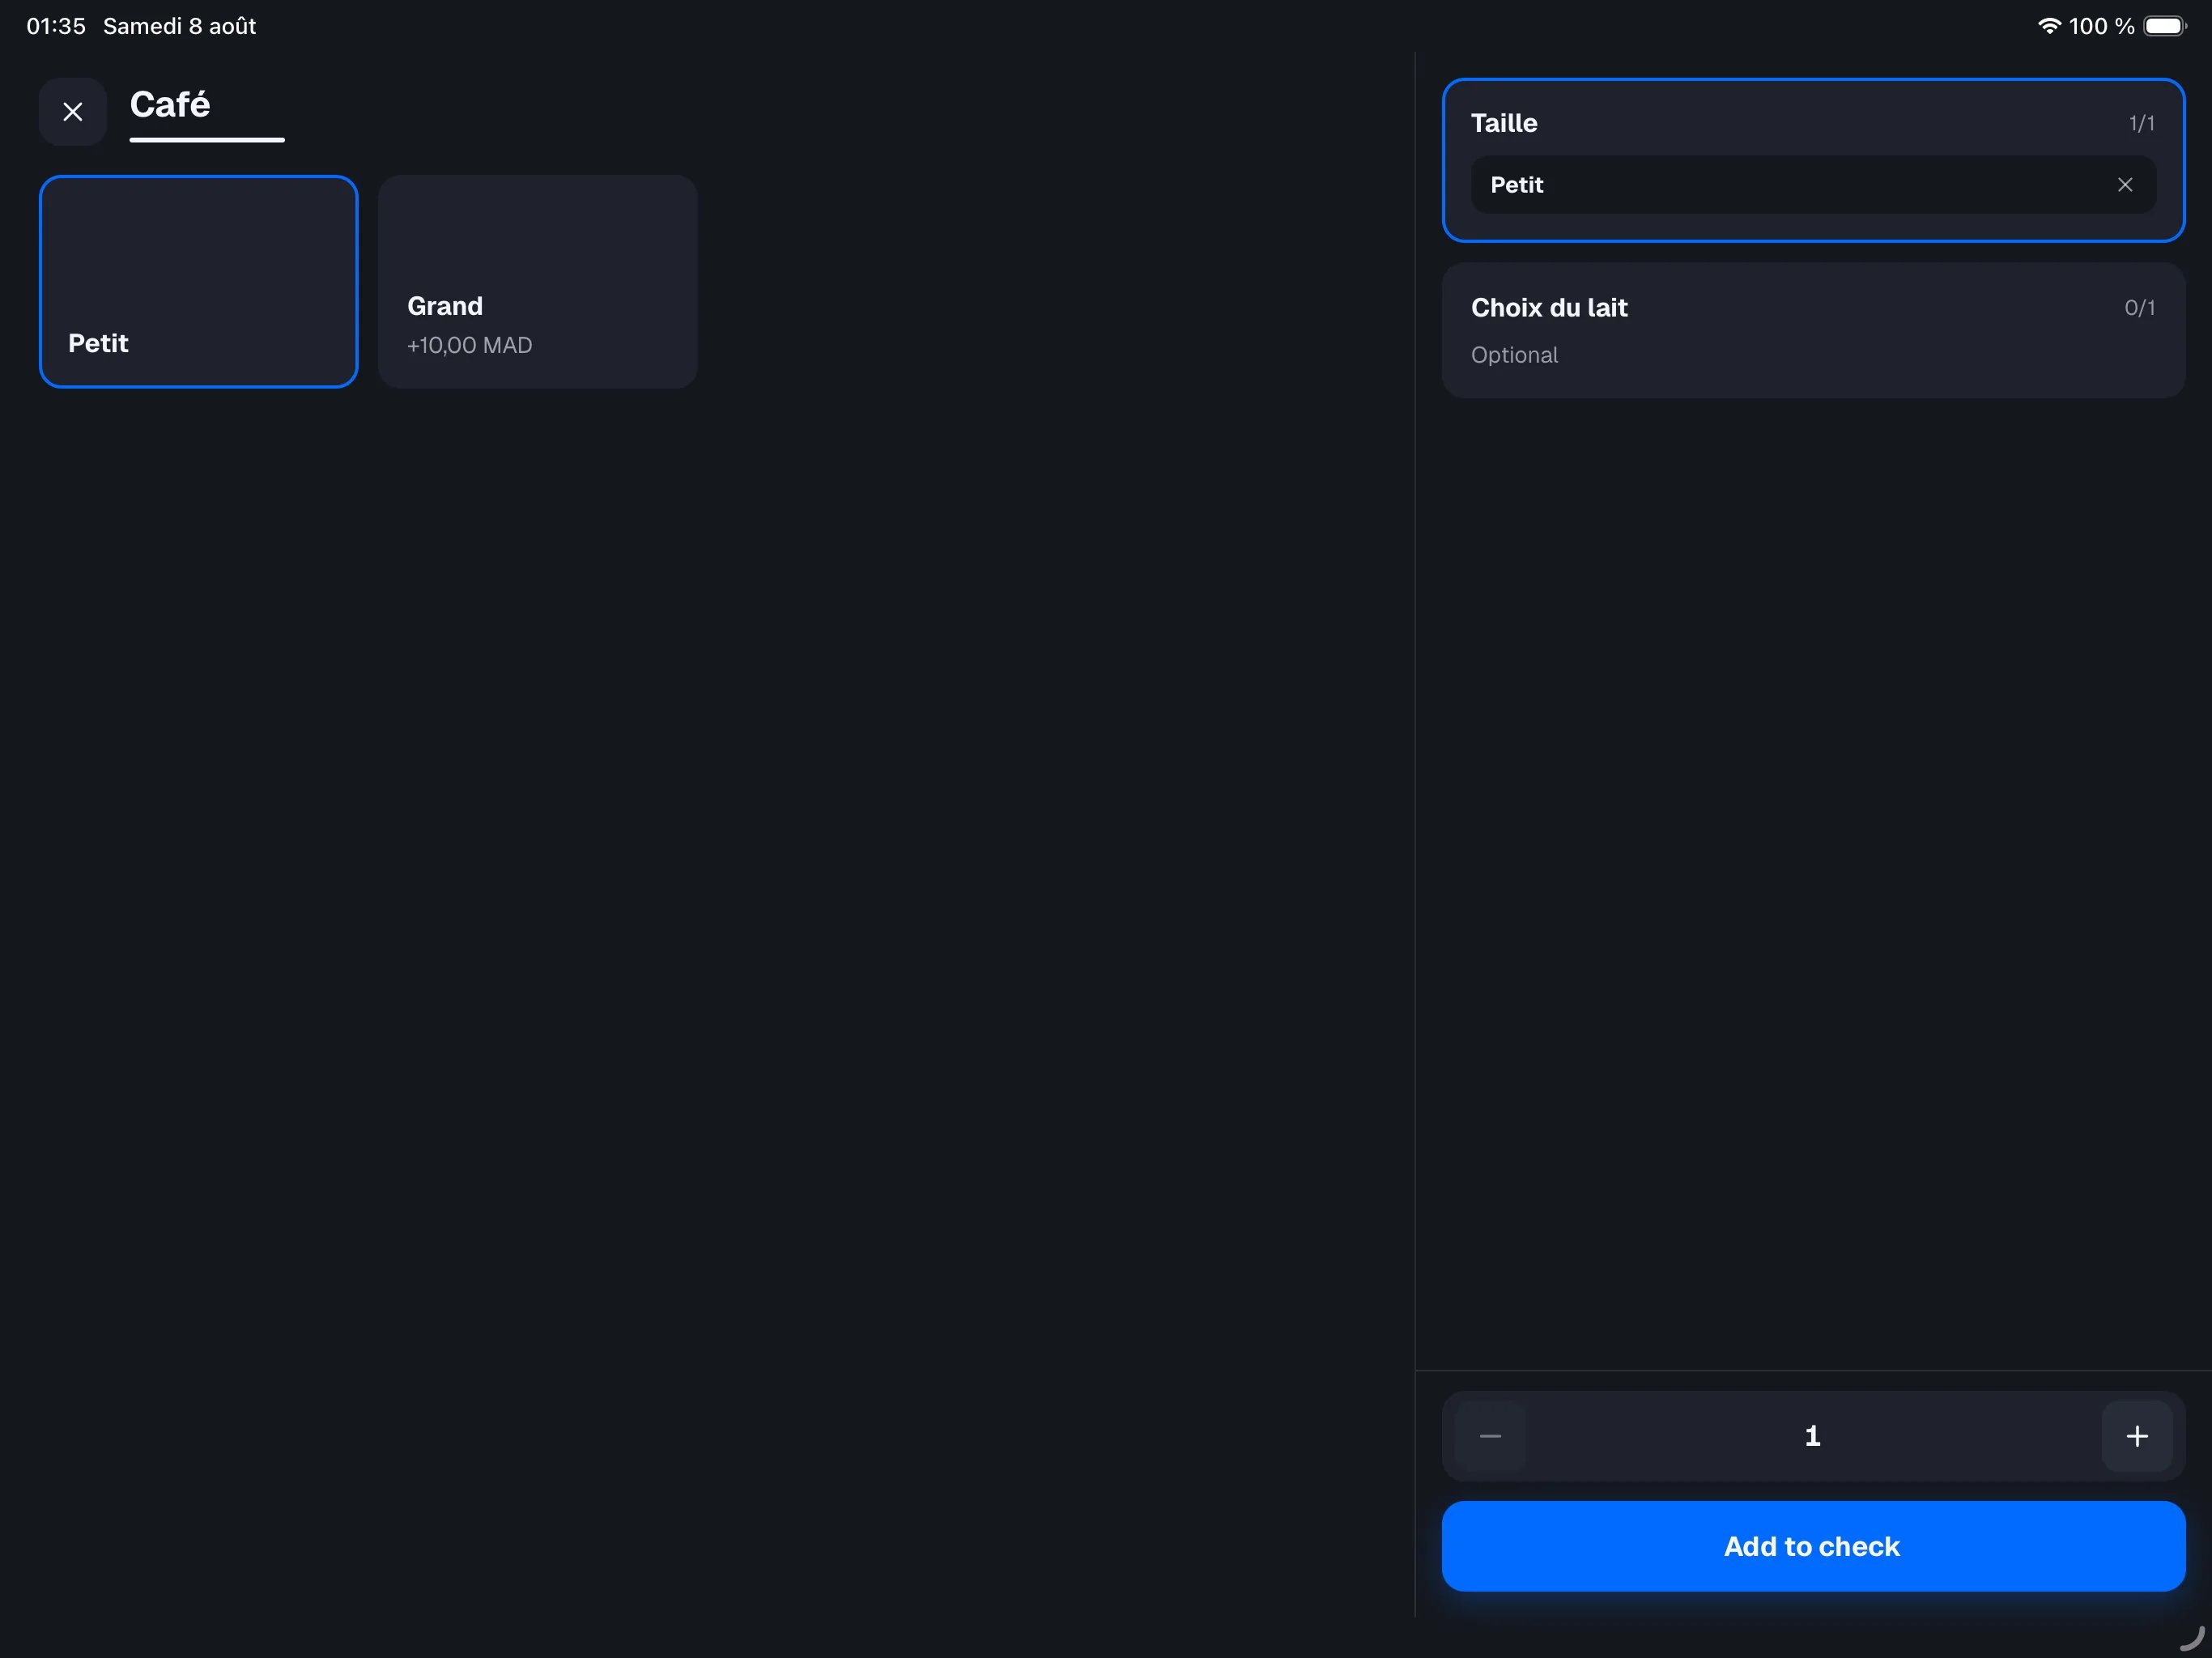
When an item has modifiers, the choice screen opens full screen:- The choice groups are listed on the right. A group marked Required must be completed before the item can be added; an Optional group can stay empty.
- Tap an option to select it. Options with a surcharge show their price (for example +0.50).
- The quantity stepper at the bottom adds several at once, all configured the same way.
- Tap Add to check to confirm. The button shows the total of the chosen surcharges.
Combos
Restaurant mode. In retail mode, the equivalent is the bundle — see below.
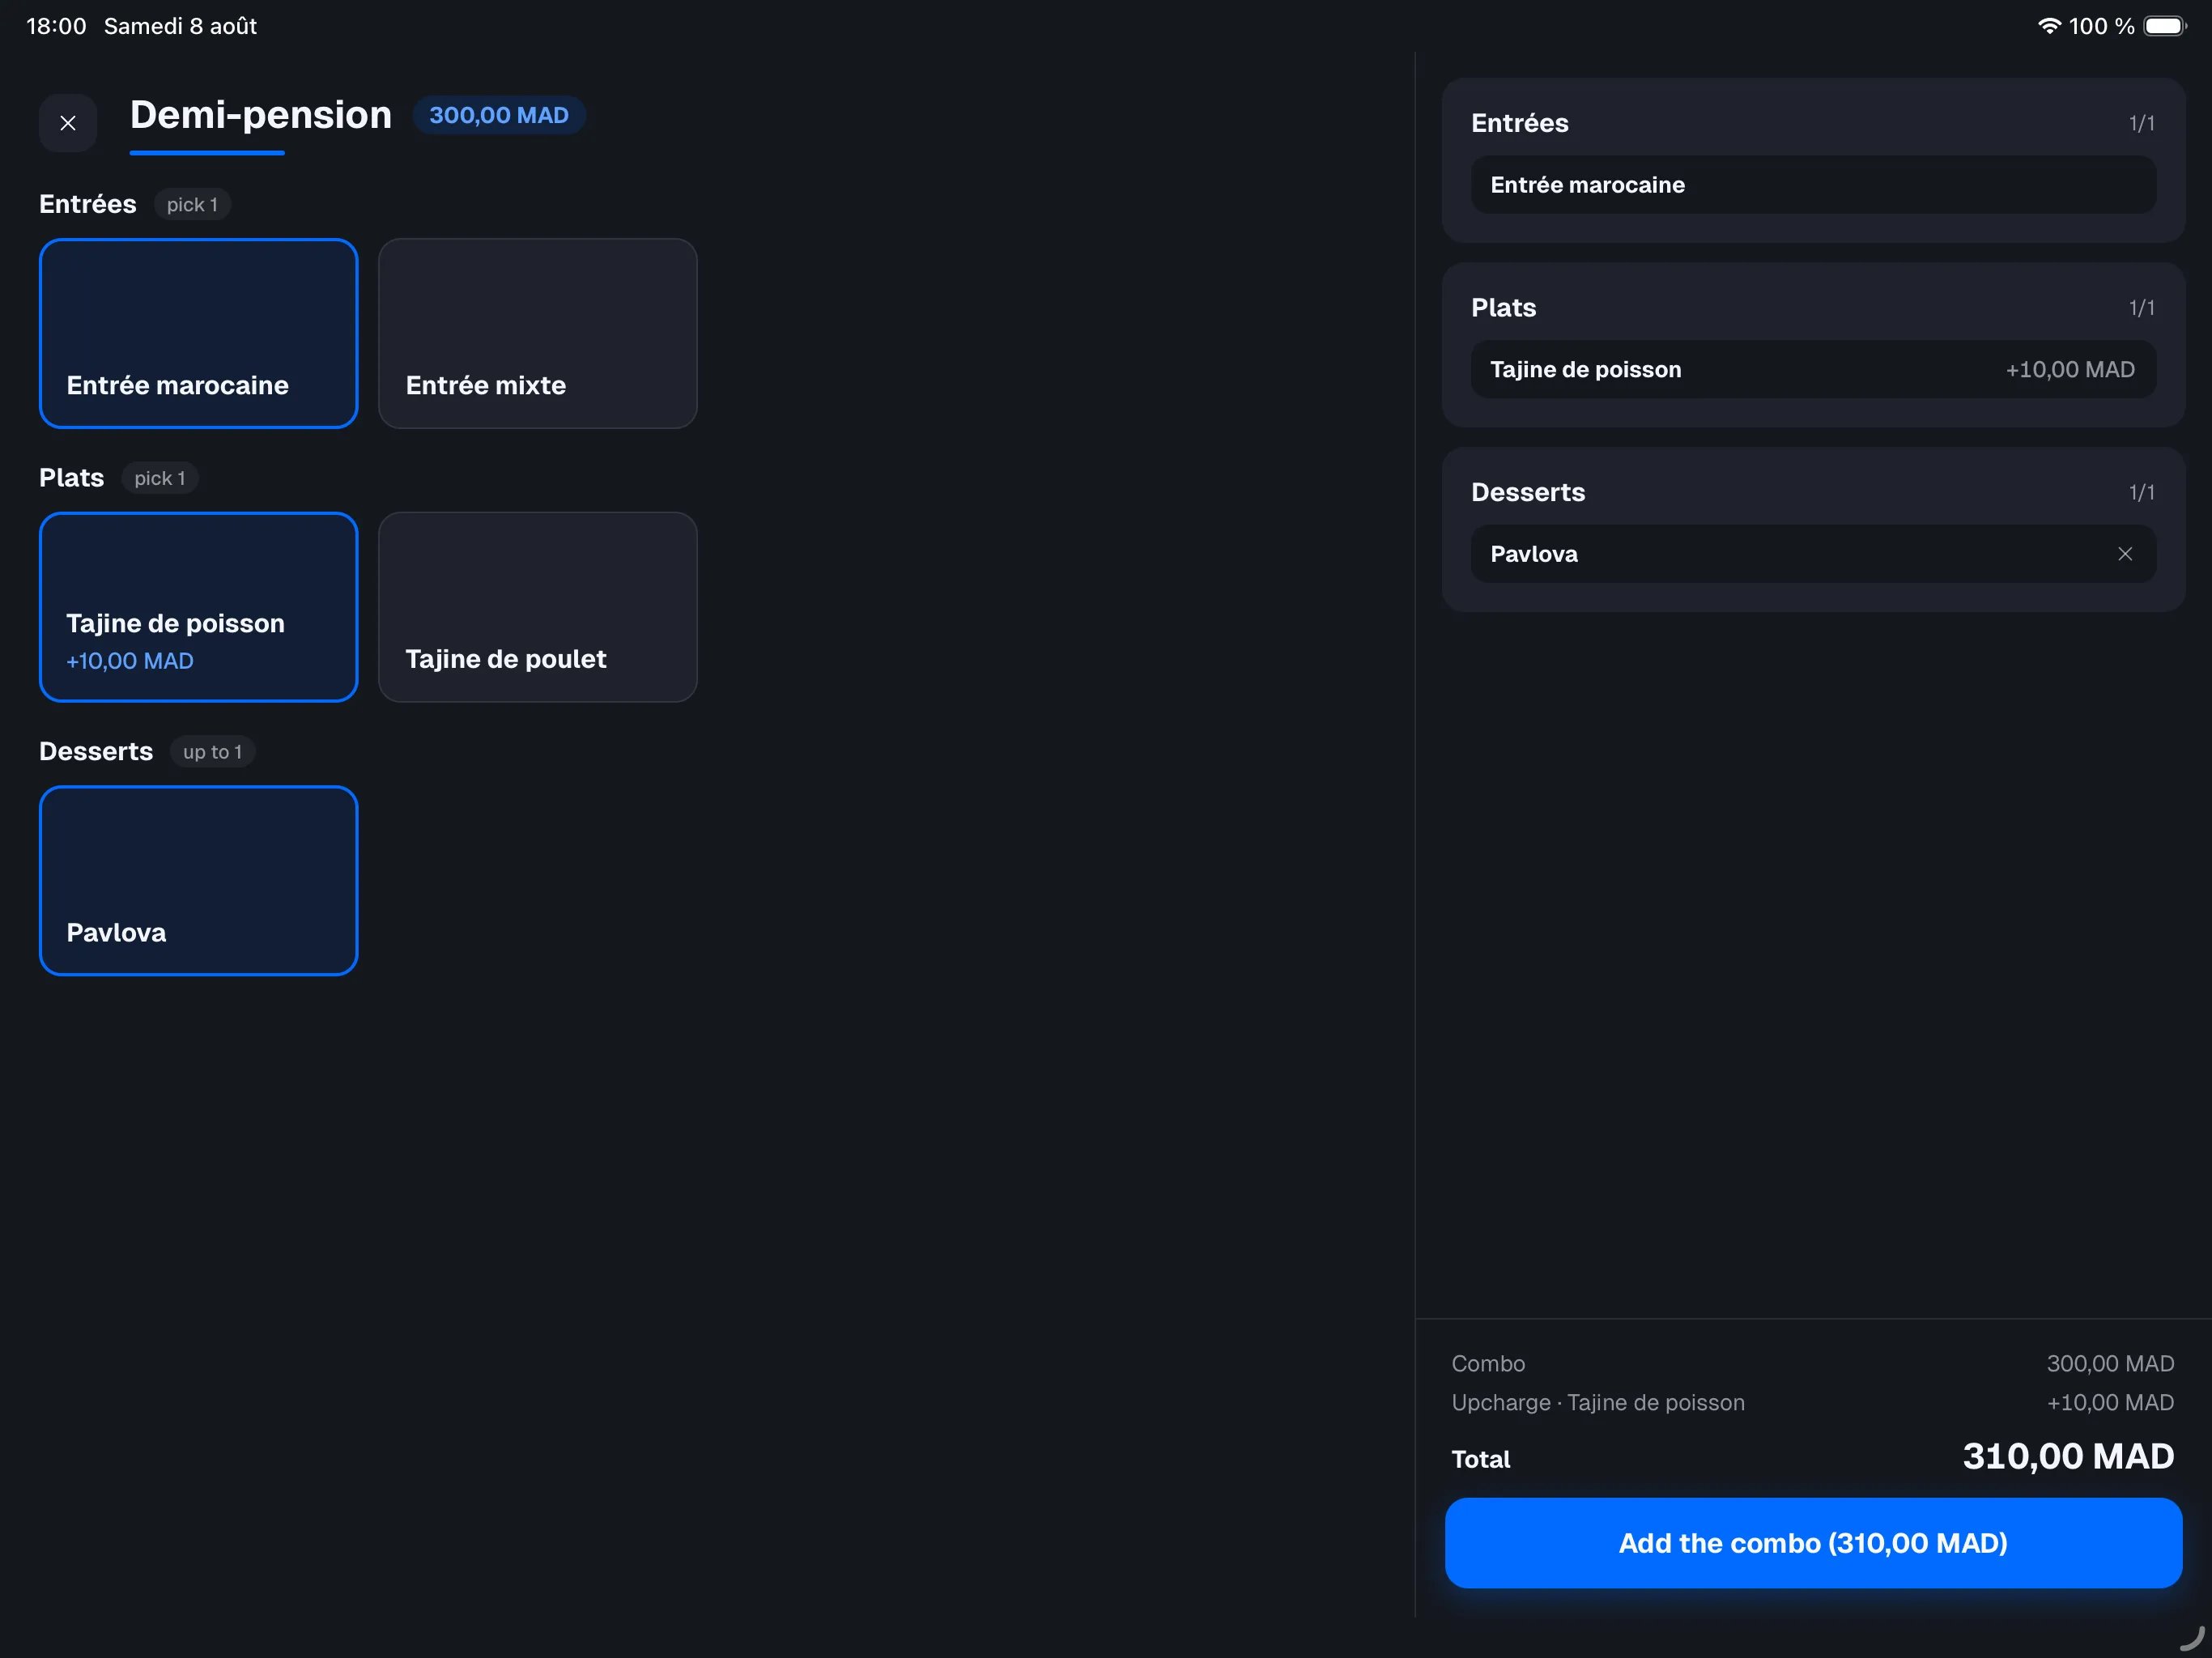
- Pick one item per group (“Starter”, “Main”…). An item with an upcharge shows its extra price; if the chosen item has its own modifiers (cooking, sauce…), the register chains into their screen.
- The recap at the bottom shows the combo, its upcharges and the total. Tap Add the combo to confirm.
A combo is removed whole: taking one of its items off removes the whole
combo — there is no half combo. It cannot be spread across several checks
when splitting either.
Dine-in or takeaway
Restaurant mode only. In retail mode, orders have no type.
Switching is refused in two cases.A payment has already been taken: the type drives the tax rate, so it
cannot move under money already taken. Reverse the payment first.The order is seated at a table: a takeaway order holds no table, and
switching would hand the table back to the floor plan with the guests still
on it. Release the table first — Actions tab → Release the table —
then change the type.
Finding takeaway orders
Below the tabs, a filter bar:- the search field finds an order by its number (
42or#42) or by the pickup name; - the Takeaway chip keeps counter orders only. Tap it again to go back to the full list.
Pickup name
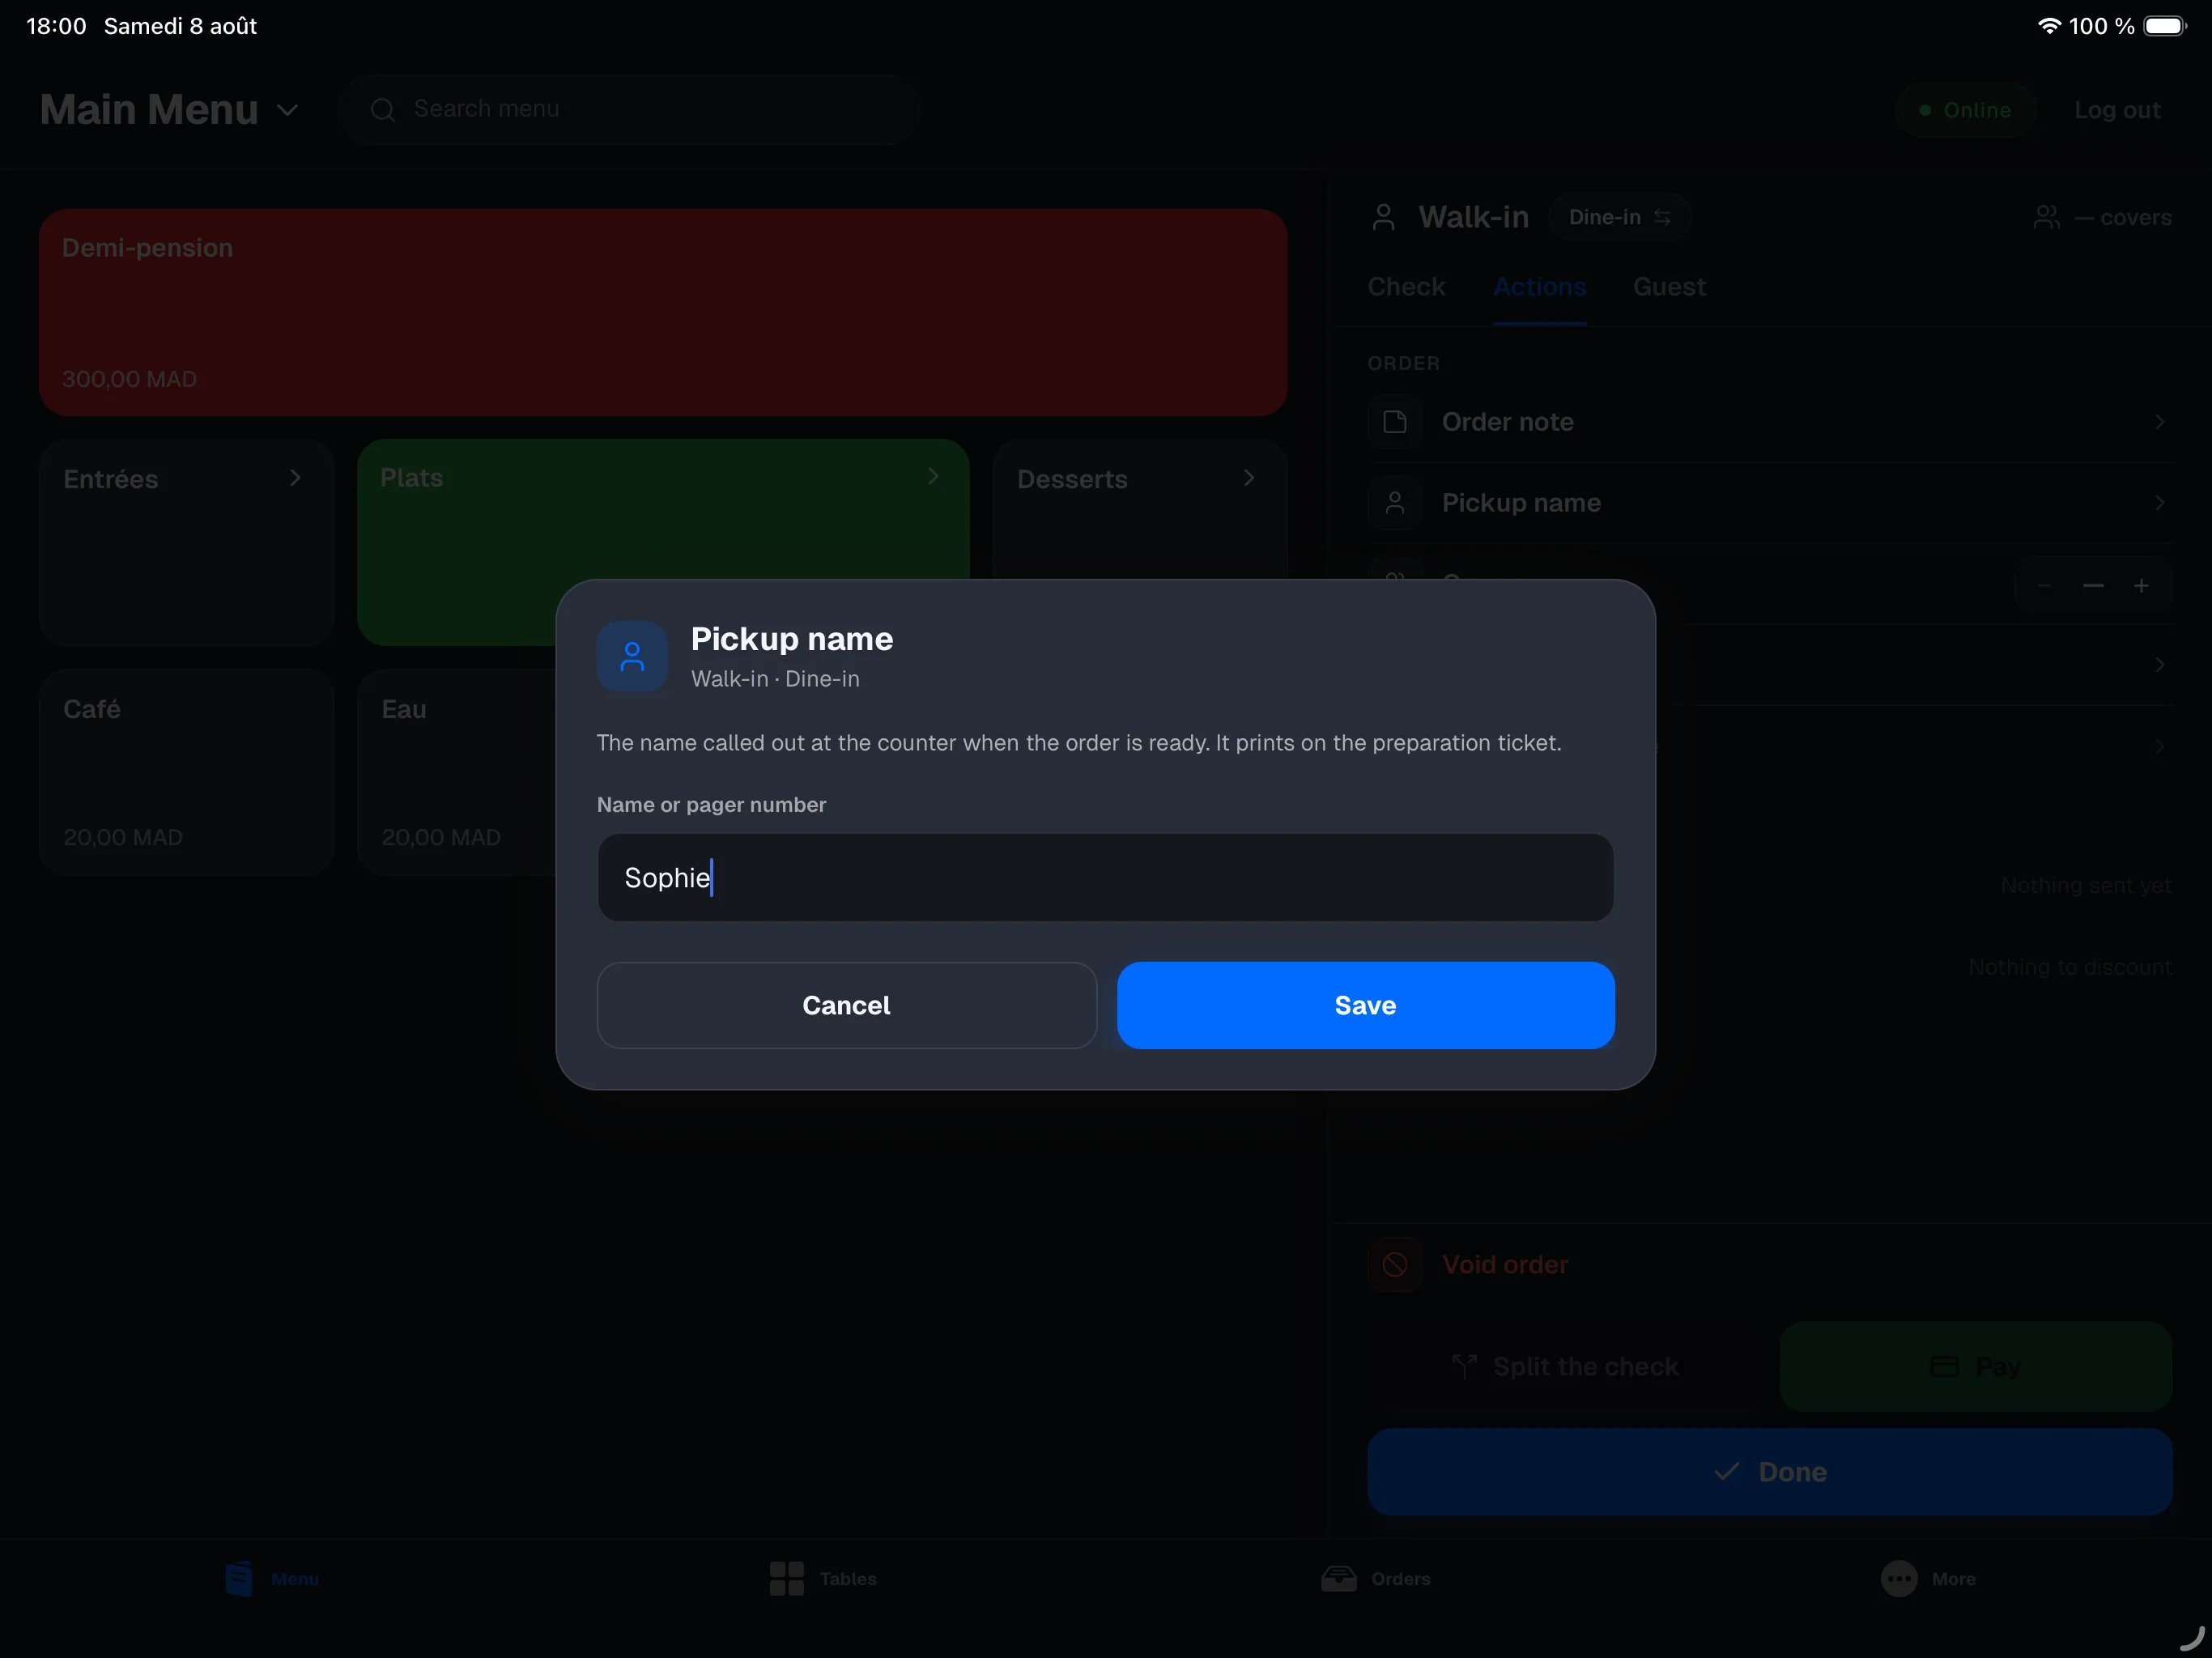
A takeaway order has no table to identify it. Give it a name: in the order’s Actions tab, Pickup name — a first name, a party name, a pager number. The name then shows at the top of the order panel, in the Guest column of the orders list, and prints large on the preparation ticket — it is what the station writes on the bag and what you call out at the counter.The pickup name is service information: it appears neither on the receipt
nor on the invoice.
Sending to the kitchen
Restaurant mode only.
If coursing is on, sending happens course by course (starters, mains,
desserts) instead of all at once, and the panel is grouped by course. See
coursing.
- PENDING: items not sent yet. They stay editable (quantity, removal).
- SENT: items already gone to the kitchen, with the time they were sent.
1
Tap Send
The Send button at the bottom of the panel sends every pending item to
the kitchen, then brings you back to the orders
list — or to the floor plan if the
order is at a table. When there is nothing to send, the button reads
Done.
2
Add to the order later
Reopen the order from the list — or from its table on the floor plan — to
add more items, then tap Send again. Only the new items go to the
kitchen.
Once the order is sent, the Menu tab starts over: coming back to it shows
an empty register, ready for the next order. Reopening an order that was
already sent is always explicit — from its table or from the orders list.
Pending items, on the other hand — the ones not sent yet — are kept: you
can glance at the floor plan and come back to the check you were ringing up.
- Swipe right and tap Repeat to add the same line again (same modifiers).
- Swipe left and tap Void to cancel it — the kitchen already received it, so the void is tracked. See order actions.
The Guest tab
Restaurant mode only.
- Linked to a booking with a guest card — the read-only profile: contact, the guest’s allergies and note, visit history, tags and stats (visits, average spend, no-shows). Guest details are managed in the provider; the register only shows them. It is the same profile you open from the floor plan.
- Linked to a booking with no guest card — the booking context: name, covers, time, table and the staff internal note.
- Walk-in with no booking — the tab is empty. If the service still has reservations left to seat, a Link to a booking button attaches the order to one of them — handy when you realise after the fact that a party had booked.
In retail mode
The flow is shorter: no sending to the kitchen.- The right panel is the Cart: a single flat list of items, with the same gestures (− / + stepper, swipe for Delete).
- Add items by tapping the Catalog grid or by scanning their barcodes.
- A bundle (several products sold together at a single price) is added directly, with a tap or a scan of its own barcode — there is nothing to choose. See combos and bundles.
- Tap Pay (the button shows the total) to charge right away. See payments.
The first payment of the day triggers start of day
if it hasn’t been done yet.